Useful Hint - Tank Removal

Yamaha FJR Motorcycle Forum

Help Support Yamaha FJR Motorcycle Forum:

This site may earn a commission from merchant affiliate links, including eBay, Amazon, and others.

Dale2010

Well-known member
Joined
Jun 10, 2010
Messages
114
Reaction score
2
Location
Yarmouth, N.S., Canada
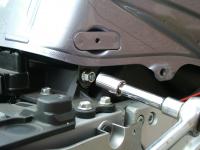
Just a hint for removing gas tanks (for those interested)...

Part of gas tank removal involves removing the fuel line fitting. This involves sliding the orange section of the clamp outward and then compressing the two small gray rectangles on each side of the fitting to release the fuel line from the tank. Those of us with big fingers tend to have problems with this (squeezing and releasing the grey buttons on the clamp).

Here's an idea I use (after dropping my disconnected tank on the floor while trying to remove the clamp). Use or buy a cheap set of needle nose pliers. Using a vice, bend each jaw about 45 degrees (about 1.5 cm from the tip) inward (tips will then close with only the ends touching). This makes a cheap and perfect tool for releasing the connection clamp on the fuel tank and will prove especially useful for those of us with large fingers.

FWIW

 
Good tip. Another is not to totally remove the tank until you release all hoses/wires/connections. Leave the rear bolt in and just lift the front part of the tank up to disconnect all the stuff. Then remove that rear bolt and remove the tank. No dropped tank that way. Oh, and of course if you know you have some work coming up which will involve removing the tank, its best to thave the tank more empty than full.

 
I've managed to do all maintenance (including 25k mile valve checks and adjusts) on my '05 for over 80k miles and never removed the fuel tank.

It's much harder to drop the tank when it is still attached to the bike.

JSNS

(FWIW I have removed another owners FJR's tank and those clips are a royal PITA)

 
Good tip. You can buy curved tip needle nose pliers. I have a pair that I find useful for lots of stuff. They help pop off the TBS caps with the wire clips still on them. They can be used on Gen I and Gen II plug caps. Instead of pulling on vacuum hoses which causes the 'Chinese handcuff' syndrome you can put the tips just past the end of the hose and pull, bunching the hose up and making it pop right off.

 
I've managed to do all maintenance (including 25k mile valve checks and adjusts) on my '05 for over 80k miles and never removed the fuel tank.
It's much harder to drop the tank when it is still attached to the bike.

JSNS

(FWIW I have removed another owners FJR's tank and those clips are a royal PITA)
I use to do much of the servicing on my old (2010) FJR with the tank attached but for some reason, the tank would only lift a few inches on my 2013 model when first attempted. However, after the tank dropping episode, I refastened the tank on the pivot bolt and then was able to lift the front much higher.

However, removing the ignition coil spark caps was such a hassle, I again removed the tank to get more room to pry and tug on the plug caps.

 
I remove the tank for major stuff, when I need unhindered access such as valve checks. For other stuff, such as plugs/TBS/wiring in stuff, I leave the rear bolt attached, but loosen it to provide free play.

I prop the front up temporarily with a bit of wood, then throw a loop around the front bracket, and attach a stout line or use a ratchet strap to the middle part of the pilion grab bar.

 
Last edited by a moderator:
The trick for me is getting the front bolts to line up. The tank seems to sit lower every time I put it back on so that I have to use a piece of wood wedged under the tank by the pivot bolt and lever it up to get it up far enough to align with the holes.

 
Alignment of those front bolts can be annoying. I found that by rocking the tank slightly laterally and pushing forward helps. Make sure that rear bolt is slack first, then snug up the front bolts with one hand, whilst keeping a bit of forward pressure on the tank with the other.

A slim hex key bit on a short socket extension is useful here.

 
I've found setting the tank on a plastic garbage can works well. The tabs and shape of the tank hold it in place with little risk of dropping it.

 
The trick for me is getting the front bolts to line up. The tank seems to sit lower every time I put it back on so that I have to use a piece of wood wedged under the tank by the pivot bolt and lever it up to get it up far enough to align with the holes.
Are you loosening the rear bolt before lifting?

(Click on image for larger view)


If not, you bend the rear bracket on the tank, makes it "shorter".

 
Last edited by a moderator:
My FJR tank comes off???
blink.png


The trick for me is getting the front bolts to line up. The tank seems to sit lower every time I put it back on so that I have to use a piece of wood wedged under the tank by the pivot bolt and lever it up to get it up far enough to align with the holes.
I've found (at least on my 2013) that if I leave the rear pivot bolt quite loose, I'm usually able to wiggle the tank forward enough to align the holes. Then be sure to tighten the pivot bolt, after the front two bolts are sucured ;-). However, I recall occasionally having a heck of a time realigning the front bolts on my 2010 FJR.

Oops. Just noticed that further along someone has already offered this suggestion. Guess I was too quick to jump in trying to help.

 
Last edited by a moderator:
Aligning those bolts is even more fun when you have a rambone mounted. I love my rambone but I hate when I have to remove those bolts.

 
On the Gen 2, you can loosen the bolts to the front seat mount and scootch it forward a bit. Since the back of the tank is attached to the same bracket it helps with the front bolt alignment.

 
Last edited by a moderator:
I've discovered on my '09 that it makes it much easier to refasten the two screws at the front of the tank if I first remove the long bolt at the rear. Once the front screws are turned down finger tight the rear bolt just slides into place easily. If I don't remove the rear bolt it is necessary to do a lot of pushing and wedging the tank forward to get the holes in the bracket to line up nicely with the screw holes.

 
Top