RossKean said...
It just isn't that big of a problem!! A few people have needed a clutch clean and soak. Very few have needed more than one. My clutch is working very well after many miles.
I wouldn't consider messing with something that really doesn't need to be fixed. (Unless, of course, you are an expert automotive engineer with specific experience with hydrodynamics related to oil flow and intimate knowledge of the workings and requirements of mechanical wet clutches.)
Its Friday!!!
Well, it's Monday, but I started it Friday
I ain't no edumacated, high falut'n expert at this, but...
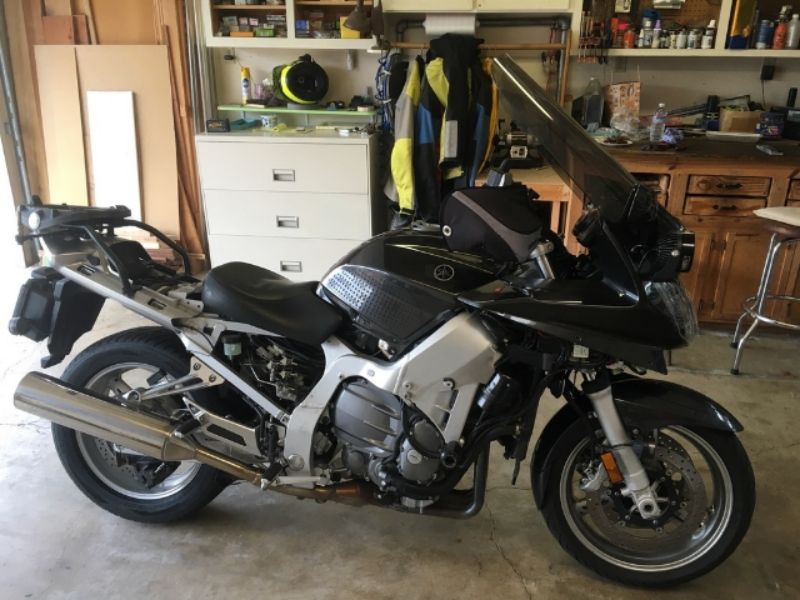
I decided to have a good look at my clutch assembly on my '08
Advanced
Edition. Granted, it was working just fine, however, this thread got me thinking how it could be improved so the 'Clutch Soak' would be a thing of the past. The suggestion for adding extra holes in the hub to let increased amount of oil flow onto the steel and friction discs sounded good to me. I had done that very same thing to my Honda Ascot many years back and it seemed to improve it's performance/feel IIRC, and since it's relatively easy to get to, and I had an extra cover gasket, I had a look.
To make things easy, I decided to remove the bodywork so I could also check up on other things while I was at it.
The bike was still warm from a 20 minute commute earlier that morning.
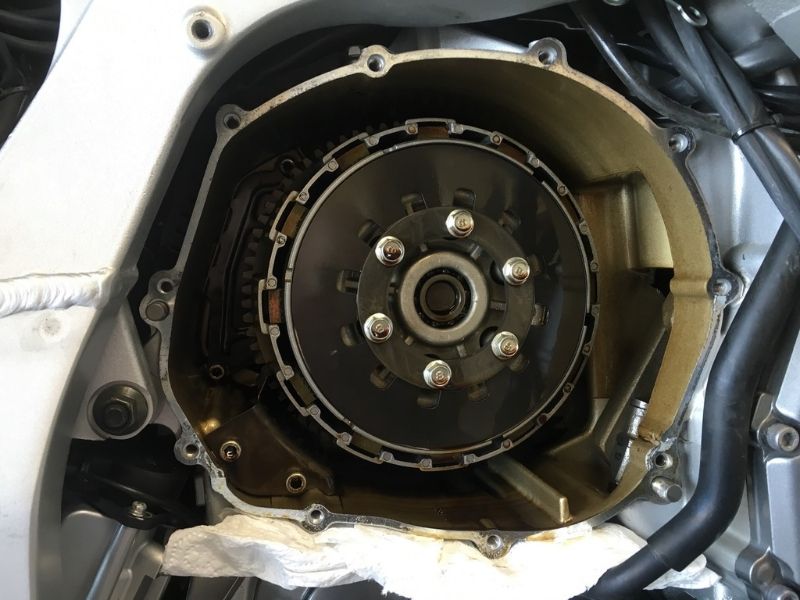
Notice the big hole to the right of the clutch assembly where the crankshaft throw is. Murphy lives down there and is hungry for one of those small cap screws that I was about to extract. Needless to say I covered it before I even started. Off came the pressure plate and the friction elements one by one. I just stacked them on top of each other in order of extraction. I wanted to do a oil coating upon reassembly, not an overnight oil soaking.
As you can see, there was plenty of oil in the clutch hub area. I don't think it's oil starved, I'll go into that in a bit.
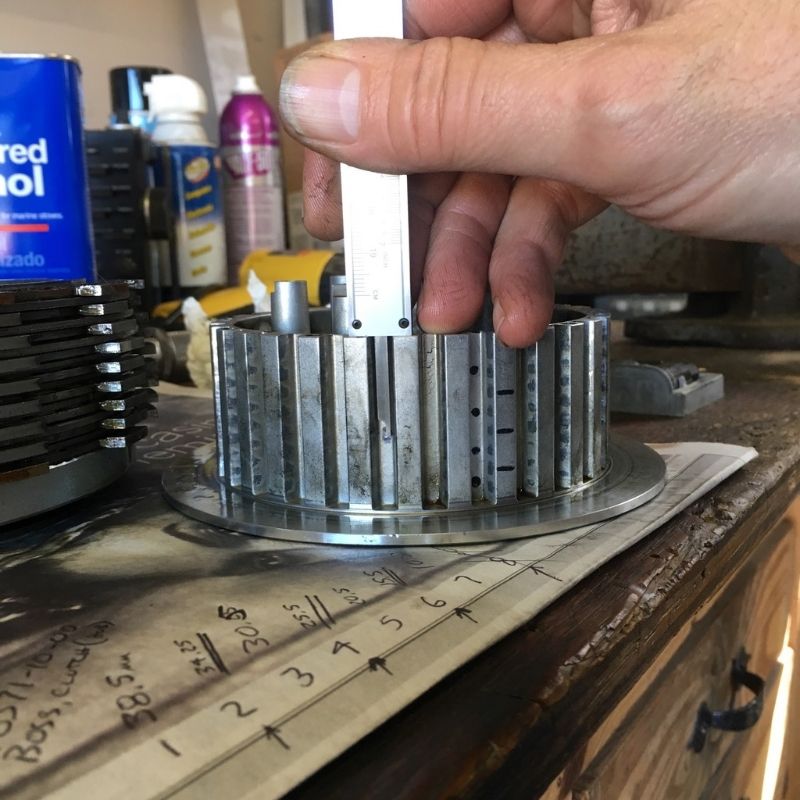
I found that there are 4 holes, 3mm diameter servicing the clutch plates. You can see them in the above picture at the 3
o'clock, 5 o'clock, 9 o'clock, and 11 o'clock positions.
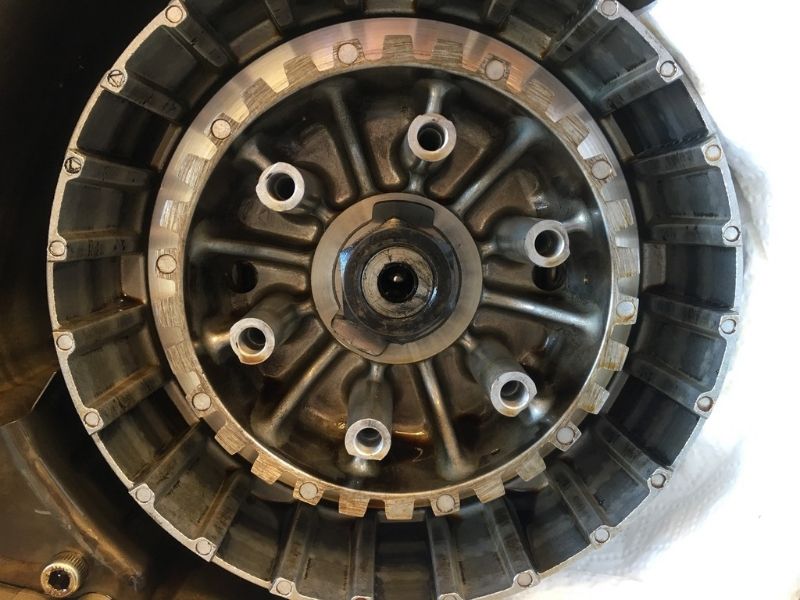
When I plotted them out in one of the ribs on the outside diameter, I could see by the witness marks that every other steel plate had a oil hole above it. In the picture below the bottom black dot is actually one of the oil holes Yamaha gives us. The other 3 black dots are the positions of the other 3 oil holes distributed about the perimeter. I decided to add 3 more holes of the same diameter, also distributed about the perimeter. The lines on the rib in the picture below represent the levels I drilled them at. I chose not to drill a 4th hole near the edge of the hub for fear of weakening the die casting. By adding these holes, now 7 of the 8 steel plates has it's own oil hole to service it. I figured the 8h plate and pressure plate, being on the outside of the stack up has a good chance of getting splash from the #4 cylinder crankshaft throw.
A note about where the oil comes from...
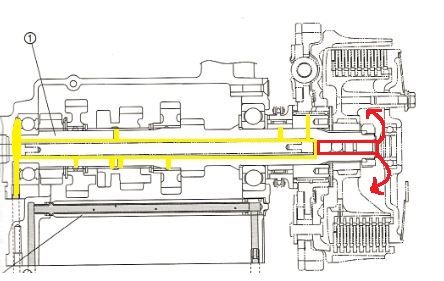
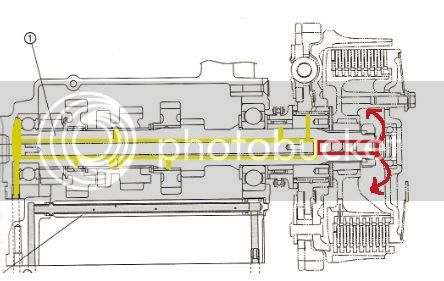
In the illustration below (provided by Mr. BR), it shows the gear shaft sprocket which supports the clutch assembly. The yellow lines represent the pressurized oil gallery, the red lines were used for discussion in a previous post. Please note that the needle bearing which the clutch basket spins on is fed by the shaft oil gallery.
That needle bearing is sealed off to the left side, but is able to flow oil out to the right side by way of that slotted flat spacer. There are 2 shallow slots machined into this hardened spacer on both sides, 4 slots total. They're not very deep, but combined provide a metered flow through this needle bearing. That is why there is an O-ring on the short shaft to the right of the ball, it seals up that oil passageway to keep it pressurized. DO NOT RE-ASSEMBLE WITHOUT THIS O-RING intact and in place !!! If it is missing, the oil pressure will be much lower, and will put critical rotating parts at risk of oil starvation.
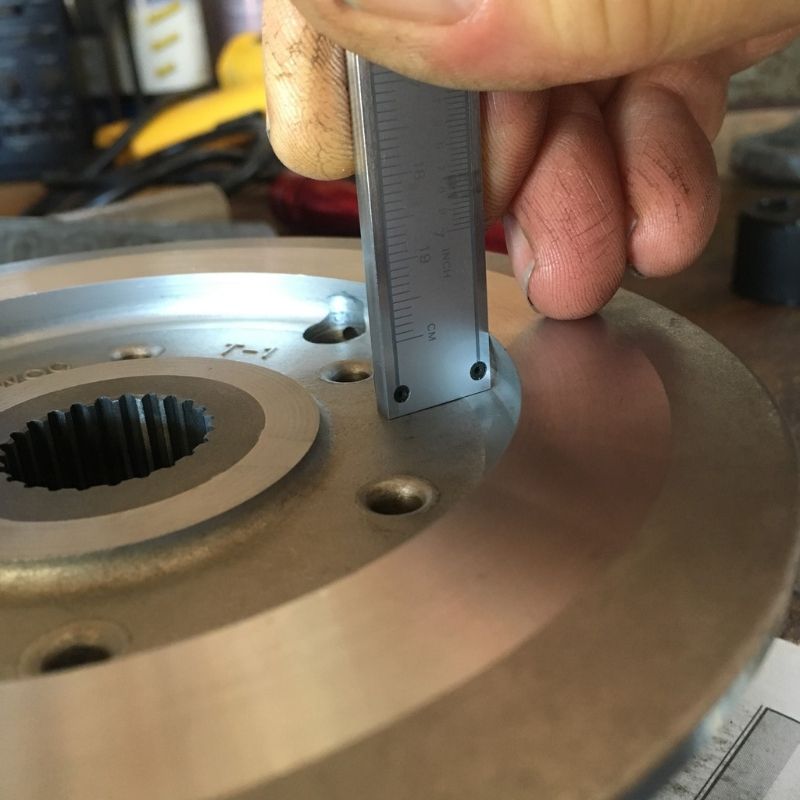
What this line drawing misses is the configuration for the back side of the clutch hub. Note that the hardened ring is inboard of the die casting edge. When the engine is running, oil from the needle bearings is metered through the 4 shallow slots and then slung outward to the back side of the clutch hub. Note the actual configuration in the picture below...
This edge is angled in such a way as to catch the slinging oil from the slotted disc and channel it into the center of the clutch hub by the 2 drilled passage ways, one of which has an oil hole serving the first of the steel ring.
These Yamaha engineers are SMART
I like the way they design things - no wasted space, everything has a function!
I drilled my three holes, cleaned everything up and put it all back together. I made an error in procedure in that I put the flat and dished ring in first before the first friction plate, and I think that lead to a decrease in motion due to an edge being pinched, but it sorted itself out after several minutes of futzing and I was able to get the proper 2.8mm throw.
I did hit the rear brake hard and did a break in spin as directed in the manual, as the plates were probably not indexed the same way as they came out, but I kept the order and proper face out upon reassembly.
After a few blocks, the YCC-S system went into a severe chatter mode when attempting to start from a dead stop.That lead me to bleed the clutch fluid sooner in the day, but it was the Shift-66 setting which raised the engagement point RPM which rectified that situation.
Did my 3 extra holes help the shifting situation? To be honest, I really can't say for sure as the 200k miles I've put on my bikes, they never really did have any shift issues.
But, it seems to me that this bike is now shifting as good as I remember any one of my 3 bikes ever did.
This being my first go at a clutch job on one of these
Yamaha
Chip
Controlled
- Shift bikes, I had a bit of a learning experience, the service manual was quite helpful, however I want to thank several of our members here on the FJRForum who have taken the time years ago to give back to this community, and shared their knowledge. That really shortened my learning curve considerably.
Thank you 'Smart People of the FJRForum' ... this was fun - especially being 2 weeks before NAFO.
As Always ... YMMV
Brodie
