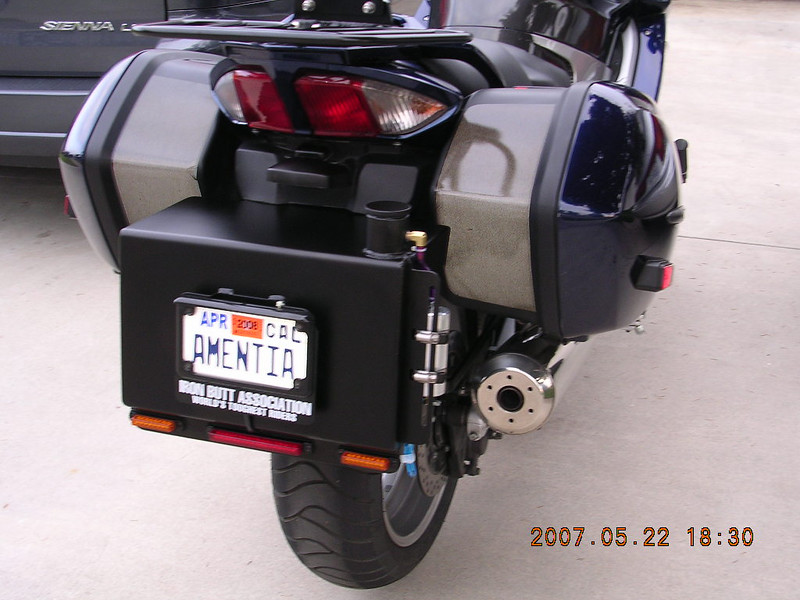
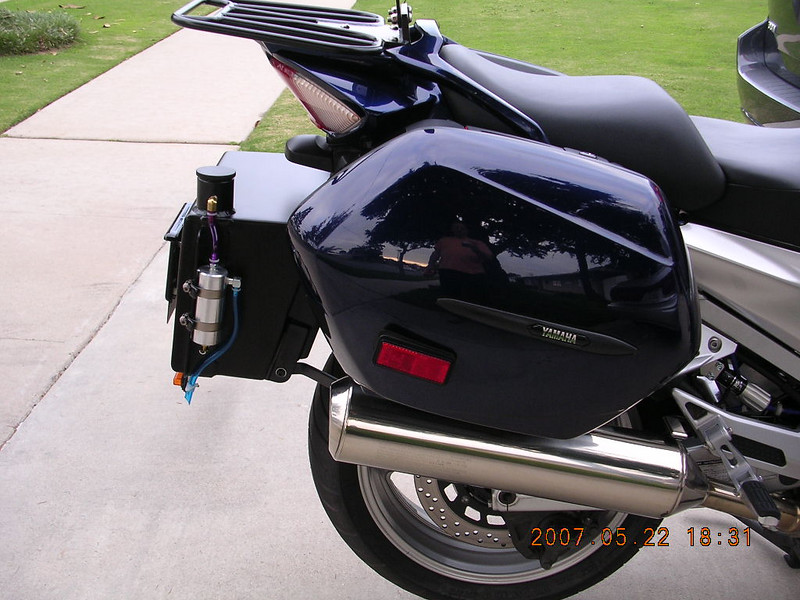
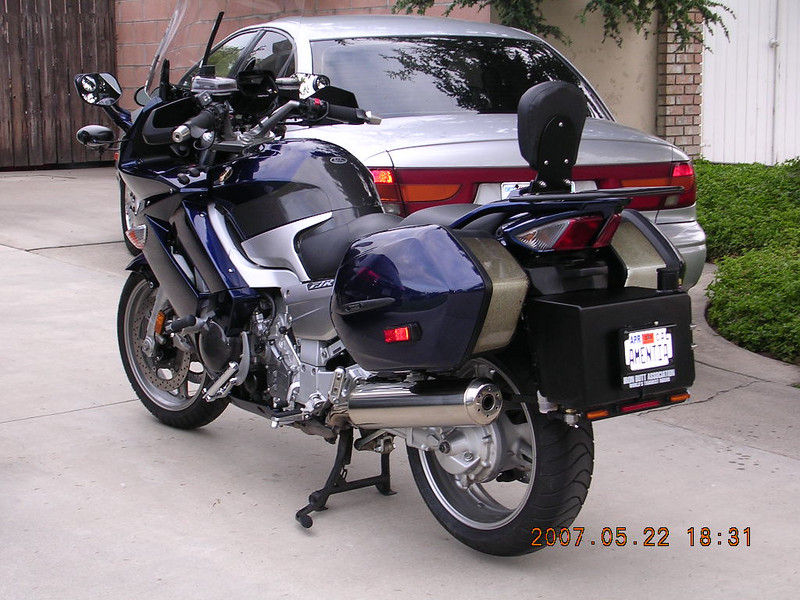
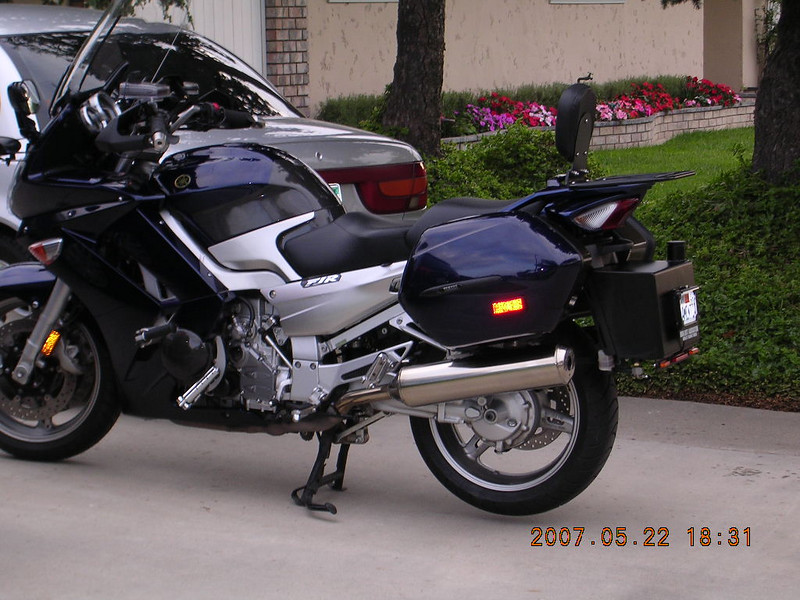
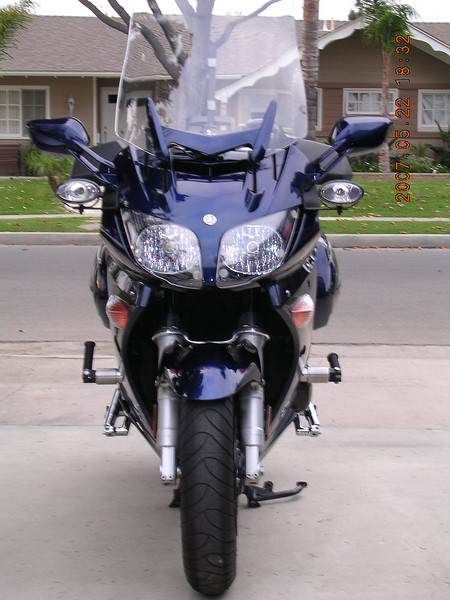
First - let me give you some stats about the tank.
Using the external measurements, the volume shows 4.65 gallons. I haven't filled it up yet, but I estimate at probably around 4.45 to 4.5 gallons capacity. I'll verify this tomorrow when I do the first fill.
The tank has a vertical baffle designed to stop fuel sloshing back and forth - (IBA requirement).
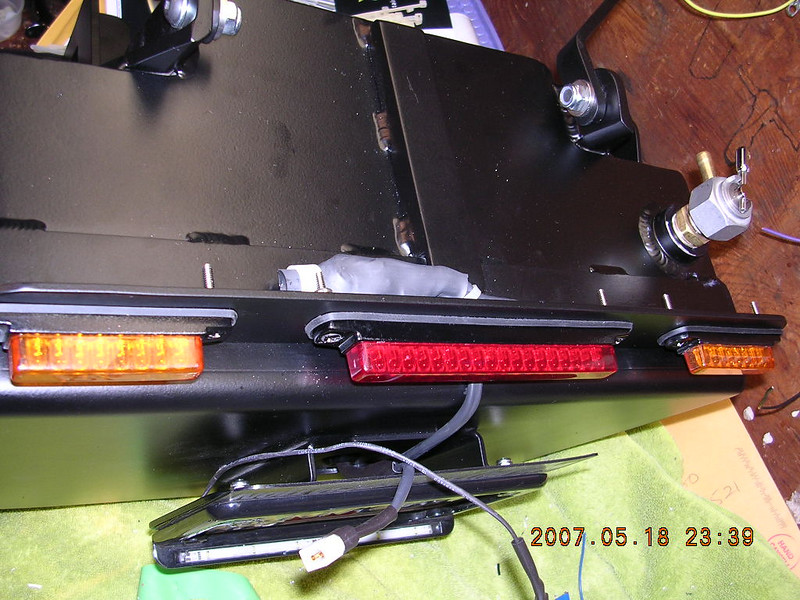
A 3/8" diameter tube is installed through the tank - sloping from the upper front and exiting behind the license bracket. This allows you to extend the wiring necessary for the license light, as well as any additional lighting you may want.
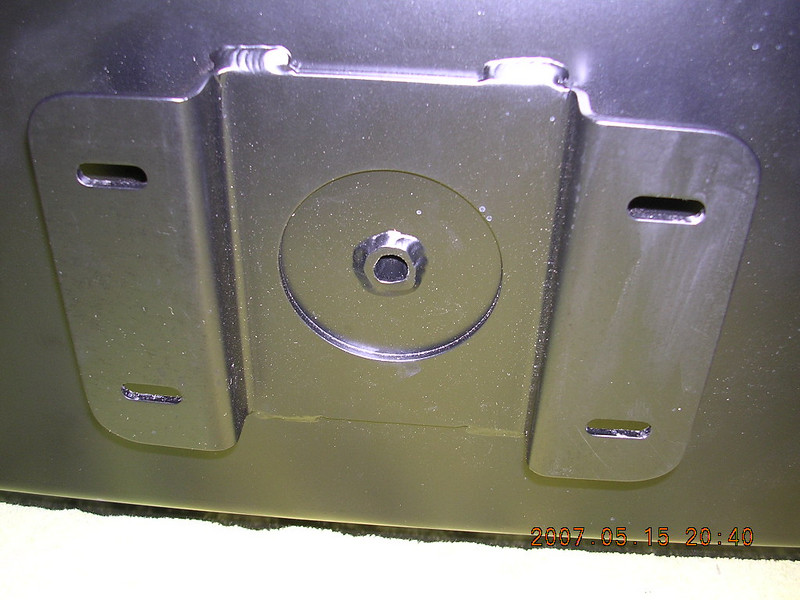
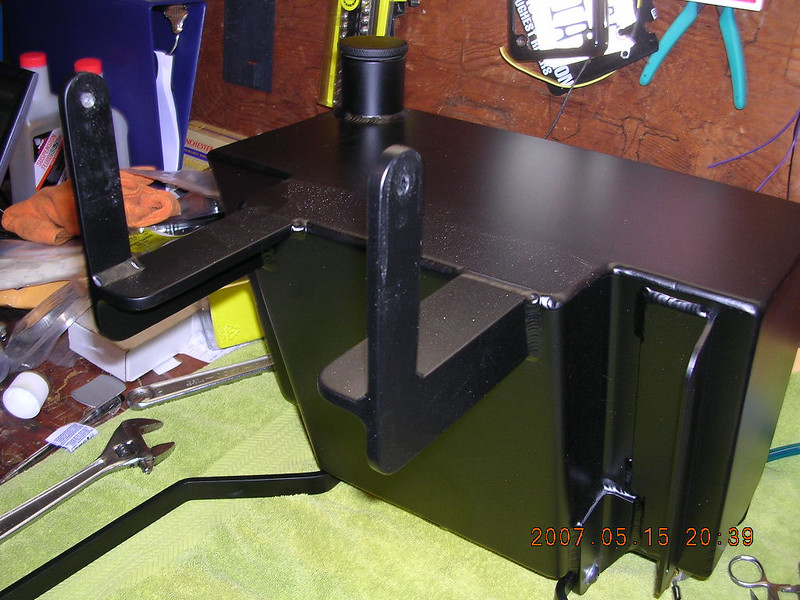
The brackets for the additional LED lights, the right side 'catch' or overflow tank, and the left side fuel line were added in by Ron Sampson during the manufacturing process. These can be varied to what ever you want.
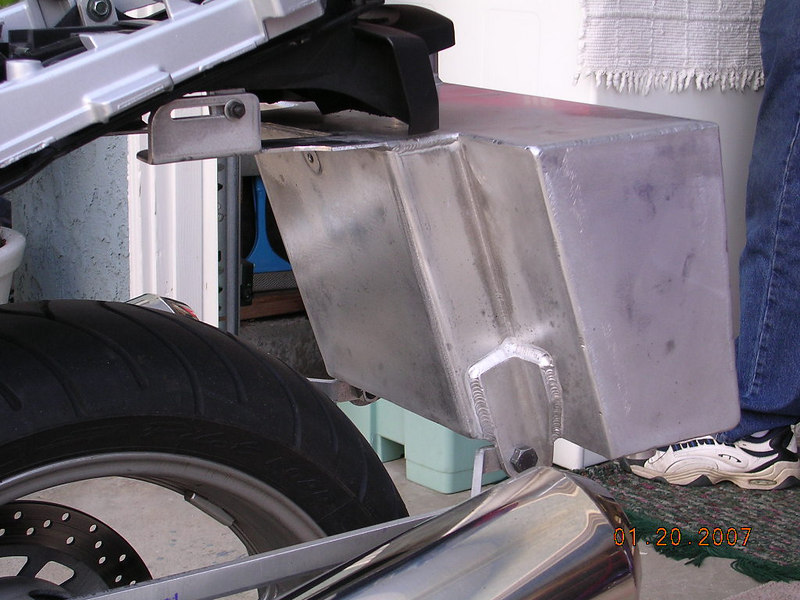
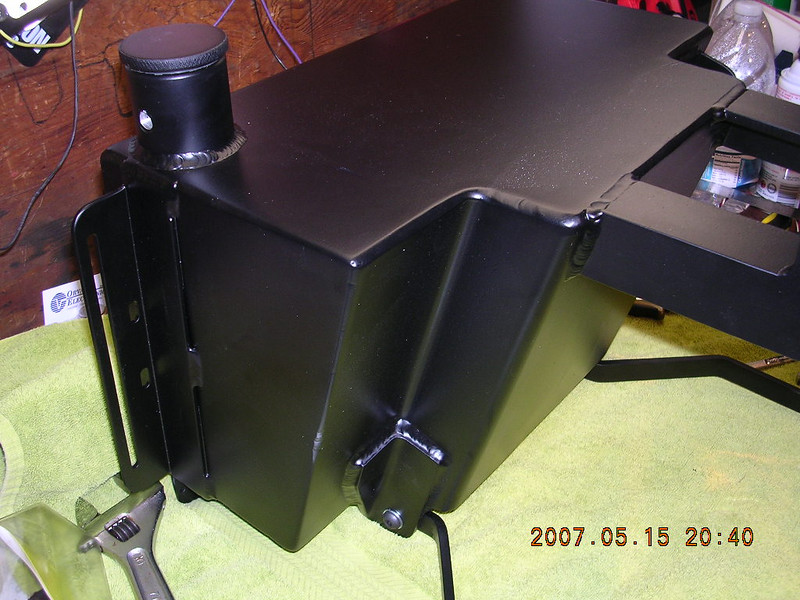
The tank you see below is an ST1100 tank that Ron Sampson has been building using the Ron Majors design for quite some time. Note the date - this was taken on January 20 07.
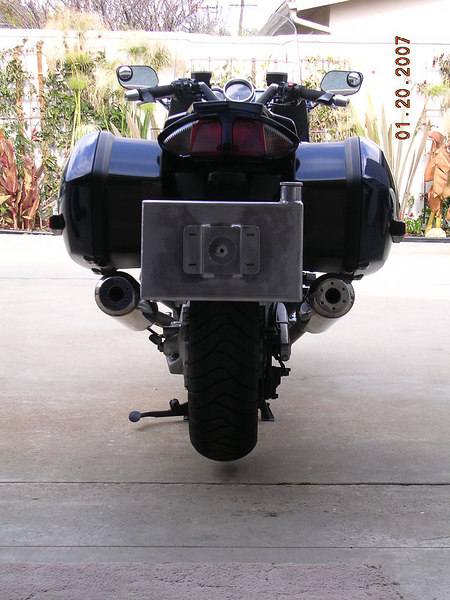
Note the brackets - everything on this 'fitment' tank is designed to adjust in order to obtain the optimum measurements. The idea here is that I would live with the tank for a while, and once dialed in, Ron pulled the measurements and incorporated them into the production units - without any adjustment. This makes a far stronger rig. I rode the bike for a few weeks like this - some of you may remember seeing the bare tank at the Accident Management class held last January.
At this point, Ron had the tank powdercoated - wrinkle finish - and I installed it with full functionality.
I had originally decided to use 5/16" fuel line - but discovered that 5/16" would not make the turn radii that I wanted, so I used 1/4". As this tank is lower than the main tank, a pump is required.
So - where to mount it?
Here's the spot:
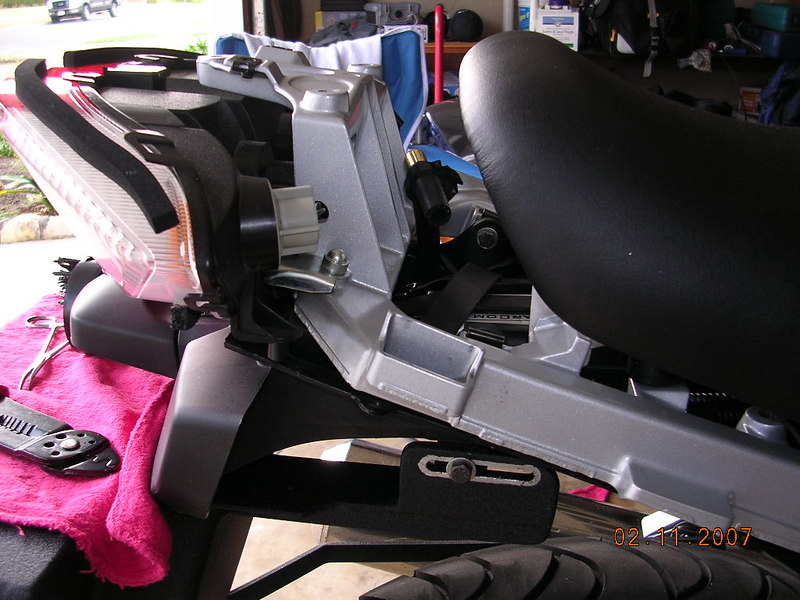
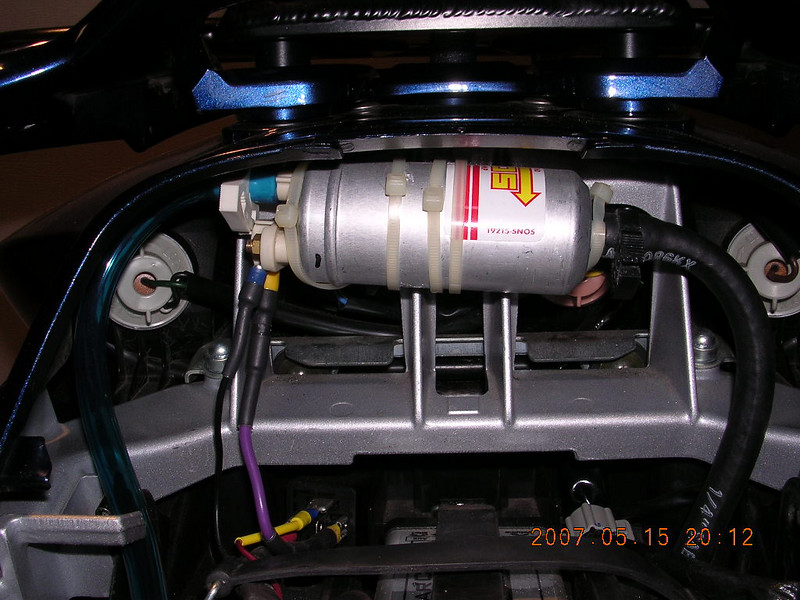
There is a lot of room up under the tail piece - I removed all of the plastic to do the install - and the installed rear seat shows just how much room exists. Lots.
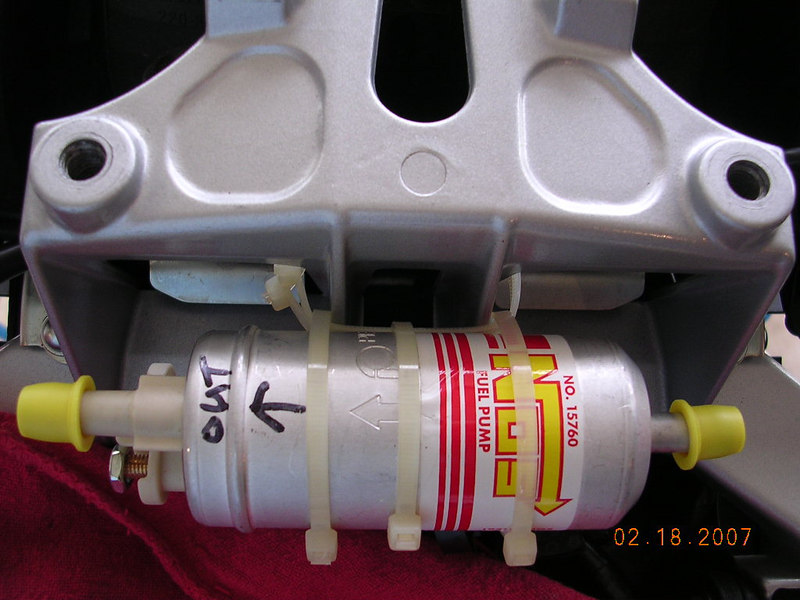
The pump I used is a NOS 15760 - German made, they are going up in price with the devaluation of the US dollar - I bought this one last January for about 87.00. Now up to 96$$ - JEGS.COM seems to have the best price - Jegs NOS Fuel pump There are two pumps listed - The low pressure pump is what you want. Beautiful piece of equipment. A LA based LD rider gave me the tip on this pump - he doesn't ride an FJR - his ride is a GL1800 with a warp core installed. :dribble:
I mounted the switch here:
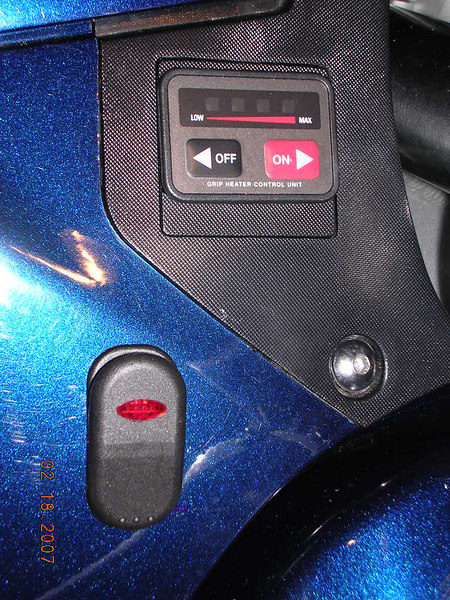
Yes, I cut a hole in my cowling. The switch you see here is a cheezy, supposedly sealed unit - the first one I installed came apart during the process - literally - came apart into all of it's components. So - I now have a Blue Sea switch - and it's not going to come apart. "Ya gets what ya pays for". I should have bought the Blue Sea first, and saved myself the grief. But - its a lesson learned.
So - riding along, I wait until I'm at 1 bar on the fuel gauge - then hit the switch. My tank fills back up. You just have to be darn sure that you have room in the main tank to take the fuel in the aux tank, or it will pump fuel out the vent line.
The pump is fused at 12v, 5 amps - I haven't been able to find the actual amps - but assuming that it's fused at twice draw, it's pulling somewhere in the neighborhood of 3 amps - or 36 watts while operating. I have it wired through the BlueSea fuse block, with it's own relay.
I've installed a Pingel petcock valve - this so the tank can be shut off should one of the fuel lines be damaged. In order to prevent a full main tank from backflowing into the aux tank, a kyton body/viton diaphragm check valve is installed in line. There are two disconnect fittings - one between the aux tank and the pump; the other between the main tank and the check valve. Both of these disconnects close the line when separated. A bulkhead penetration fitting is installed in the main tank, just as you would with any other tank.
The catch can is mounted on the tank vent -
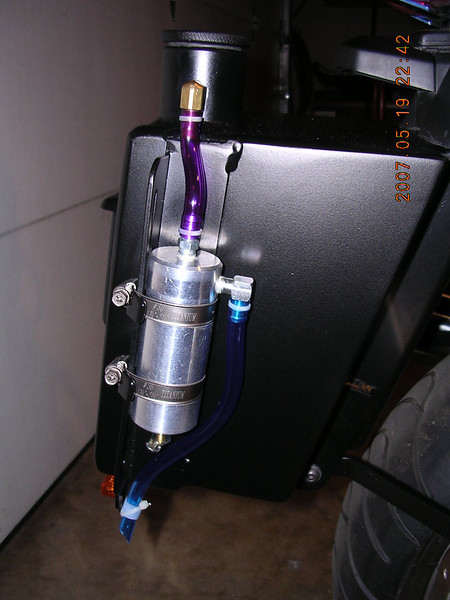
I'll be installing a small fuel filter on the 'spill' line downstream of the catch outlet - this is to filter the air being drawn into the tank as it empties.
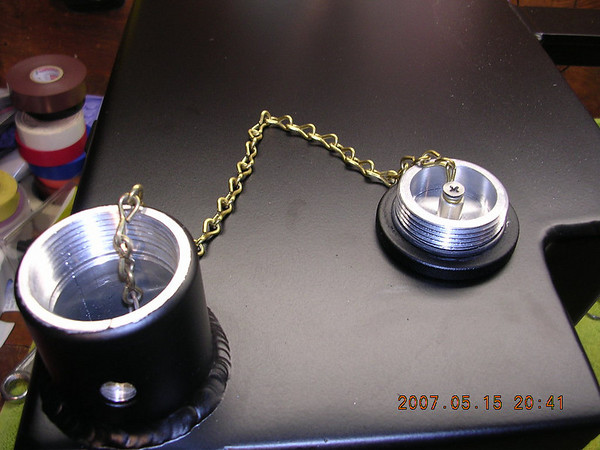
Ron makes his own lids - and affixes them with a length of brass chain - much easier to find the tank lid when it's attached ..
Having the weight of the fuel at the axle level has little effect on handling - when full, I do notice it in the front end - similar to having some weight in a top box, but being lower than the CG of the bike, it's much more stable. I used the 'fitment' tank in some very heavy winds, with no ill effects.
And - a side benefit - as some of you saw on the Death Valley ride last March, it can be used two up.
The fitment tank had some clearance issues - the production tank does NOT. And, you can still pull the rear wheel in your garage - just ask BigDolma.
I'll be taking some pics out in the sunlight tomorrow - I'll post those up when I get time.
As to price? I have no idea. Ron is still working up costs - he will sell you just the tank, and you can rig it yourself - and I understand that he will be making them available as a kit - tank, disconnects, fuel line, bulkhead fitting, check valve, fuel pump, etc.
If you want to contact Ron about this tank, PM me, and I'll give you his contact info.
And - I have to say this - the normal disclaimer applies. No afilliation, I don't profit by this, etc.
(Although he did say something about a bottle of tequila, a burro, and Tiajuana ....... ??? :blink: )
I'll be putting this tank to the test on June 1 - I'll let you know how it turns out.
More Pics:
Using the external measurements, the volume shows 4.65 gallons. I haven't filled it up yet, but I estimate at probably around 4.45 to 4.5 gallons capacity. I'll verify this tomorrow when I do the first fill.
The tank has a vertical baffle designed to stop fuel sloshing back and forth - (IBA requirement).
A 3/8" diameter tube is installed through the tank - sloping from the upper front and exiting behind the license bracket. This allows you to extend the wiring necessary for the license light, as well as any additional lighting you may want.

The brackets for the additional LED lights, the right side 'catch' or overflow tank, and the left side fuel line were added in by Ron Sampson during the manufacturing process. These can be varied to what ever you want.
The tank you see below is an ST1100 tank that Ron Sampson has been building using the Ron Majors design for quite some time. Note the date - this was taken on January 20 07.

Note the brackets - everything on this 'fitment' tank is designed to adjust in order to obtain the optimum measurements. The idea here is that I would live with the tank for a while, and once dialed in, Ron pulled the measurements and incorporated them into the production units - without any adjustment. This makes a far stronger rig. I rode the bike for a few weeks like this - some of you may remember seeing the bare tank at the Accident Management class held last January.

At this point, Ron had the tank powdercoated - wrinkle finish - and I installed it with full functionality.
I had originally decided to use 5/16" fuel line - but discovered that 5/16" would not make the turn radii that I wanted, so I used 1/4". As this tank is lower than the main tank, a pump is required.
So - where to mount it?
Here's the spot:

There is a lot of room up under the tail piece - I removed all of the plastic to do the install - and the installed rear seat shows just how much room exists. Lots.

The pump I used is a NOS 15760 - German made, they are going up in price with the devaluation of the US dollar - I bought this one last January for about 87.00. Now up to 96$$ - JEGS.COM seems to have the best price - Jegs NOS Fuel pump There are two pumps listed - The low pressure pump is what you want. Beautiful piece of equipment. A LA based LD rider gave me the tip on this pump - he doesn't ride an FJR - his ride is a GL1800 with a warp core installed. :dribble:
I mounted the switch here:

Yes, I cut a hole in my cowling. The switch you see here is a cheezy, supposedly sealed unit - the first one I installed came apart during the process - literally - came apart into all of it's components. So - I now have a Blue Sea switch - and it's not going to come apart. "Ya gets what ya pays for". I should have bought the Blue Sea first, and saved myself the grief. But - its a lesson learned.
So - riding along, I wait until I'm at 1 bar on the fuel gauge - then hit the switch. My tank fills back up. You just have to be darn sure that you have room in the main tank to take the fuel in the aux tank, or it will pump fuel out the vent line.
The pump is fused at 12v, 5 amps - I haven't been able to find the actual amps - but assuming that it's fused at twice draw, it's pulling somewhere in the neighborhood of 3 amps - or 36 watts while operating. I have it wired through the BlueSea fuse block, with it's own relay.
I've installed a Pingel petcock valve - this so the tank can be shut off should one of the fuel lines be damaged. In order to prevent a full main tank from backflowing into the aux tank, a kyton body/viton diaphragm check valve is installed in line. There are two disconnect fittings - one between the aux tank and the pump; the other between the main tank and the check valve. Both of these disconnects close the line when separated. A bulkhead penetration fitting is installed in the main tank, just as you would with any other tank.
The catch can is mounted on the tank vent -

I'll be installing a small fuel filter on the 'spill' line downstream of the catch outlet - this is to filter the air being drawn into the tank as it empties.
Ron makes his own lids - and affixes them with a length of brass chain - much easier to find the tank lid when it's attached ..

Having the weight of the fuel at the axle level has little effect on handling - when full, I do notice it in the front end - similar to having some weight in a top box, but being lower than the CG of the bike, it's much more stable. I used the 'fitment' tank in some very heavy winds, with no ill effects.
And - a side benefit - as some of you saw on the Death Valley ride last March, it can be used two up.
The fitment tank had some clearance issues - the production tank does NOT. And, you can still pull the rear wheel in your garage - just ask BigDolma.
I'll be taking some pics out in the sunlight tomorrow - I'll post those up when I get time.
As to price? I have no idea. Ron is still working up costs - he will sell you just the tank, and you can rig it yourself - and I understand that he will be making them available as a kit - tank, disconnects, fuel line, bulkhead fitting, check valve, fuel pump, etc.
If you want to contact Ron about this tank, PM me, and I'll give you his contact info.
And - I have to say this - the normal disclaimer applies. No afilliation, I don't profit by this, etc.
(Although he did say something about a bottle of tequila, a burro, and Tiajuana ....... ??? :blink: )
I'll be putting this tank to the test on June 1 - I'll let you know how it turns out.
More Pics:


Last edited by a moderator:


