First Valve Clearance Check

Yamaha FJR Motorcycle Forum

Help Support Yamaha FJR Motorcycle Forum:

This site may earn a commission from merchant affiliate links, including eBay, Amazon, and others.
If they are in spec then all is good. If I had one or more that was out of spec, I would probably bring all to near the midpoint. You are likely to have to do those when you dig into it the next time. So far, all of my exhaust valves have been OK. On the last check (35,000 miles ago), I had a couple of intake valves below minimum so I set them all to a bit wider than midpoint. Probably a winter works project again this year.
I had formed the thought that I would skip the next check but since I have two exhausts at the minimum it would be wise to do this again in 30k miles or so. Dang! I really hate wrestling with all of the body work to do this.

Dan

 
It's really amazing what gets in there and ??? HOW ???

I also had a mummified bird up in front of engine. Nicely dehydrated.

They say to use EFI friendly gasket stuff as it can effect certain sensor readings, don't know ????

Did you use the really great valve spread sheet from the Forum ?

Really good spread sheet when working on the valve clearances.

I have the full shim kit but have never needed to use any of them yet, lol lol.

But looks like I may have a job to do soon on a mates FJR,

It is very lucky that once the clearances are set the first time, they rarely change.

I haven't done my Gen3 yet, haven't been on a bike in 10 months, but things are improving.

Pushed my first tools on a mates FJR on Tuesday AND loved it. Be back on a bike in a month I hope.

 
Last edited by a moderator:
Did you use the really great valve spread sheet from the Forum ?Really good spread sheet when working on the valve clearances.
I've always made up my own maintenance recording sheets on my 2d CAD system. I keep meticulous records on everything I do to each vehicle I own (and have owned for the past few decades). I have all these in a binder on the book shelf with a dozen or so FSMs. The FSMs stack up even after the vehicle is long gone, for some reason I just can't throw them out.

Dan

 
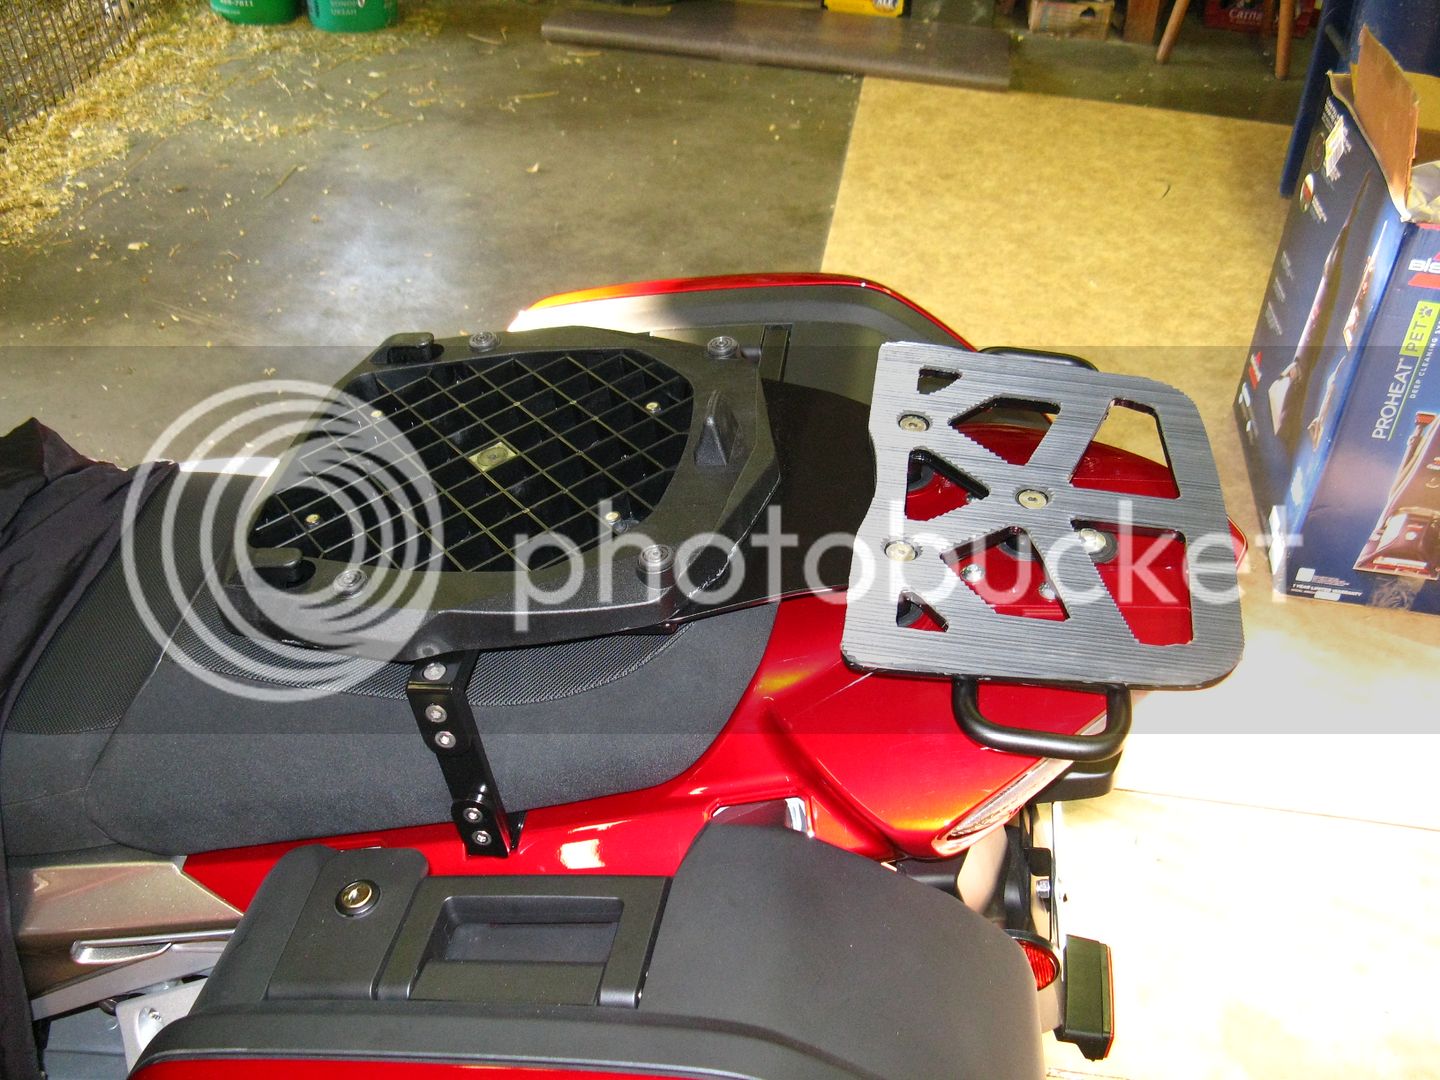
In the pictures of your bike, I noticed that you have an interesting back plate installed. It is the furthest one back. Could you tell me where you got it from?

Thanks.

 
I had formed the thought that I would skip the next check but since I have two exhausts at the minimum it would be wise to do this again in 30k miles or so. Dang! I really hate wrestling with all of the body work to do this.

Dan
Good to see that it's all worked out for you Dan. You've prolly discovered like I did- after the first time you wonder what all the dread was about. And as far as plastic removal goes, I just think of it as my reward for changing coolant and plugs and (in my case) cleaning & gooping ground spiders. Plus having the plastics off to clean is so much easier than when they're installed. Once per yr, after my annual wash-n-wax I still marvel at how gorgeous the '07 black cherry is.

 
In the pictures of your bike, I noticed that you have an interesting back plate installed. It is the furthest one back. Could you tell me where you got it from?Thanks.
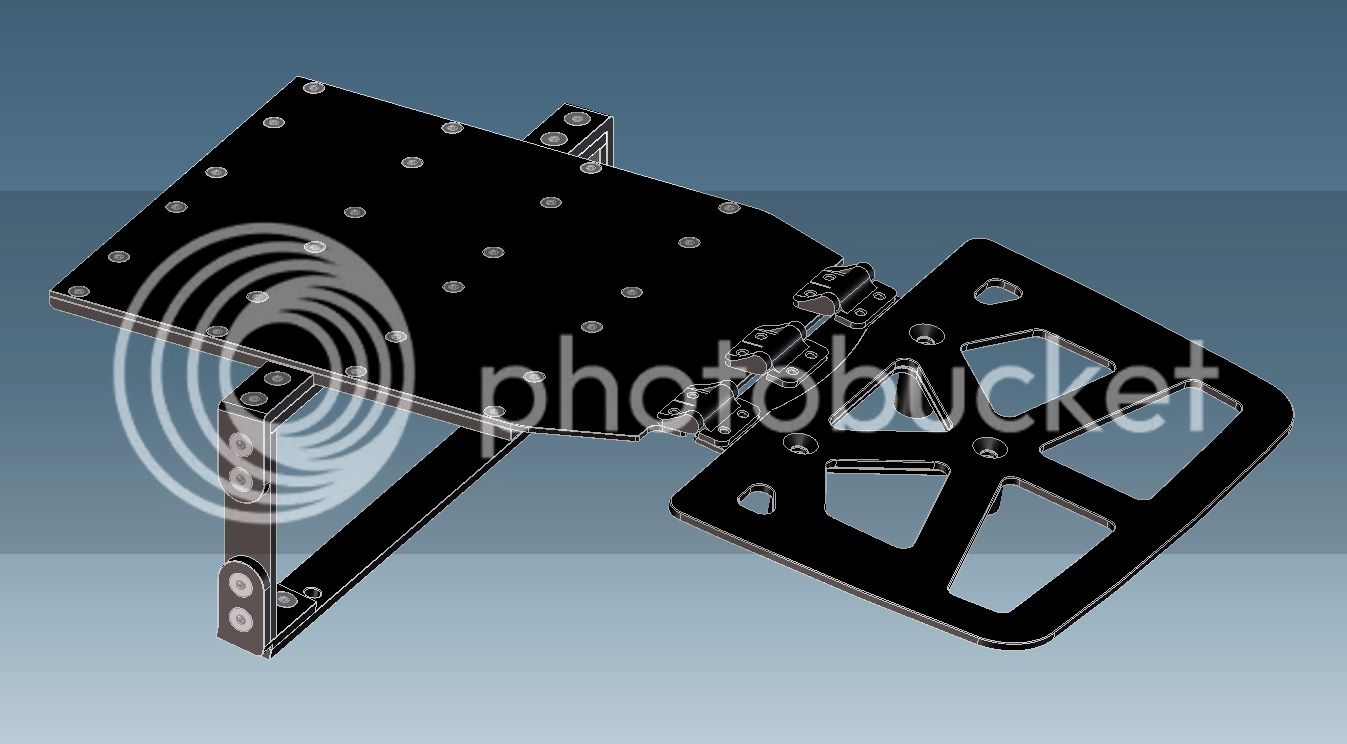
That is a rack I made myself out of 1/4" thick 6061-T6 aluminum. I then powder coated it in semi-gloss black (BK-05) and bonded the ribbed rubber padding to the top surface. I have a 3d CAD model of it and can generate a 2d drawing for it if interested. Let me know.

Dan

 
I had formed the thought that I would skip the next check but since I have two exhausts at the minimum it would be wise to do this again in 30k miles or so. Dang! I really hate wrestling with all of the body work to do this.

Dan
Good to see that it's all worked out for you Dan. You've prolly discovered like I did- after the first time you wonder what all the dread was about. And as far as plastic removal goes, I just think of it as my reward for changing coolant and plugs and (in my case) cleaning & gooping ground spiders. Plus having the plastics off to clean is so much easier than when they're installed. Once per yr, after my annual wash-n-wax I still marvel at how gorgeous the '07 black cherry is.
The Black Cherry is an excellent color. Easy to pick out an '07 on the highway. I'm going to take advantage of the plastic being off to go over the chassis. I have a power wire to my fuseblock I want to replace, I would like to install at least one Powerlet connector (need to make a bracket for it), check the air filter, etc.

I am also going to change brake/clutch fluids and do an oil/filter change.

I really marvel at the sophisticated engineering Yamaha invested in the FJR. Being a Mechanical Engineer myself, I can certainly appreciate the design. That peripheral frame is a work of art and is obviously extremely rigid and light weight for the job it does.

Dan

 
All good points, Ken, thanks! I have some very good silicone grease I will add to the stick coils when replacing. They were a bit sticky to remove but I twisted them first to break the rubber from the aluminum. I glued the new gasket into the valve cover just now with a very thin line of blue silicone gasket sealer so it will set tonight and make it easier to lower the valve cover without wrestling with the gasket to keep it in place. That is the first task tomorrow morning. Once the cover is back on and bolted down (and I am sure the gasket is good), then I will breath easier.
I blasted off the valve cover with compressed air before removing anything, lots of little gravel bits in the pockets. Most of the bits were in the pockets for the cooling pipe, spark plug wells were clean as a whistle.

Got a written record of clearances. I just wish that Yamaha would see it in their infinite wisdom to include a factory shim map with each new FJR so I know what is in there. If I need to replace a shim I would be able to know what to get at the dealer before a camshaft-ectomy to find out.

Next time. I have a one week ride from northern California to the Columbia River Gorge and back coming up in late September that I'm getting the bike ready for now. After the engine is back together, new coolant goes in as well as brake/clutch fluid replacement.

I would have paid an extra $2,000 for this motorcycle if it came with hydraulic valve lash compensators (like on the Honda Nighthawk S and Kawasaki ZG1200 Voyager).

Dan

Something I failed to do when I did my last valve adjustment. Thought I had it sealed well, but alas, I had a small oil leak requiring complete disassembly.

 
So you have a Givi rack over the passenger seat. Is that just sitting there or is it actually mounted that way?

Dave

 
So you have a Givi rack over the passenger seat. Is that just sitting there or is it actually mounted that way?
Dave
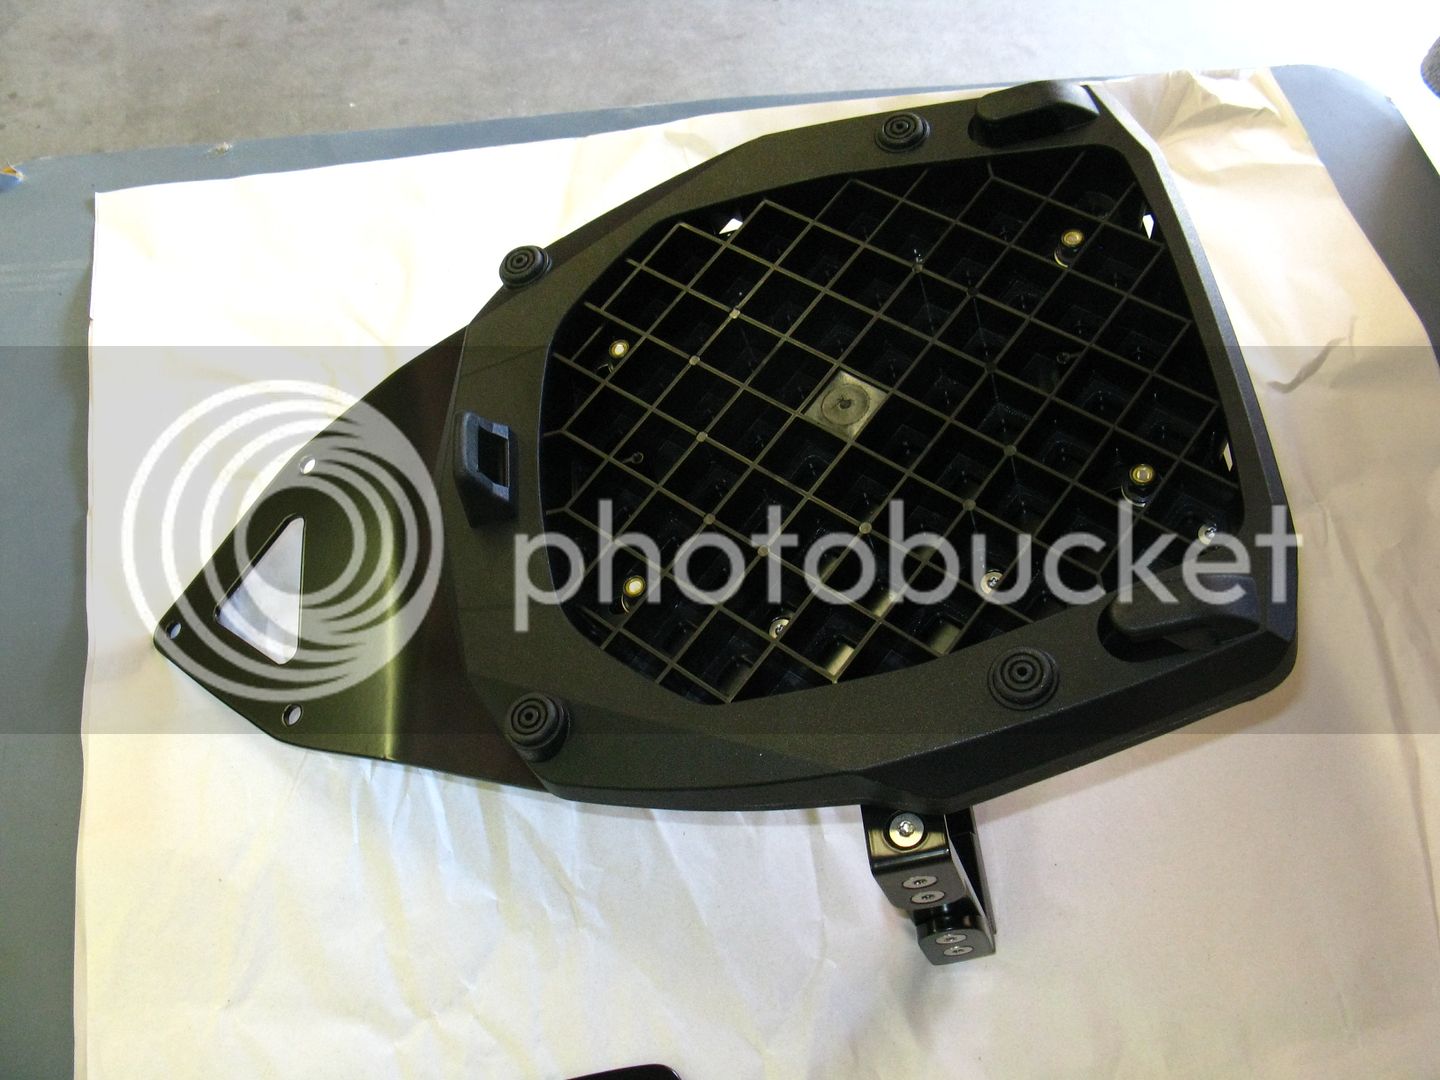
I designed and built a deck for the Givi that hovers over the passenger seat:


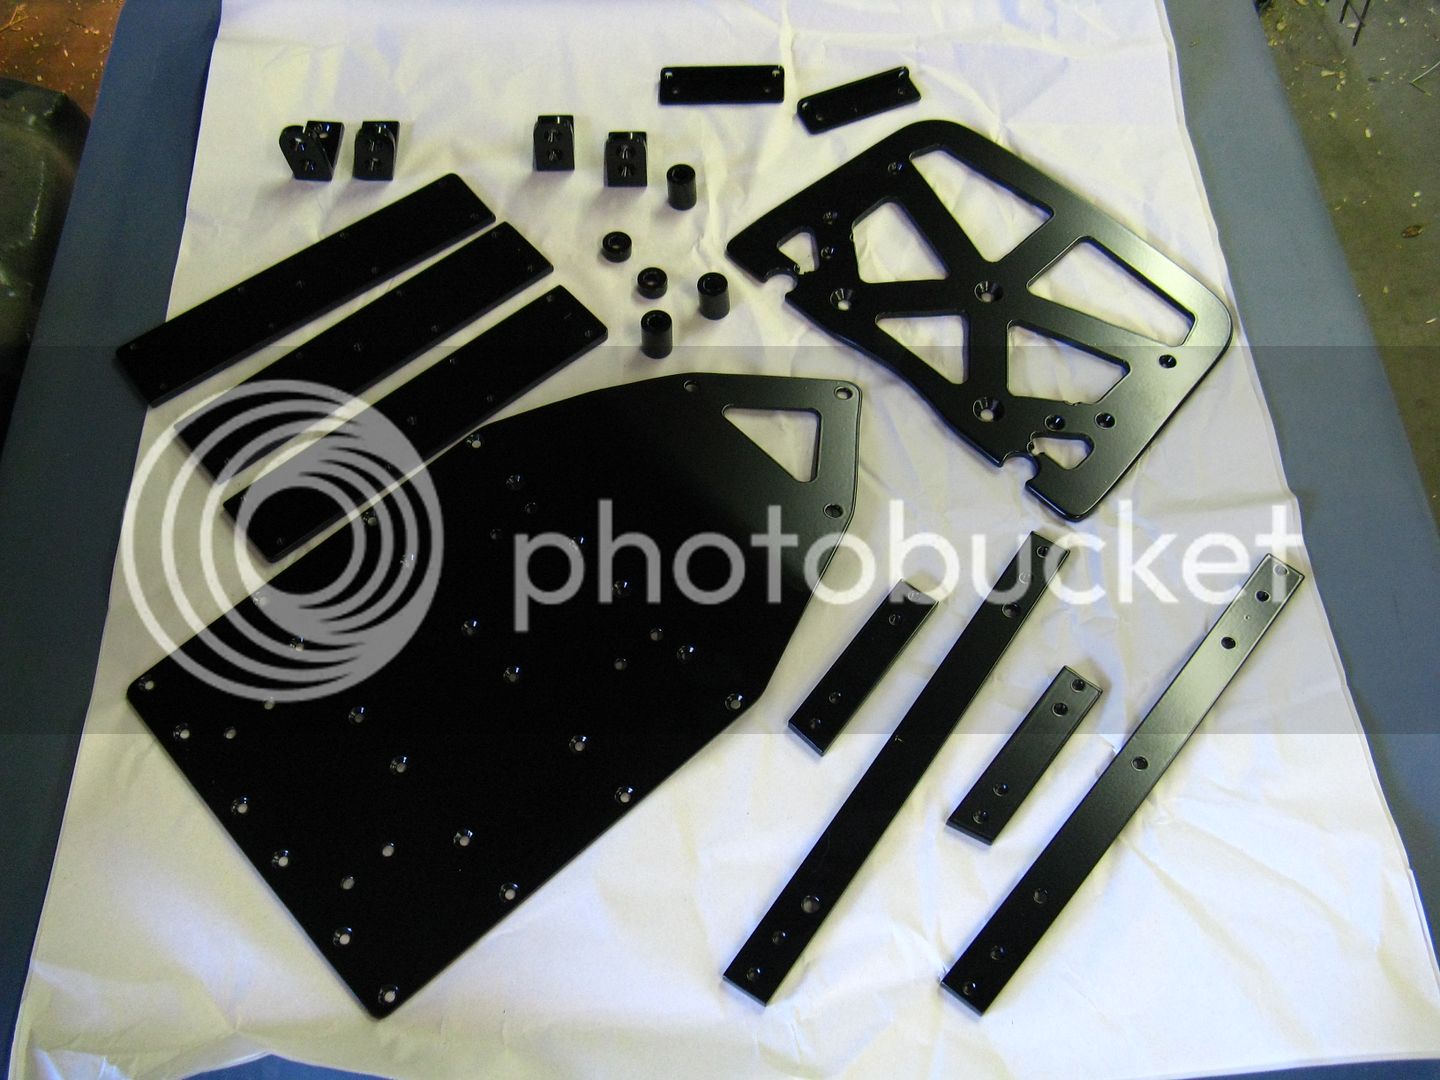
After getting all the parts powder coated:


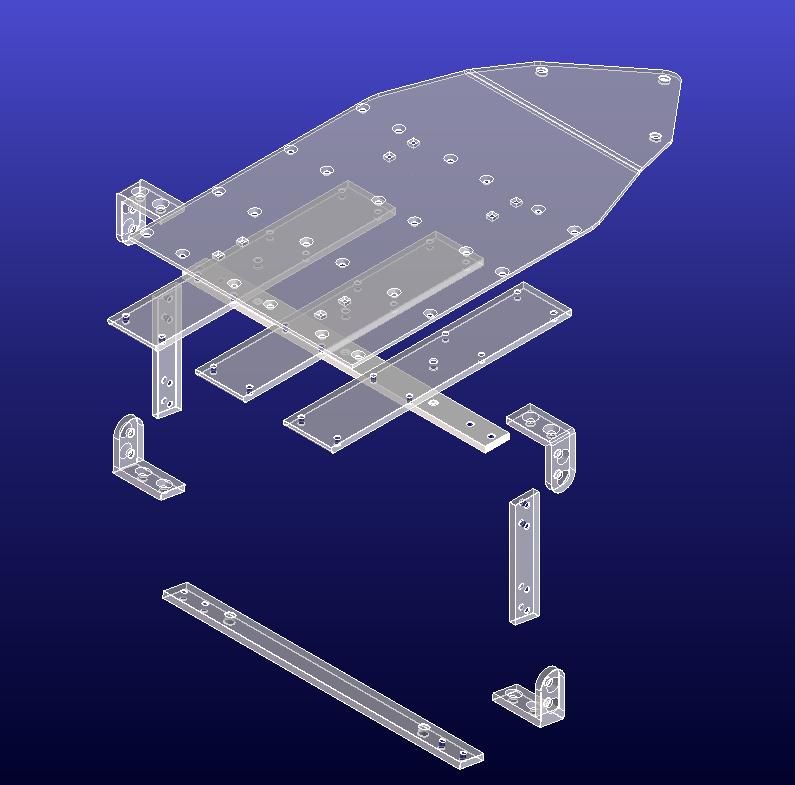
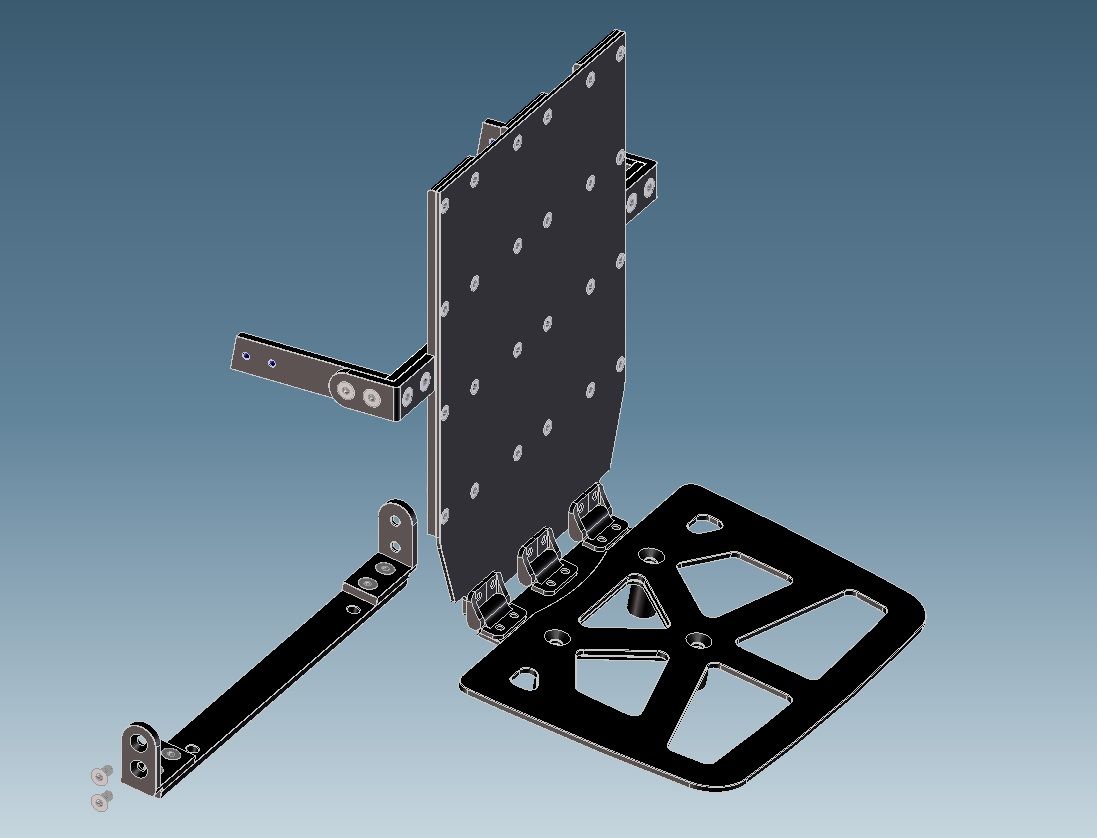
The 3d CAD model:


It does make it difficult to get under the seat for various things (storage, etc.). I am working on a modification of the design that would allow the deck to hinge upward to be able to remove the seats.

Dan
I think some quick release screws, like on the side air vents, on the sides would do the trick for easy removability.

 
I'm working on a design with a hinge-open feature:


These are not the hinges I will use (way too expensive and bulky). I will most likely use an extruded aluminum piano hinge mounted below so it will not be as visible. Fastening the vertical struts to maintain structural integrity will be the next challenge. I like the idea of 1/4 turn Dzus fasteners (if they are strong enough). I'll check into those, thanks.

Dan

 
Last edited by a moderator:
Oh, that is freaking awesome. I'm constantly astounded at the design capability of some people here. Being able to move the trunk forward to centralize mass, and at the same time eliminate any aerodynamic issues that cause high speed wobble with a trunk and no passenger, is a huge win-win. I know I've said it before about your design, but it bears repeating.

Did you use the really great valve spread sheet from the Forum ?
Really good spread sheet when working on the valve clearances.
I've always made up my own maintenance recording sheets on my 2d CAD system. I keep meticulous records on everything I do to each vehicle I own (and have owned for the past few decades). I have all these in a binder on the book shelf with a dozen or so FSMs. The FSMs stack up even after the vehicle is long gone, for some reason I just can't throw them out.

Dan
Do take a look at the spreadsheet. It was put together by Billy Fitz (Yammafitter) here on the forum, and it is a stroke of pure genius. I helped him clean it up a little and make it as useful as possible, but all credit goes to Bill.

The advantage of the spreadsheet is that, not only does it give you a great data sheet to record the as found and as set clearances, it also calculates what you will ideally want to install for the new shims with no need for a lookup table.

I do suggest that anyone that after making initial clearance measurements thinks that they will need to re-shim, to switch from using imperial, inch-based measurements, to metric feelers. The accuracy of the readings is more than doubled, which can only be a good thing.

I have what I believe to be the latest version of the spreadsheet hosted on Dropbox here:

FJR Valve Clearances rev 1.xls

You can download the file without joining or giving away your first born children, just say "No Thanks" when they spam you to become a member. They'll still let you get the file.

As for having the right shims, you do not need all of the shim sizes that come in a standard re-shim kit. Those kits are designed to cover a wide range of bikes and manufacturers, that use widely different stock shim sizes out of the factory. I did a survey at one time to try and nail down the most commonly found stock shims in FJR engines, and that is no doubt languishing somewhere on this cloud of forum data and could be found with some diligent searching. I seem to recall that it comes down to only about 2-3 sizes of intake and exhaust sizes being needed, but be aware that the factory uses shims of much smaller differences (.01mm) to hit their production tolerances as compares to what is available during re-shim (.05mm).

My take on this was to say screw it and sand the original shims down to what I needed to hit the 70th percentile using a micrometer, to the .01mm (actually tighter) level of accuracy. Again, there are several accounts of people sanding shims documented on here, including my own.

Lots of ways to approach this thing, but none of them are all that complicated once you understand the principles and what you are attempting to achieve.

PS - I know what you mean about throwing away old FSMs. They are like our children. We can't just leave them at the dump, even if nobody else wants them. ;)

 
Just completed my first valve clearance check (shop did previous) found 1 intake and 3 exhaust readings out of speck. Readings are:
Intake: .006 .006 .005 .006. 006 .006. 006 .006 . Exhaust : .006 .005 .007 .006 .007 .007 .007 .007
Since issues are with cylinders 1 and 2, I plan to just tilt the cam up to access the valve caps. Just wondering what happens to the CCT. Do I need to remove it? or is there a way to retract it and hold in retracted position until done? Then there is the question that since they are all essentially at the minimum, is it better to just center them all?
 
If they are all at the minimum, I would probably center them all - or even to the 70% of max. (0.009 Exhaust and 0.008 Intake)
With the cover screw on the CCT removed, you can fit a long thin blade flat screwdriver in through the frame hole to retract the CCT. I do that and then clamp a small vice grip to the screwdriver shaft and let the weight prevent it from unwinding.

Did you get the cam timing sorted out?
 
Top