Snoofus
Active member
Hi,
I haven't written one of these before, but here goes...
I was hunting for an additional brake light for my 2008 FJR. There were several products to consider, but when I found out that Admore Lighting sold a wiring harness to add to my FJR I didn't look any further. The link to the wiring harness isn't particularly easy to find - it's here.
The light and harness kit arrived nicely packed. This is what you'll find inside:
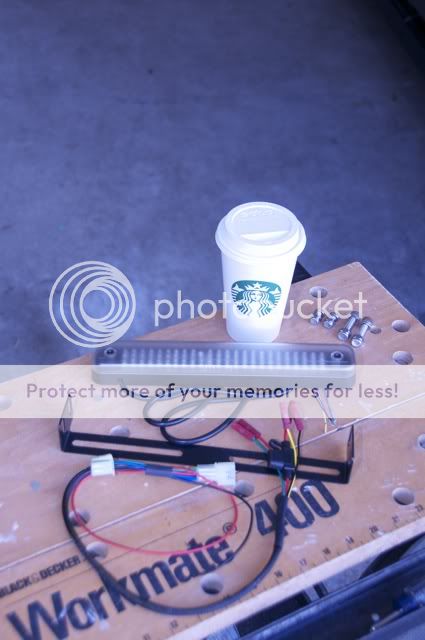
Note the Starbucks' coffee cup - since the container is opaque you can fill it with any beverage of your choice (don't tell anyone, okay?).
The bracket was different from the one shown on the company's web site. This bracket has two mounting slots which will give you options on placing the light. I believe the bracket is designed to fit behind your license plate. That will allow an installation without any additional holes. On an FJR that installation would shade the license plate light. You may be willing to risk the grief associated, I decided not to.
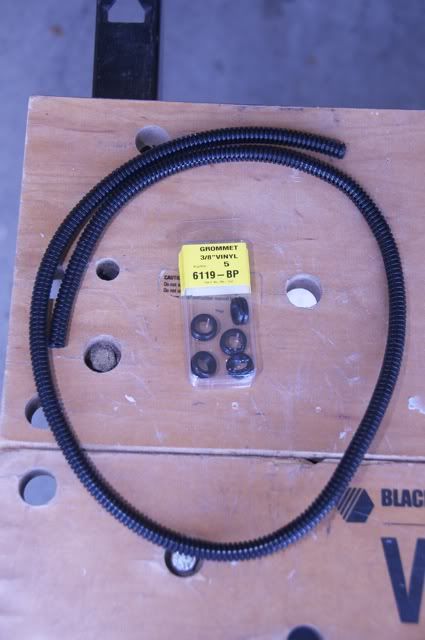
I decided to add a plastic loom over the factory wiring. I'm not sure it's necessary, but it will protect the wiring from abrasion. I also purchased grommets to fit the loom through the plastic fender.
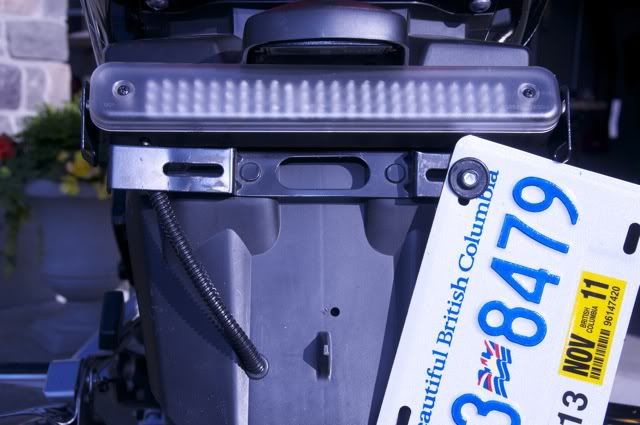
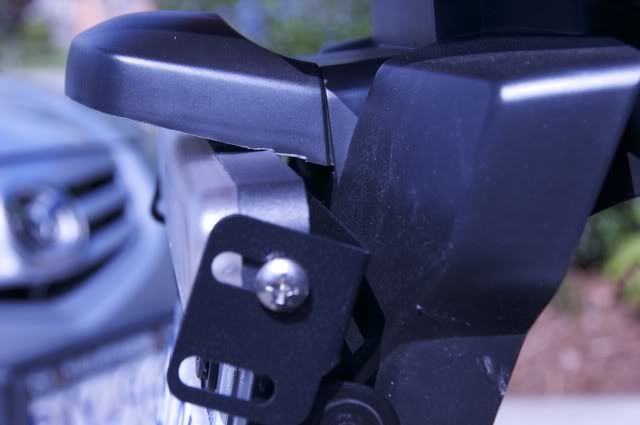
In this photo you can see the brake light interferes with the license plate light. Fortunately the license plate light is made of soft plastic. It's easy to remove the material necessary with a file, sharp knife, or Dremel tool.
Once I had the bracket in place, I had to route the wiring. I'm sure there are other, perhaps better, ways of doing it but this is what I came up with. In order to avoid any tight turns with related kinked wires, I routed the wire through the fender behind the license plate. I used one of the grommets in this hole. The plastic of the fender is soft, so the drill bit goes through very rapidly. Be careful not to damage your tire!
On the inside of the fender there were two existing holes in the reinforcing rib. These proved ideal for a couple of cable ties/zap straps to attach the wiring.

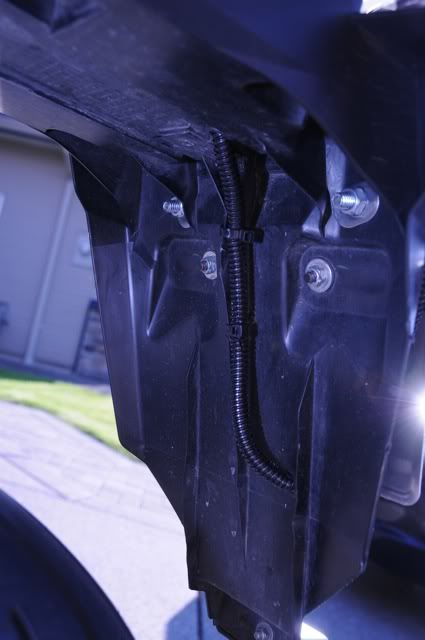
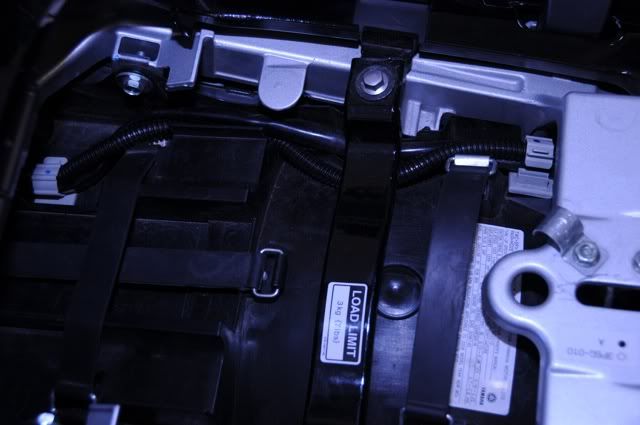
I found another existing hole underneath the tail light nacelle. I enlarged it with the drill, added a grommet, and viola the wiring was now under the seat. The clips holding the factory wiring are easily released and with a bit of work the additional wiring fits in there, too. In this photo the additional wiring is in the loom with the ribbed appearance.
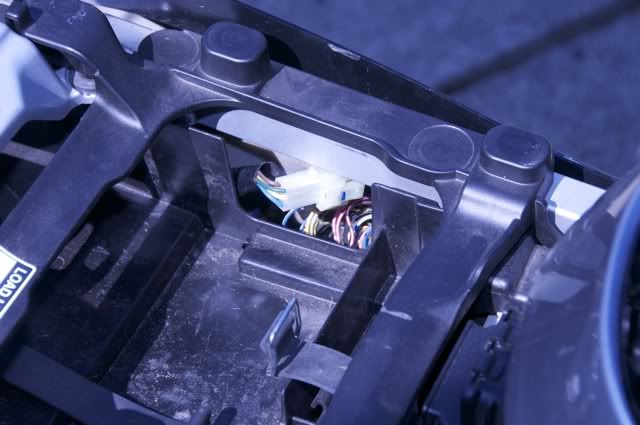
The factory harness has this clip located on the left side. This is where you insert the harness from Admore Lighting. Once the connections are made, there's enough room to tuck everything neatly out of sight.
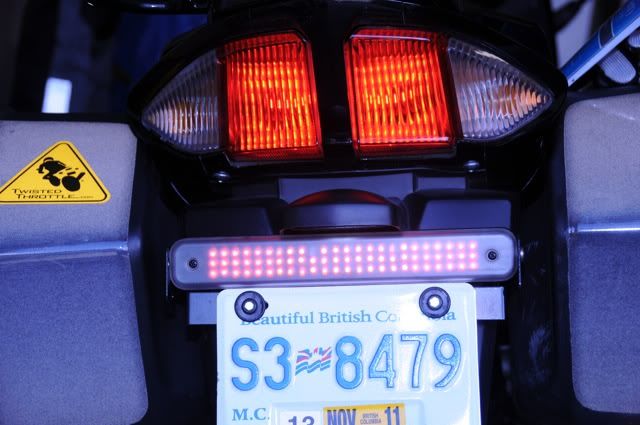
This is the final result. The photo was taken in bright sunlight, you can see the reflection off the 3M material on the saddlebags. The LEDs appear slightly brighter than the tail and signal bulbs in the factory light. Note there's one LED out in the top row of the brake light - hopefully Admore will replace it for me.
There are links on this page to videos of the light bar in action. It's quite bright.
Everything looks well made, the fasteners are high quality, and I'm pleased with the final result. The only item still to be done is to re-attach the two round red reflectors previously on the ends of the license plate bracket.
I haven't written one of these before, but here goes...
I was hunting for an additional brake light for my 2008 FJR. There were several products to consider, but when I found out that Admore Lighting sold a wiring harness to add to my FJR I didn't look any further. The link to the wiring harness isn't particularly easy to find - it's here.
The light and harness kit arrived nicely packed. This is what you'll find inside:
Note the Starbucks' coffee cup - since the container is opaque you can fill it with any beverage of your choice (don't tell anyone, okay?).
The bracket was different from the one shown on the company's web site. This bracket has two mounting slots which will give you options on placing the light. I believe the bracket is designed to fit behind your license plate. That will allow an installation without any additional holes. On an FJR that installation would shade the license plate light. You may be willing to risk the grief associated, I decided not to.
I decided to add a plastic loom over the factory wiring. I'm not sure it's necessary, but it will protect the wiring from abrasion. I also purchased grommets to fit the loom through the plastic fender.
In this photo you can see the brake light interferes with the license plate light. Fortunately the license plate light is made of soft plastic. It's easy to remove the material necessary with a file, sharp knife, or Dremel tool.
Once I had the bracket in place, I had to route the wiring. I'm sure there are other, perhaps better, ways of doing it but this is what I came up with. In order to avoid any tight turns with related kinked wires, I routed the wire through the fender behind the license plate. I used one of the grommets in this hole. The plastic of the fender is soft, so the drill bit goes through very rapidly. Be careful not to damage your tire!
On the inside of the fender there were two existing holes in the reinforcing rib. These proved ideal for a couple of cable ties/zap straps to attach the wiring.
I found another existing hole underneath the tail light nacelle. I enlarged it with the drill, added a grommet, and viola the wiring was now under the seat. The clips holding the factory wiring are easily released and with a bit of work the additional wiring fits in there, too. In this photo the additional wiring is in the loom with the ribbed appearance.
The factory harness has this clip located on the left side. This is where you insert the harness from Admore Lighting. Once the connections are made, there's enough room to tuck everything neatly out of sight.
This is the final result. The photo was taken in bright sunlight, you can see the reflection off the 3M material on the saddlebags. The LEDs appear slightly brighter than the tail and signal bulbs in the factory light. Note there's one LED out in the top row of the brake light - hopefully Admore will replace it for me.
There are links on this page to videos of the light bar in action. It's quite bright.
Everything looks well made, the fasteners are high quality, and I'm pleased with the final result. The only item still to be done is to re-attach the two round red reflectors previously on the ends of the license plate bracket.
Last edited by a moderator: