Bulb fell into headlight

Yamaha FJR Motorcycle Forum

Help Support Yamaha FJR Motorcycle Forum:

This site may earn a commission from merchant affiliate links, including eBay, Amazon, and others.
Grabbing it's gonna be the easy part...getting it out -- that's gonna be another story!

Good luck...and let us know what worked.

--G

 
I think that you must remove the headlights of the bike to do the job much more easy with the tool as Twigg suggested or with any other tool.

If you try to do this job with the headlights on the bike i am very afraid that you will destroy the reflectors!

I think that this is the only way..

 
Last edited by a moderator:
If I read this right, the bulb in question was the one being replaced?

If it were me I would give up trying to recover the bulb intact.

Use whatever you can to smash the glass envelope then mangle the metal base so it's easy to retrieve through the hole.

Use a vacuum cleaner to clean out the debris.

 
I think Mihalis fjr is right...

I don't know how much a PITA it is to remove the whole headlight assembly but at least then you can position it on a table to do the removal. To do it while laying under the bike, to me, would be an even greater PITA... IMHO.

 
The bulb is out!

I started by removing the plastic trim, side panels and windshield hardware in preparation for removing the headlight housing . I took a look at the back of the headlight housing and could clearly see the bulb. Earlier I had used the rare earth magnet and forceps to move the bulb just below the opening. I figured I would give it one more shot before I removed the headlight housing. I reached in with the forceps and clamped on to one of the three electrical prongs. I pulled the bulb toward the hole and rotated the bulb so the smaller two alignment tabs were toward the bottom of housing. I slid the bottom of the bulb through the opening in the headlight housing and used the square notch on the right side of the opening to get the full diameter of the bulb baseplate through opening. Finally, I tipped the bulb tip up and the large alignment tab cleared the top of the hole in the housing.

In hindsight, I had enough clearance to do this after I removed the plastic trim around the gauges. Oh well, now I know how to remove bodywork.

Sorry no pictures.

 
Time to find someone that normally performs arthroscopic surgery, they will have the tools and the skills
wink.png


Removing the headlight buckets will familiarize you with 90% of the plastic on the FJR. It's not hard but the first time you will find all kinds of hidden hardware and interlocking panels. Once you have the headlights out I'm with the break it up, crush it down and suck it out method. (I still can't figure out how it fell in if nothing is broken.)

Edit: I see the OP was posting his success story while I was typing. By the time I clicked Save on my post the headlight dilemma had already been resolved. Congratulations on a happy outcome (so to speak).

 
Last edited by a moderator:
Time to find someone that normally performs arthroscopic surgery, they will have the tools and the skills
wink.png
THE GYNECOLOGIST WHO BECAME A MECHANIC

A gynecologist had become fed up with malpractice insurance and HMO paperwork,

and was burned out. Hoping to try another career where skillful hands would be

beneficial, he decided to become a mechanic. He went to the local technical

college, signed up for evening classes, attended diligently, and learned all he

could.

When the time of the practical exam approached, the gynecologist prepared

carefully for weeks, and completed the exam with tremendous skill. When the

results came back, he was surprised to find that he had obtained a score of

150%. Fearing an error, he called the Instructor, saying, “I don’t want to

appear ungrateful for such an outstanding result, but I wonder if there is an

error in the grade?”

“The instructor said, “During the exam, you took the engine apart perfectly,

which was worth 50% of the total mark. You put the engine back together again

perfectly, which is also worth 50% of the mark.”

After a pause, the instructor added, “I gave you an extra 50% because you did it

all through the muffler, which I’ve never seen done in my entire career”.

 
All I know, is this one isn't going to be called "Pulling a GixxerJasen."
biggrin.png


Congrats on getting that out. How many times did you go through your book of curse words?

 
THIS...........................................................................................................................................is a very good thread. Funny, informative and with a happy ending.

 
The bulb is out! I started by removing the plastic trim, side panels and windshield hardware in preparation for removing the headlight housing . I took a look at the back of the headlight housing and could clearly see the bulb. Earlier I had used the rare earth magnet and forceps to move the bulb just below the opening. I figured I would give it one more shot before I removed the headlight housing. I reached in with the forceps and clamped on to one of the three electrical prongs. I pulled the bulb toward the hole and rotated the bulb so the smaller two alignment tabs were toward the bottom of housing. I slid the bottom of the bulb through the opening in the headlight housing and used the square notch on the right side of the opening to get the full diameter of the bulb baseplate through opening. Finally, I tipped the bulb tip up and the large alignment tab cleared the top of the hole in the housing. In hindsight, I had enough clearance to do this after I removed the plastic trim around the gauges. Oh well, now I know how to remove bodywork. Sorry no pictures.
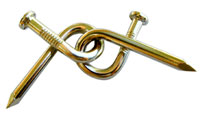
You'd be pretty good with these, I bet.

together.jpg


I love happy ending!
smile.png
God, me too!

 
I've searched till my head fell off and can't find the thread where Two Wheel nut busted the bulb inside the lens.

I know it's not helpful for this guy but it was
fool.gif
hilarious!

Admins?

 
Top