https://www.motorcycl...ad-Breaker.aspx
That combined with something like the mojolever should get it done? I was wondering if I would need to 'mount' that thing, but from watching youtube videos it looks like it will not be a problem.
Any tips from those DIY'ers I'm all ears.
That is really just a tire bead breaker. I'm sure that it will do that OK. But... no better than mine, which I made for free (all scrap stuff I had laying around).
Fred W might disagree with me on that one.

And of course, Skooter is exactly right.
I've changed a butt load of motorcycle tires, both on my own bikes and also helping out some of the locals, using nothing more than a wheel stand and bead breaker that I made from an old steel car wheel and some 2x3"s, and a pair of good MotionPro tire irons. I did buy the tire irons from a local bike shop and a wheel balancing rig off eBay. I've and even managed to spoon on (and then almost immediately take back off) a car tire onto my FJR's back wheel (long story).
One of the guys' wheel was all scraped up from somebody misusing one of the whammy spin bar type setups. I'm sure that there are some that won't scratch the wheel, but using my method I've never scratched one either.
Here's a look at my tire changing "gear"
(most of these pictures were stolen from ionbeam from a rainy day when we changed a few folks tires last year)
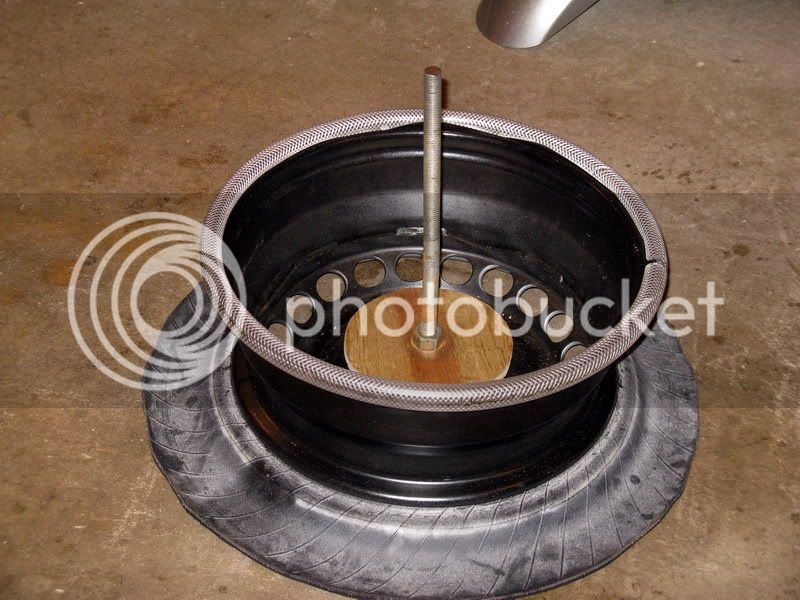
The Frugal Freddie Tire Mounting Facilitator
As you can see, this is just a steel wheel that I've covered the top edge with a piece of split 1/2" hose. Some old garden hose would work fine. I just had a reel of the clear stuff laying around. I cut the old tire and left the bottom sidewall still attached to give me something to stand on when pulling off the 2nd bead during a dismount. Piece of threaded rod allows me to hold down the wheel. Because I'm using spoons and not a Mojo lever type bar I don't have t worry about any rotation of the wheel.
Here's a look at my home-brewed "Bead Breaker" in action.
As you can see, it's just a hunk of lumber nailed to the wall as a fulcrum, and the tool itself, which is a couple of pieces of 2x3 bolted together. With the wheel mounted on the facilitator, a couple of quick cranks on the bead breaker and it's free.
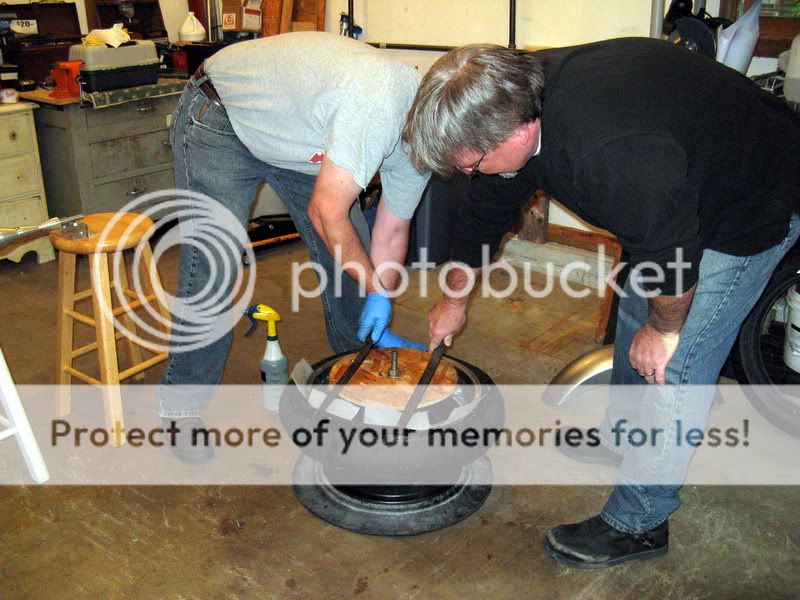
The next operation is to get the old tire off the wheel. For this I just leave the wheel on the facilitator and use tire spoons to pry the top bead off. The key to not getting any dings or scratches on the wheel from the irons is to cut up some (free!!) rim protectors out of old windshield washer fluid bottles. Same plastic as milk bottles, but thicker. Just need to make sure that there is always some plastic between the tire iron and the metal rim.
After prying the first (top) bead off, you can usually just yank the second bead off the rim manually. You just need to position the diametrically opposite bead into the valley of the rim.
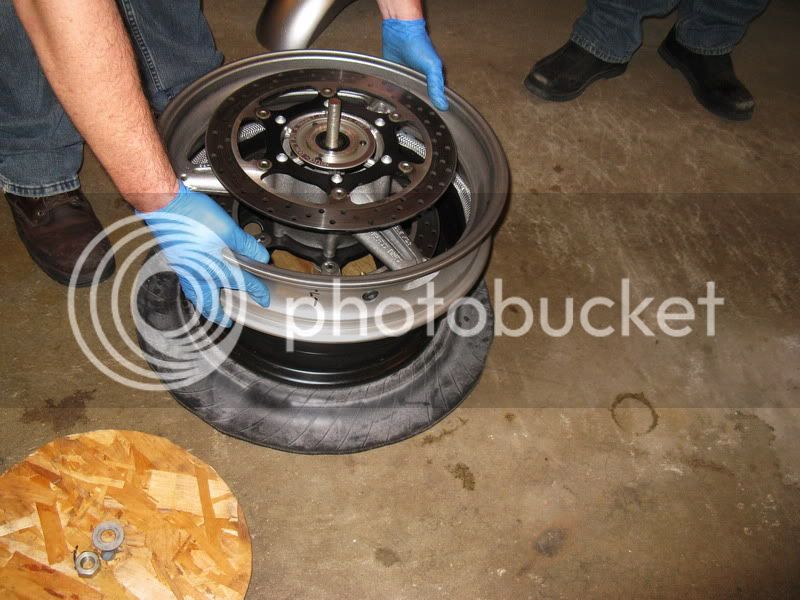
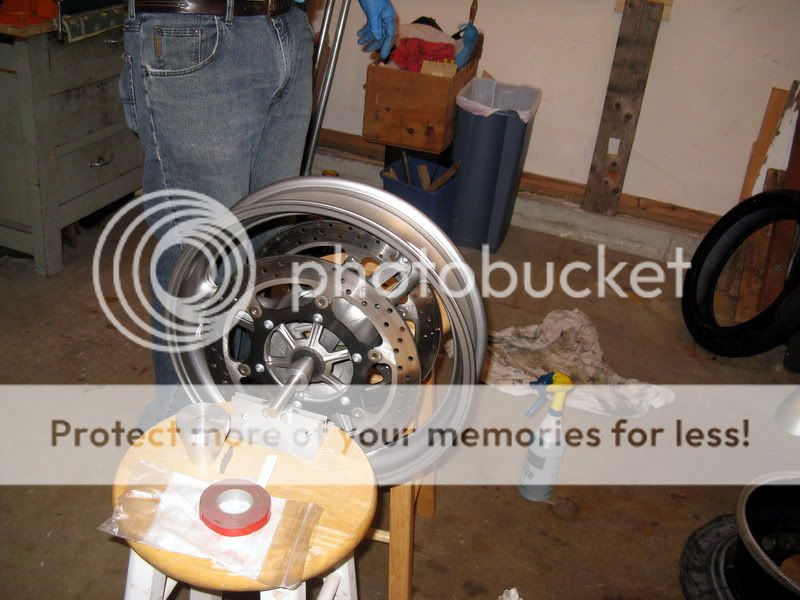
Here's a bare wheel on the facilitator
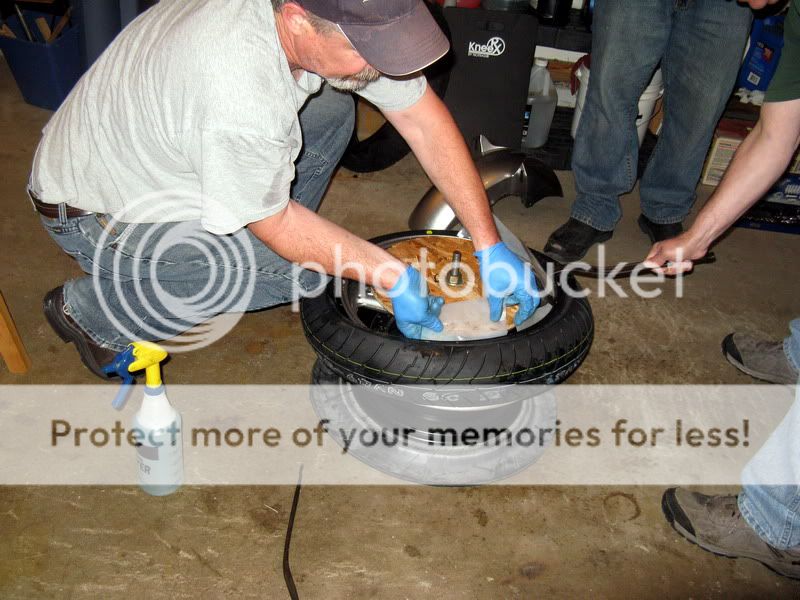
The OSB disc I made to cover up the 2nd brake rotor on the front wheel. Rear wheel I just keep the rotor side down while wielding tools.
Getting the first bead onto the wheel is just a matter of lubing it up well and then, holding the tire at a shallow (maybe 30 degrees) angle to the wheel, you thrust the tire at the stationary wheel. About half the time it will just pop all the way on. The rest of the time you can just push the 2nd bead over the rim edge. Getting the second bead on requires the use of the spoons.
Here you see me getting ready to pry the second bead of the new tire onto the wheel. Note the OSB protector in place.
There was a good crowd in the garage that day. Having an extra set of hands to hold irons, etc. makes the spooning go that much easier. But I also do it by myself all the time. It isn't all that hard. You just have to learn where to put your knees to hold the bead.
My wheel balancing station is pretty much the same as anyone else's Nothing really much new to see here...


![fjackets Real Lambskin Leather Biker Jacket — Quilted Cafe Racer Zip Up Moto Leather Jackets For Men | [1100085] Johnson Brown, XL](https://m.media-amazon.com/images/I/41I7Pm1f+vL._SL500_.jpg)


