Smokers (BBQ - not grilling)

Yamaha FJR Motorcycle Forum

Help Support Yamaha FJR Motorcycle Forum:

This site may earn a commission from merchant affiliate links, including eBay, Amazon, and others.
Alrighty then...

Last weekend I attempted to smoke the HOT half of the brisket that I bought a few weeks ago. This half of the packer was ~6 lbs, so I was prepared for a full day of smoking. Had the meat on the smoker at 8AM knowing that the pats game was at 4PM. Was going to try and use just charcoal for heat (and wood for smoke of course) but with my improvised COS I was not able to achieve high enough temps for the duration of the smoking.

After ~ 6 hours when the internal temp had only got up to ~145, I crutched it and tossed it in to the oven in the house at 250. The oven brough the temp up to 203 internal in about 2 1/2 more hours.

The results were a tad less than spectacular. The smoke flavor was phenominal, but intermuscular fat had not fully rendered out of the tip meat for some reason. The flat meat was fine, but that is the much leaner. With the extended crutching, the whole thing was as tender as can be, but I apparently still have a great deal more learnin' to do.

I think the problem was that during the initial 5-6 hours I couldn't get the temp up above about 200 F. I think that is due to the massive amount of sheet metal (due to my reverse flow mods) and the relatively small firebox on the COS. I've converted the COS back to gas where I can overpower the heat losses with BTUs input, and just deal with the minimal smoke of that configuration.

I've also procured and brought home a food grade 55 gallon drum, and given it a proper burn-out this afternoon. The UDS is in the works. Pictures when I have something to show and tell.

Keep smokin' till the snow flies!

 
Alrighty then...
After ~ 6 hours when the internal temp had only got up to ~145, I crutched it and tossed it in to the oven in the house at 250. The oven brough the temp up to 203 internal in about 2 1/2 more hours.
250 is too hot IMO. Cooking brisket isn't a race. You need all that extra time to allow everything to render and break down. When I do a brisket, I plan on it taking 12-13 hours. I set my cooker to 210.

 
Last edited by a moderator:
Yep, I cook at about 225F and pull it at about 195F and then it gets wrapped up and stuffed into a cooler filled with towels to rest for a while, usually while other things are prepared.

 
Keep smokin' till the snow flies!
One of the accessories for my Traeger is an insulating cover for cold weather smoking...

https://www.traegergrills.com/shop/detail/BAC022#.Ul81NGSidQk

Probably find or create something for your smoker to help extend the smoking season well into winter.

My Yoder also has this option, I have yet to put it on, but its getting cold out already so time to dig that bad boy out and figure out how to put it on...

yoder-smokers-ys640-07_large.jpg


250 is too hot IMO. Cooking brisket isn't a race. You need all that extra time to allow everything to render and break down. When I do a brisket, I plan on it taking 12-13 hours. I set my cooker to 210.
Scott, I'm coming to your house for brisket!

 
250 is too hot IMO. Cooking brisket isn't a race. You need all that extra time to allow everything to render and break down. When I do a brisket, I plan on it taking 12-13 hours. I set my cooker to 210.
Scott, I'm coming to your house for brisket!
Can do, but it will take about 6-8 weeks. I need to buy a cryovaced brisket and let it wet age first.

 
I understand aging, but 6-8 weeks is just nuts! I rarely go more than 2-weeks, and find the cook means a lot more in tenderness tha aging. Also, not too many people have a dedicated refrigeration source to allow longer aging.

 
Meh! I just leave it in one of the crispers in the bottom of the fridge. I normally shoot for 4 weeks, but then forget about it until the 6-8 week time period.

 
Progress continues on collecting the bits and pieces for the new UDS build. The biggest challenge is a big enough charcoal basket and ash tray, so I may just buy one pre-made Trying to decide what color to paint the outside (for rust prevention) now that the original industrial gray paint has all been burned off to burn the inside clean. I'll probably just go with basic black as I plan to use the top from a weber clone grill as the lid.

In the meantime I have family coming from away this weekend, so going to smoke-roast another pork loin, this one (6 lbs) is about twice as big as the last one, which was just for my wife and me. I'll do the roast on the COS with propane heat and apple wood smoke this time. The last one was awfully good, hence the request for a repeat performance by SWMBO (it's actually her family).

By the way, the well smoked pork loin left overs, sliced very thinly, made delicious sandwiches, and it was also a nice alternative to bacon or ham with eggs on the breakfast plate. ;)

 
Hey Fred, a metal pizza plate from walmart makes a perfect ash holder. I use the lump charcoal in mine and the good thing is it burns very cleanly with not too much ash.

 
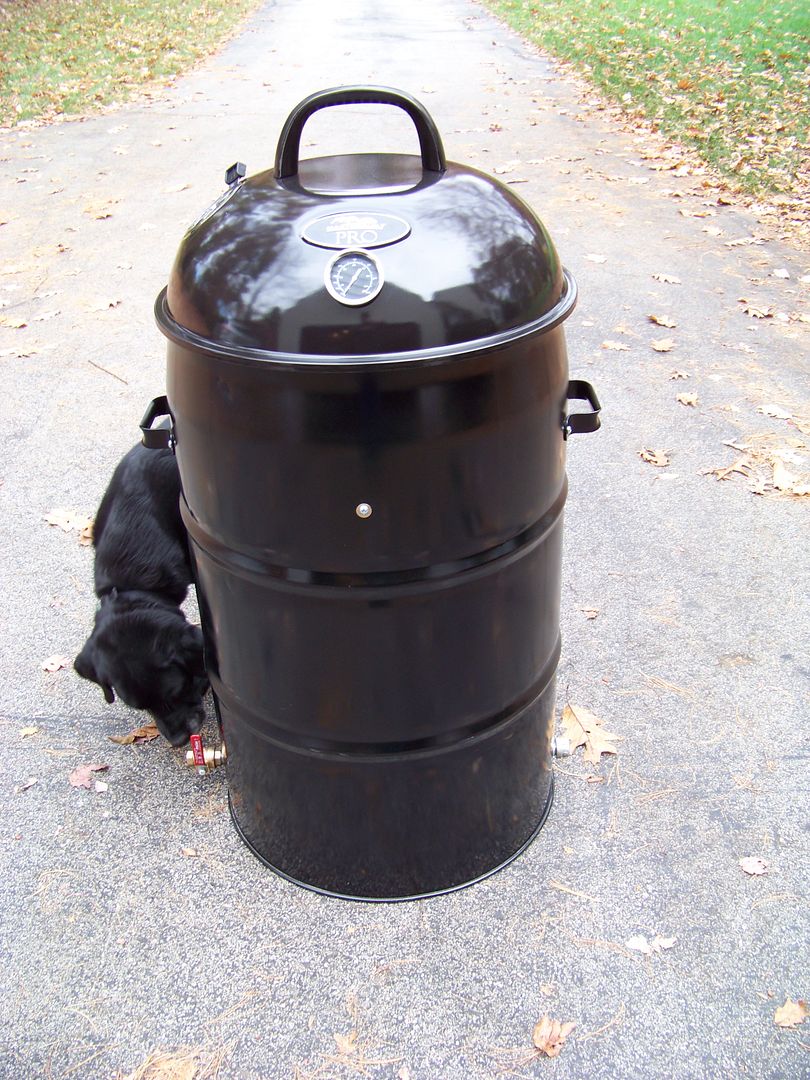
UDS build update:

100_4245.jpg


My boy, Petey, checking out the ventilation control above.

I bought a Masterbulit 22 1/2" kettle grille (Weber clone) on clearance at Home Depot (for $60) for the 21" cooking grille, the 14" charcoal grille and the fancy domed lid. Installed a thermometer in the lid and now it can be used on either the UDS or the Mastercraft grille, which actually isn't a bad little grille for short money.

I used a 1" hole saw (I already had) to cut the two vent holes, 2" up from the bottom and on opposite sides of the drum

.

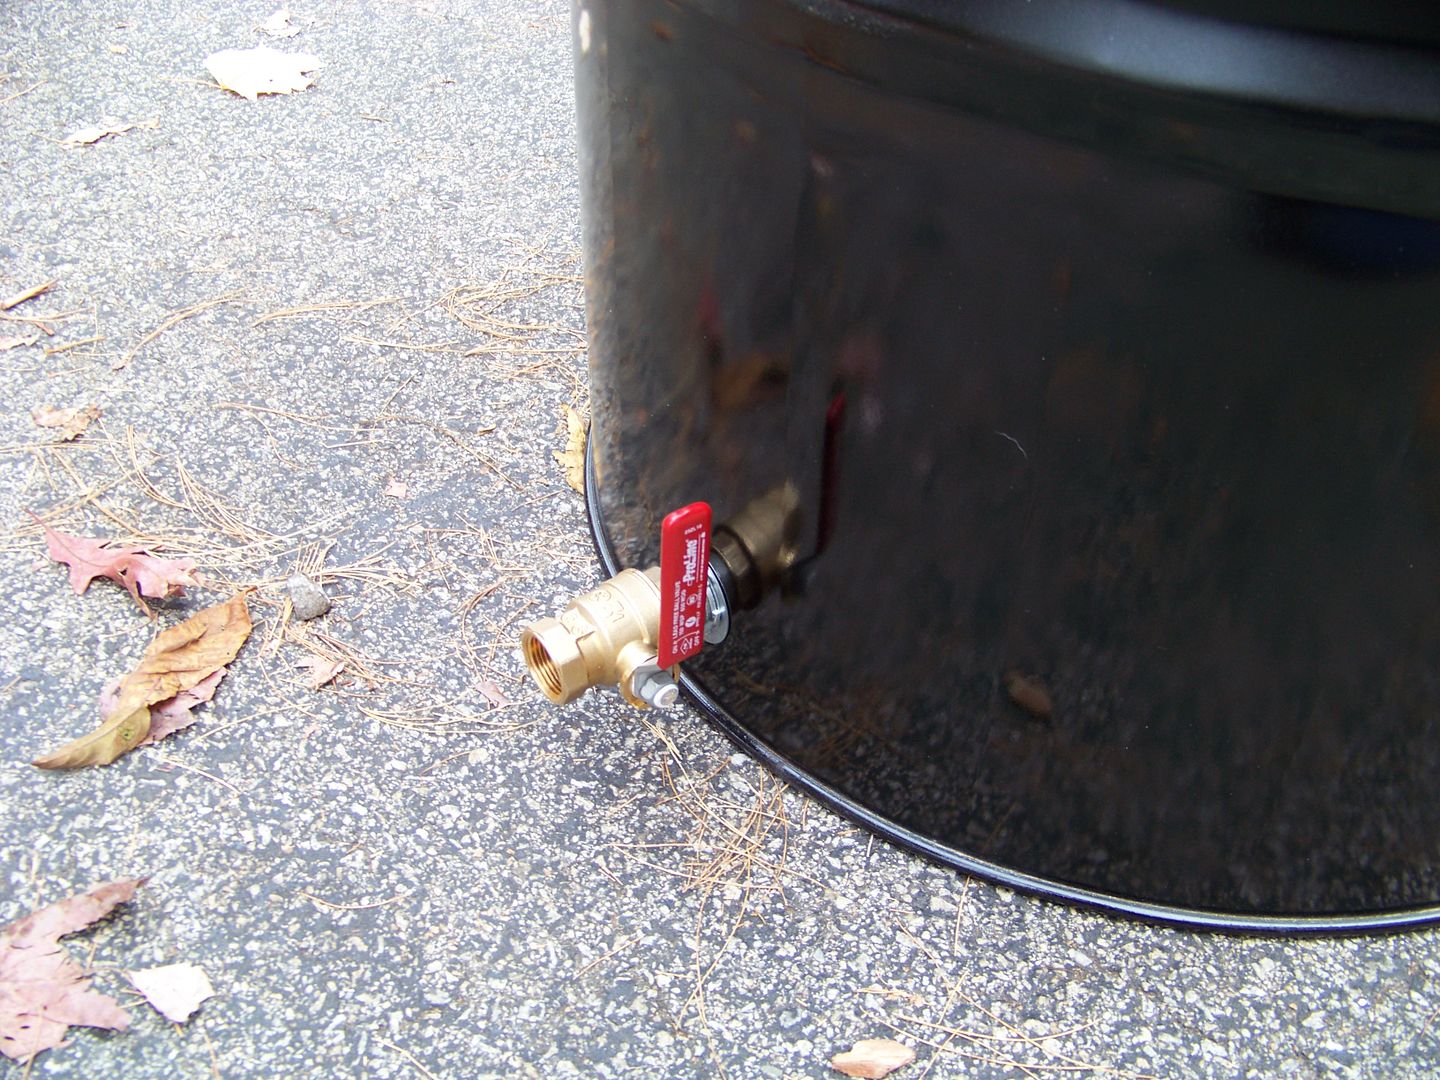
I fit these holes with 3/4" pipe nipples (close thread) with some 3/4" conduit nuts and washers for the vent pipes. Then one side gets a 3/4" full flow, brass ball valve and the other just has a 3/4" pipe cap that can be removed if more than one vent is needed. Here's a closer look at the ball valve:

100_4246.jpg


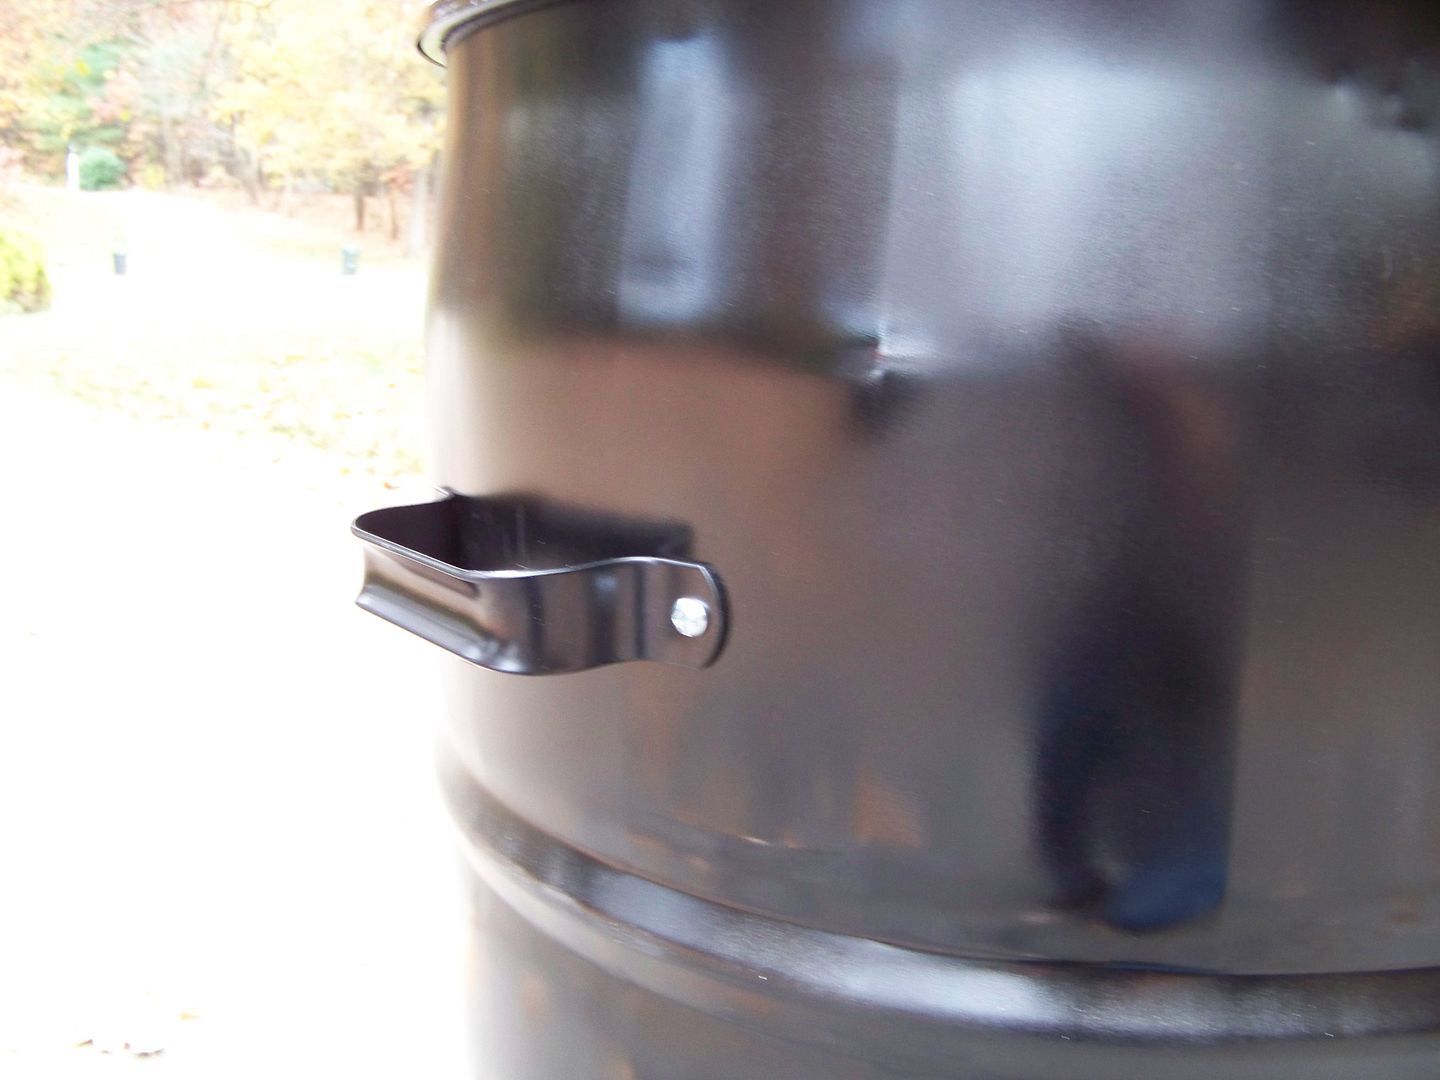
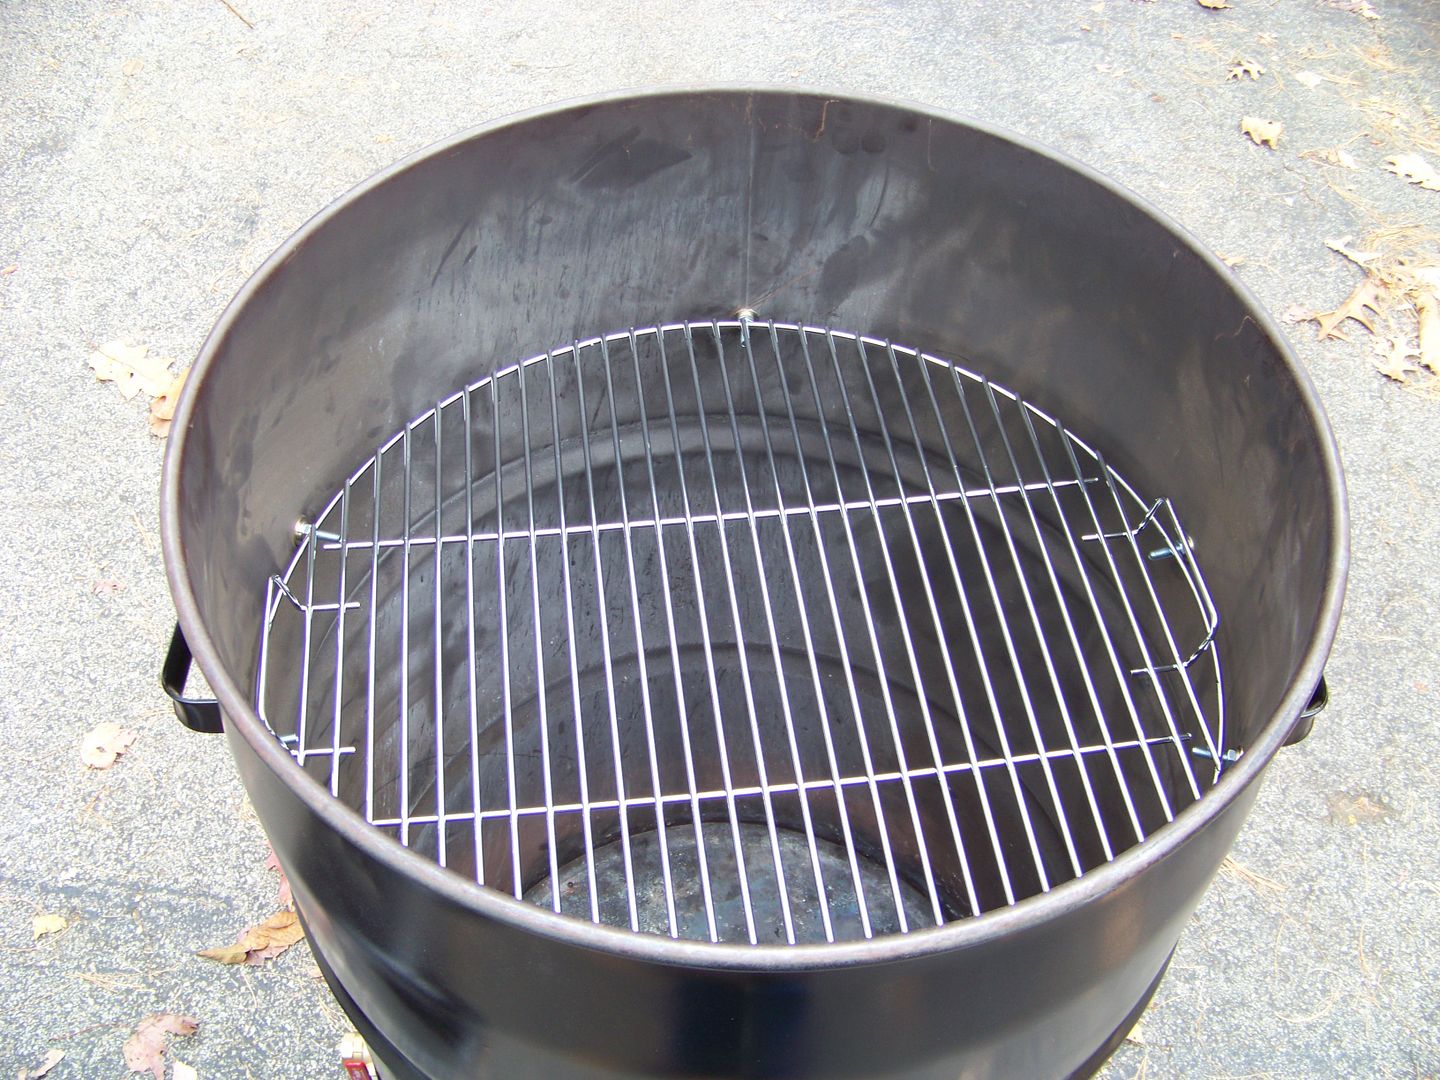
Installed a pair of carry handles with the holes drilled at 7" below the top edge of the barrel. I used 1 1/4" long 1/4-20 screws for the handles, and then added two more screws at the front and back to support the cooking grille

100_4247.jpg


100_4248.jpg


Last thing to fabricate is the charcoal box using the smaller diameter charcoal grille from the Mastercraft, and an ash pan below it (thanks for the pizza pan tip Jasen) then I'll be ready to fire this Bad Daddy up.

I'm thinking I may get a big Boston Bruins decal to plaster on the front of it. I think that would look pretty cool. Might also put some caster wheels and legs on it too. I can always add those later on.

 
Nice job. I like that lid. Might have to go grab me one of those, even though that's pricey for a lid on a budget build. :D

 
The flat lid for the barrel I got is galvanized, so I didn't really want to use that. Seems strange since this was a tomato container (still had the labels on it when I got it) so maybe the galvanizing isn't that big of a deal like some folks say.

I was scouring the local Craigs Lists for old 22" Webers (for their lids). Found one for $50 but the cooking grille was rusty and couldn't see the coal grille but I assume it was trashed. That's when I figured I'd spring for this one.

As for the budget, here's what I have into it so far:

$20 - Food grade 55 gallon drum with lid

$60 - Masterbuilt 22 1/2" grille

$40 for the plumbing parts (vents), side handles and hardware

I figure I'll spend another $30-40 on making the big charcoal basket and a lift hook to get it in and out, so the whole thing should come in at around $150-175. You could do it cheaper, but it should be a pretty decent smoker and won't be a total eyesore in the back yard.

 
Last edited by a moderator:
I see that Petey is out seasoning your new grill
laugh.png


I don't think a Bruins sticker is gonna last long on the grill. Put the decal on a galvanized disk and stick it on the grill with a magnet. 1. it'll protect the decal and 2. provide feedback if the fire is too hot -- when it hits the Curie point of the magnet it will fall off and the clang will alert you to cool the cooker
wink.png


BTW, super job!

 
Last edited by a moderator:
The barrel will probably only be at 225-250 F, but you are right, that will probably mess up a plastic decal. Maybe I'll just make a stencil and shoot the white and yellow paint right on the drum. Or a placard of some sort, like you suggest, would work. These are trivial concerns. The primary focus is getting "Big Daddy" smoking and churning out some tasty meat.

The fact that there is plenty of room for whole turkeys under the lid of this thing is not accidental. ;)

 
The barrel will probably only be at 225-250 F, but you are right, that will probably mess up a plastic decal. Maybe I'll just make a stencil and shoot the white and yellow paint right on the drum. Or a placard of some sort, like you suggest, would work. These are trivial concerns. The primary focus is getting "Big Daddy" smoking and churning out some tasty meat.
The fact that there is plenty of room for whole turkeys under the lid of this thing is not accidental.
wink.png
And it wouldn't be hard to layer in additional racks for smoking. I could see using up to three grates if you were really into some production, or wanted to add a water tray.

 
Last edited by a moderator:
Jeeze Fred. When you're not busy, will you come by my house and build some ****? I have a list. I can give it to you by priority, or alphabetized...

 
Last edited by a moderator:

Latest posts

Top