Rear shock linkage maintenance

Yamaha FJR Motorcycle Forum

Help Support Yamaha FJR Motorcycle Forum:

This site may earn a commission from merchant affiliate links, including eBay, Amazon, and others.
Damn, I love a good mental masturbation! Can't believe I have missed this one so far. Freaking work!

So here's my $.02.

I don't think it matters either way.

Way back in 2004 when installing my Wilbers shock on my first 04 FJR I came across this stuff and thought it was congealed grease. As I was removing it, I realized it was supposed to be there. Well, I cleaned and greased everything and put those needles back in without the retainer stuff and rode on that bearing for 200,000 miles with no ill effects.

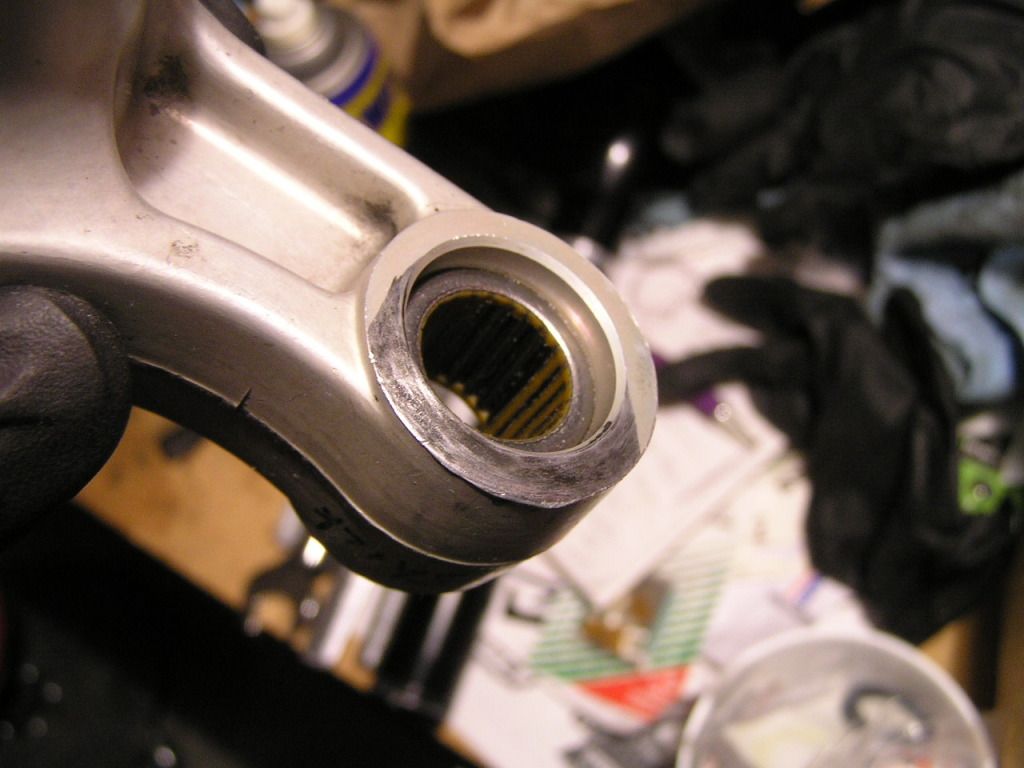
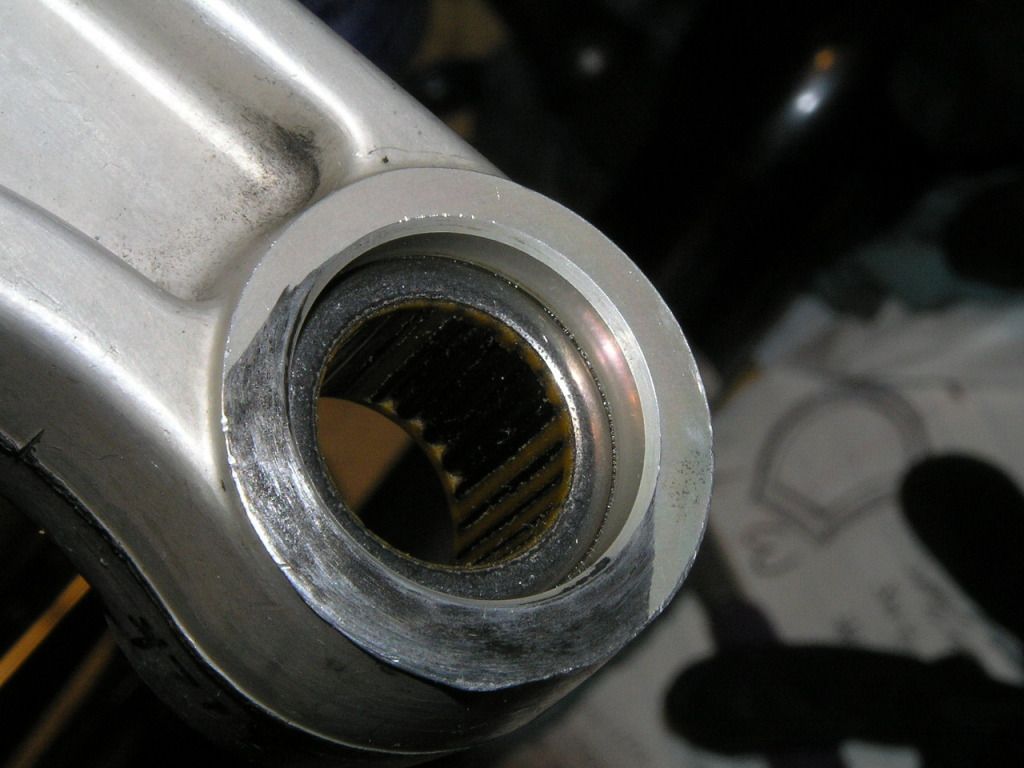
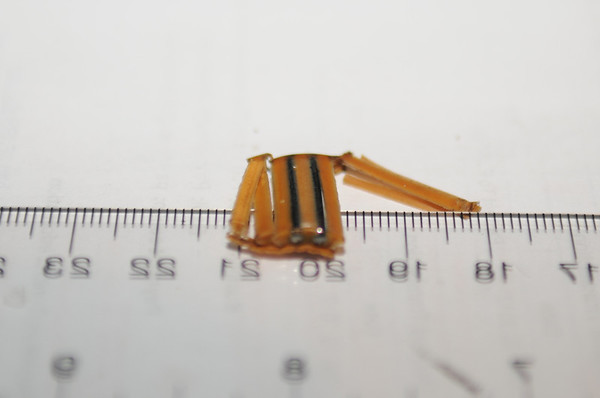
That being said, now that I know better I try to keep that retainer gunk in place when I can and try to clean the bearing gently. That doesn't always work. As the photos below show, sometimes some the retainer stuff goes partially MIA. No bid deal. I don't lose any sleep over it. Just grease it well and ride more, stress less. And the photos aren't perfect, but I think you can see that needles are pretty well packed and aren't going to 'migrate' anywhere even without the retaining stuff.

One last thing - My first FJR went 226,000 miles without ever replacing any of these bearings or collars. Preventative maintenance is the key to keeping them happy an having an indefinite life.

P1010227_zps00e12e98.jpg


P1010230_zpsbecc7700.jpg


You should have cleaned it out with compressed air..................
I went that route with can best be described as mixed results. The outer race was very clean but I don't know how clean the needles bearings are since I can't find them.

I went out in the garage and had another look at the bearings in question to refresh my apparently failing memory. As much as it pains me to say this FredW is correct as to the shock mount end and the frame pivot end of the relay arm. If Fred is correct one more time today he will be able to match the standard set by a broken clock.

Here is a photo of a couple of the needle bearings surrounded by the material in question .....

DSC_0003-001-M.jpg


The needle cage material actually has the consistency of rubber after soaking in the parts cleaner overnight. As Fred and others have said it should be possible to carefully remove the cage material and just pack the needles in grease. There is not enough clearance between the needles to worry about the needles migrating with the cage material removed as per FredW's post.

 
Well got to ride about 60 miles today here in PA. What a hoot as it has been about a month since a ride. Grinn from ear to ear. Guess what? I did not even think about the upper or lower or any other part of the rear link.:)

After seeing the other pics I "pcked up my hammer and saw".

Got it. As always it looks like maintenance is the key here. Just like the rear brake pedal, and shiffter. This one is a PITA though and like I said I will do it with valve checks. If it can go 200,000 it can go 26,000 with large amounts packed into every 26,000.

And Fred W your right again!

Thanks to all in the discussion. I am ok with it now, like I said I never gave it a thought in those 60 miles today !

 
Has anyone else wondered why Yamaha chose a needle bearing setup for this application? I was pressing an oil impregnated bronze (Oilite) bearing into my John Deere snowblower and realized that that thing does its job for years without ever having to be lubricated. Its born lubricated.

If the relay arm bearings could be swapped for a same sized Oilite bronze bearing where the OD was a press fit in the relay arm and the ID was a slip fit (.0005-.001 clearance) over the collars, wouldn't you think that this would work OK? I don't know the brearing stresses applied vs the needle bearing set up but if a little bit of lube were on the mating/sliding surfaces I think it would work well. The shafts seals used could stay in there to keep things clean.

Taking that idea one step further: You could drill a small access hole through the relay arm and journal bearing to allow a small 'lubrication replenishment' path in a convenient spot. Plug it with a felt or a rubber plug.

Just thinking.....

My guess is it is cheaper and they are commonly used for that purpose most if not all motorcycles, they don't have failures except when they are not maintained, so why reinvent the wheel for street use.

my $.02

 
Has anyone else wondered why Yamaha chose a needle bearing setup for this application? I was pressing an oil impregnated bronze (Oilite) bearing into my John Deere snowblower and realized that that thing does its job for years without ever having to be lubricated. Its born lubricated.

If the relay arm bearings could be swapped for a same sized Oilite bronze bearing where the OD was a press fit in the relay arm and the ID was a slip fit (.0005-.001 clearance) over the collars, wouldn't you think that this would work OK? I don't know the brearing stresses applied vs the needle bearing set up but if a little bit of lube were on the mating/sliding surfaces I think it would work well. The shafts seals used could stay in there to keep things clean.

Taking that idea one step further: You could drill a small access hole through the relay arm and journal bearing to allow a small 'lubrication replenishment' path in a convenient spot. Plug it with a felt or a rubber plug.

Just thinking.....

A few things come to mind:

First, the needle bearing will add less mechanical resistance to pivoting when both are new. When designing a suspension system, you really wouldn't want any uncalibrated or uncontrolled amounts of mechanical damping in the system. Ideally all damping should be done in the shock's hydraulics so you can control under what exact conditions it occurs.

Second, would be tolerance of fit. The needles can be a much tighter fit and still pivot compared to a plain bushing. The plain bushing requires space for the grease, otherwise it would be riding metal on metal. So the radial stability of the bushing would be looser. Plus a bushing is sacrificial material. It is softer and made to wear away during use so the fit only becomes sloppier. The needles should stay nice and tight (until failure)

Perhaps counter-intuitively it could also come down the exposure to the environment. I think that having the greased needle bearings inside a set of seals gives the pivot a better chance of staying relatively free to move when being exposed to all of the crap that the underside of the bike sees regularly. It really is a pretty hostile environment under there.

I was looking at my relay arm last month during the service and the forward half of the arm has a sandblasted appearance in comparison to the back half that is somewhat in the lee of the rest, or when compared to the low mileage spare I have on the shelf. My instinct is that I don't think a plain bushing would stand up to the onslaught of road grit and grime as well as the needles do.

I suppose if the plain bushing was fitted with zerk fittings, and you kept greasing them often enough you could keep the road grit out or push it out when it gets in. So maybe it's just to minimize the required maintenance in that area?

As much as we complain about it being a PITA job to service them, I was pleased to see how good those bearings actually looked inside after >75k miles. Mostly because I do ride my bike in all kinds of weather, some that other folks might shy away from, including winter / spring roads covered in salt, and those pivots seem to have done good by me so far. (knock on wood)

I have to do this same job on my V-strom sometime this winter/spring, which now has ~50k miles on it. And I'm sure that none of the prior owners ever touched the relay arm before on that bike. It should be, erm... interesting to see how bad that one looks.

 
Last edited by a moderator:
Fred, I agree that keeping the bearing surfaces clean and lubricated are key to success. See paragraph 2 above- seals kept in place, just replacing the roller bearing unit one for one with the impregnated bronze journal bearing. As far as tolerances: the roller needles and outer bearing race diameters can easily be held to tight tolerances. That might be why its the preferred method. Certainly a bushing can be turned to a tight tolerance (maybe +/- a couple tenths fo a thousanth) but the needles are probably made with .0001 total diameter variation. I don't know about the outer race, that thing almost looks like rolled sheet metal.

Has this thread out lasted its usefulness yet? I think so. Must still be winter...

 
Yes indeed. With more winter goodness to come tomorrow apparently. (ref avatar)

The bushing idea has merit. I'll admit that I was scratching my chin this morning trying to figure out why they didn't go that way myself. But I think that it probably comes down to the maintaining of tolerances issue. While the bushing can be made almost as tight as the roller bearing (certainly tight enough) as the bushing wears it enlarges, making things sloppier and sloppier. That is just the nature of how bushings work.

But, so long as we maintain our rollers, they should hold pretty darn close to the manufactured level of sloppiness for their entire lives.

Definitely time to move on to something else though. How much (more) can we obsess over a couple of bearings?
wink.png


Last edited by a moderator:
The Japanese manufacturers used to use bushings, all be it plastic ones, for swing arm bearings in the 70's. They wore out, usually to an oval shape. Now they typically use roller bearings. Leason learned I'd say.

 
How much (more) can we obsess over a couple of bearings?
wink.png
But I haven't finished wrecking my FJR yet (new bearings installed on relay arm). Bolts for centerstand bracket still on backorder but are scheduled to be back in stock next week. As a Plan B I have some 10x30mm bolts from Canadian Tire I can stick in there in a pinch.

There is no rush to put at all together just yet since Snowmageddon is supposed to arrive tomorrow and bury us under another snowdrift. I would like to have her back on her wheels in time for Bustmageddon in April though.

 
Last edited by a moderator:
You're not alone Bill. Just finished Sawzall-ing the bolts off not an hour ago. And I'm held up also as need to wait for my shock to come back with another spring. All this even with a Gen I!

 
It strikes me that alot of people are spending an inordinate amount of time hacking pieces of metal off their bikes just because they're too lazy to remove the exhaust. Just remove the exhaust, string the bike up (properly) and the job is easy-peasy.

Every winter the bike is disassembled and _all_ bearing and pivots outside the engine are cleaned, regreased and reassembled. After 9 years and over 100000 miles the bike still runs like a charm and the bearings are still all original (with barely a spec of wear on them)

Here's how its done......If you want to go all the way.......

https://www.kolluzion.com/ColinsFJR2013/004/Dsc07273.jpg

Note: Image is hosted off a personal server at my place. It may be up or down depending on its mood...

- Colin

 
It strikes me that alot of people are spending an inordinate amount of time hacking pieces of metal off their bikes just because they're too lazy to remove the exhaust. Just remove the exhaust, string the bike up (properly) and the job is easy-peasy.
Every winter the bike is disassembled and _all_ bearing and pivots outside the engine are cleaned, regreased and reassembled. After 9 years and over 100000 miles the bike still runs like a charm and the bearings are still all original (with barely a spec of wear on them)

Here's how its done......If you want to go all the way.......

https://www.kolluzion.com/ColinsFJR2013/004/Dsc07273.jpg

Note: Image is hosted off a personal server at my place. It may be up or down depending on its mood...

- Colin
Wow, I don't envy your long, cold, un-ridable winters
uhoh.gif


It strikes me that alot of people are spending an inordinate amount of time hacking pieces of metal off their bikes just because they're too lazy to remove the exhaust. Just remove the exhaust, string the bike up (properly) and the job is easy-peasy.
Every winter the bike is disassembled and _all_ bearing and pivots outside the engine are cleaned, regreased and reassembled. After 9 years and over 100000 miles the bike still runs like a charm and the bearings are still all original (with barely a spec of wear on them)

Here's how its done......If you want to go all the way.......

https://www.kolluzion.com/ColinsFJR2013/004/Dsc07273.jpg

Note: Image is hosted off a personal server at my place. It may be up or down depending on its mood...

- Colin
You clazy man! I don't think I'll ever have the time or patience for that amount of dissassembly.

GP

 
Thanks for the adnauseam discussion!

Now this thread is better than any Wikipedia crap!

Appreciate all the input! It's been great!

 
Hmmm...

To "just remove the exhaust header," requires moving the radiator, which requires removing the front tupperware lowers, and also draining the coolant so that you can remove the radiator hoses (required whether you remove the rad or tilt it forward). And that will add about an hour or more of recreational maintenance fun to the project.

OTOH, cutting a couple of bolts off with a Sawzall or Dremel cutoff wheel would take about 5 minutes max and cost a couple bucks at the hardware store for some grade 8 metric replacements.

Maybe you should think about taking up skiing or snowmobiling or some other winter recreational activity, Colin? ;)

 
Hmmm...
To "just remove the exhaust header," requires moving the radiator, which requires removing the front tupperware lowers, and also draining the coolant so that you can remove the radiator hoses (required whether you remove the rad or tilt it forward). And that will add about an hour or more of recreational maintenance fun to the project.

OTOH, cutting a couple of bolts off with a Sawzall or Dremel cutoff wheel would take about 5 minutes max and cost a couple bucks at the hardware store for some grade 8 metric replacements.

Maybe you should think about taking up skiing or snowmobiling or some other winter recreational activity, Colin?
wink.png
I didn't do all that crap, I took the lowers off as I was doing other stuff. All I did was take the lower radiator bolt out and loosed the headers so they swung down and forward out of the way. Not much difference in time for me to drive to town to buy replacement fasteners.

Been a long winter as we have beat this one to death.
lazy.gif


Top