Canyon Cages for 2013, development input.......

Yamaha FJR Motorcycle Forum

Help Support Yamaha FJR Motorcycle Forum:

This site may earn a commission from merchant affiliate links, including eBay, Amazon, and others.
Update from Ryan, this one is specifically for Roger (Pcarnut)...

Richard,

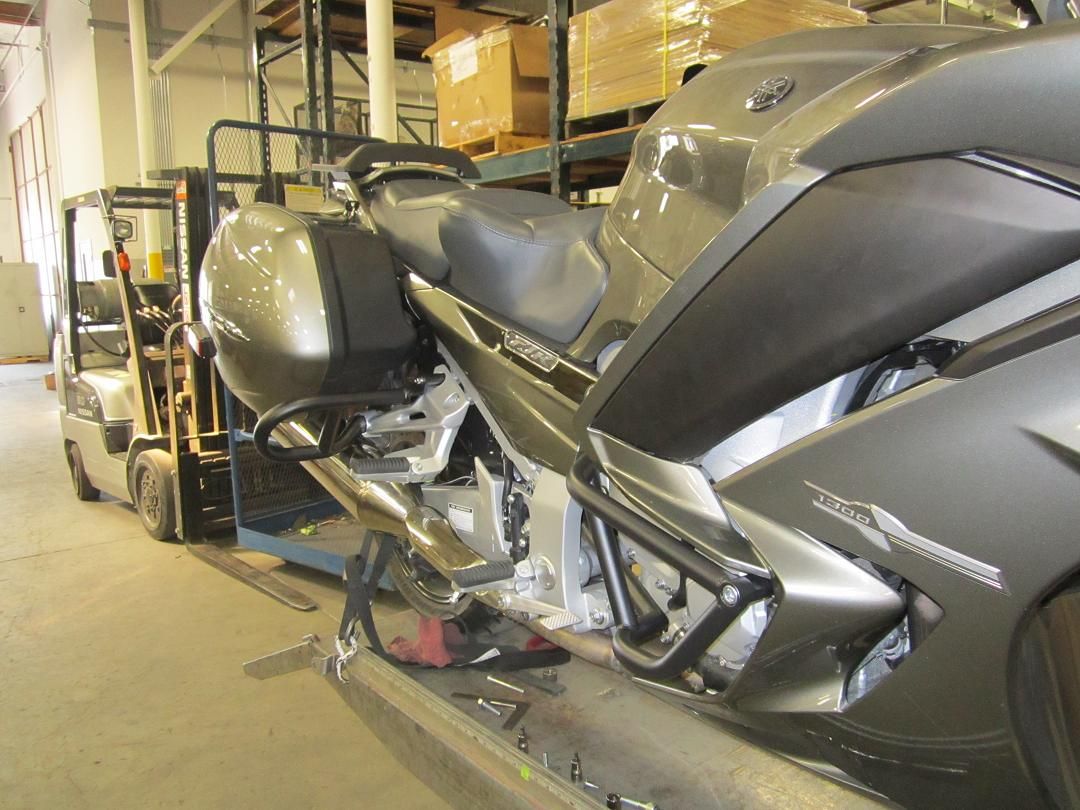
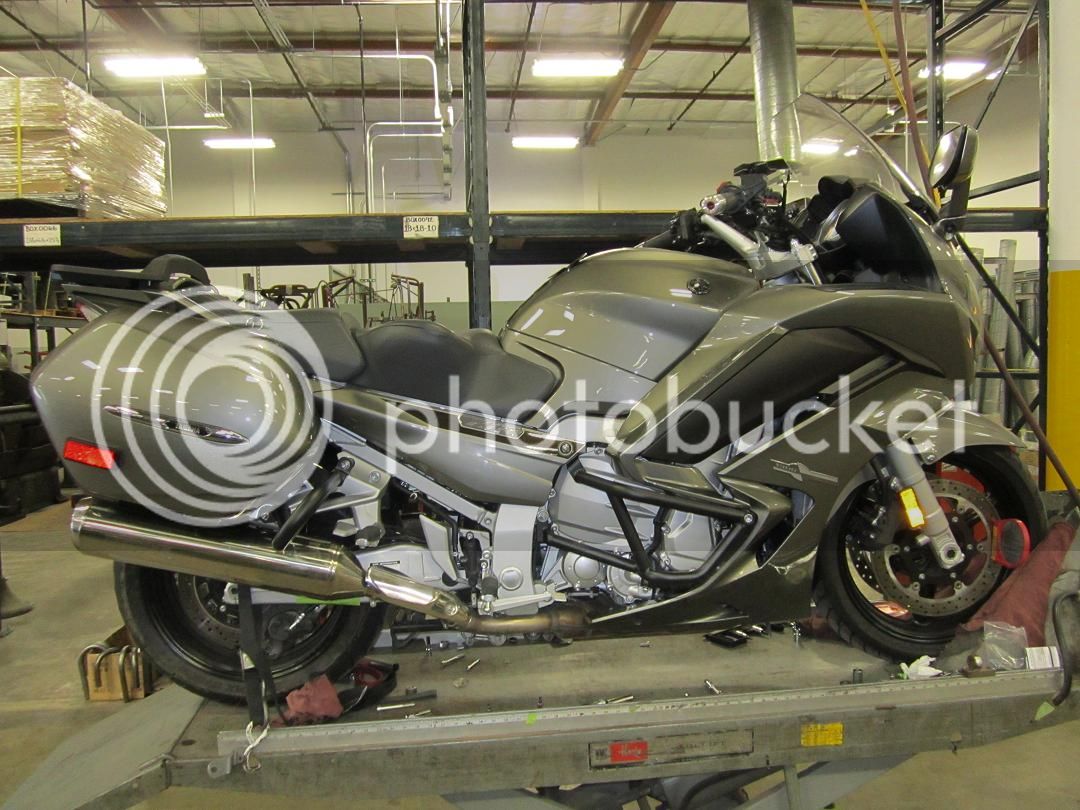
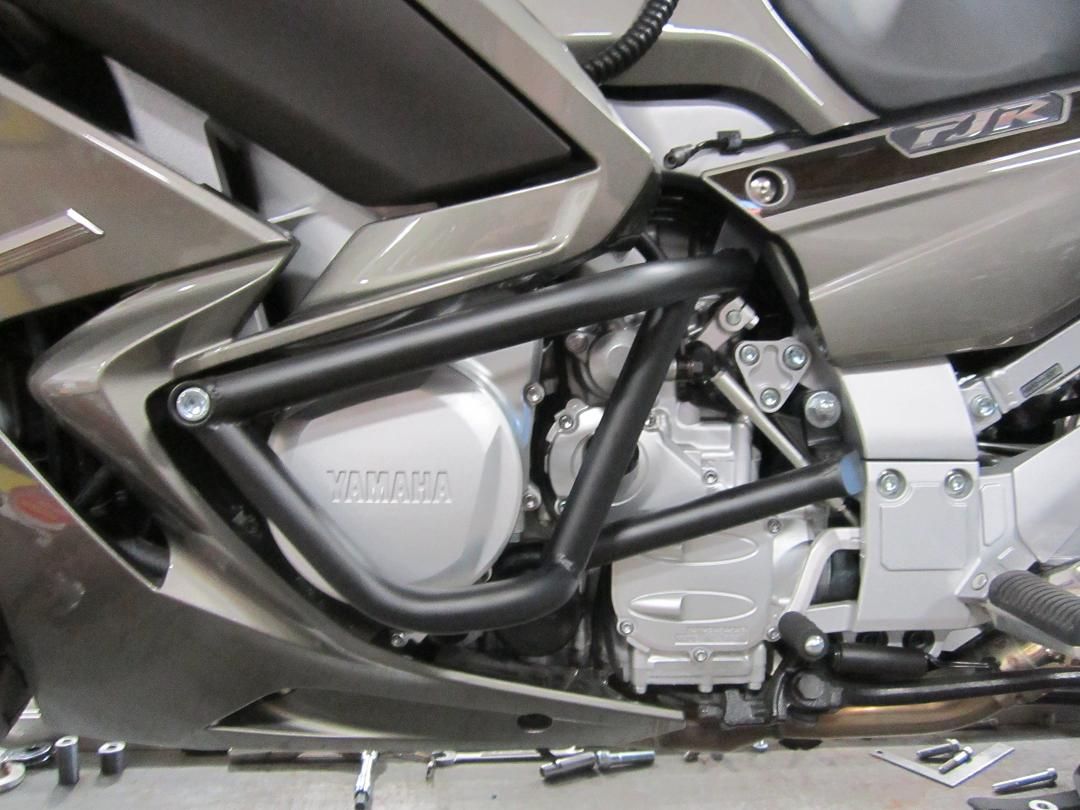
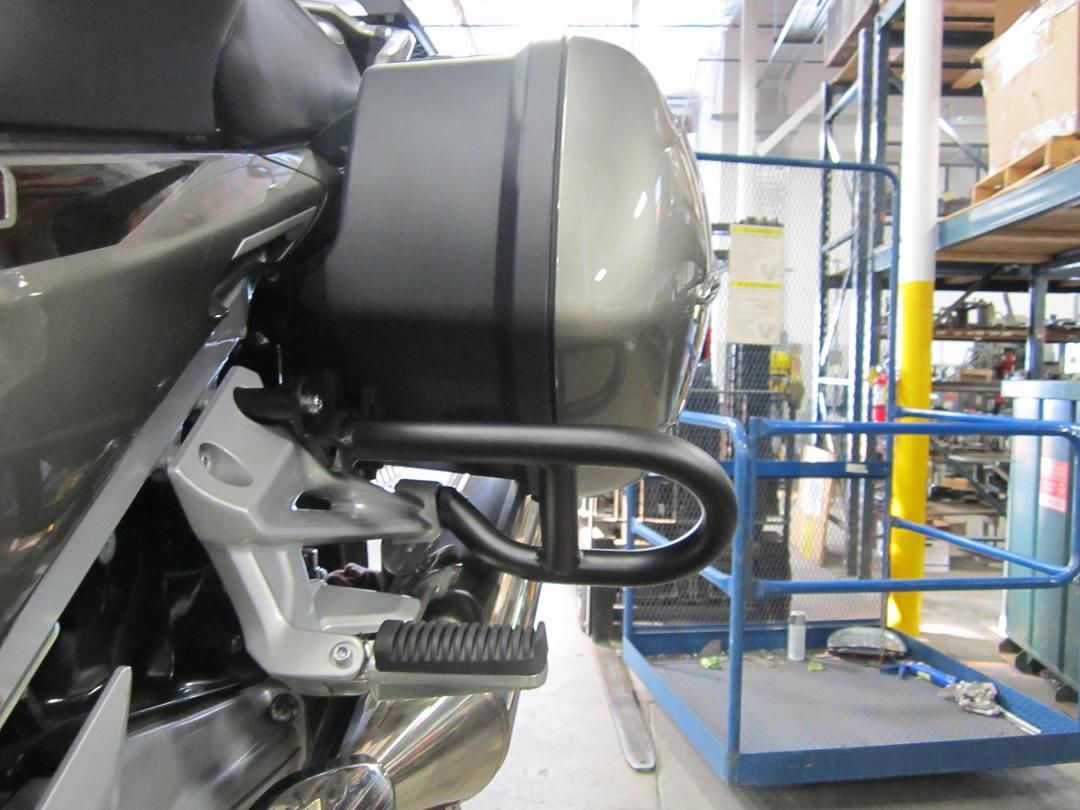
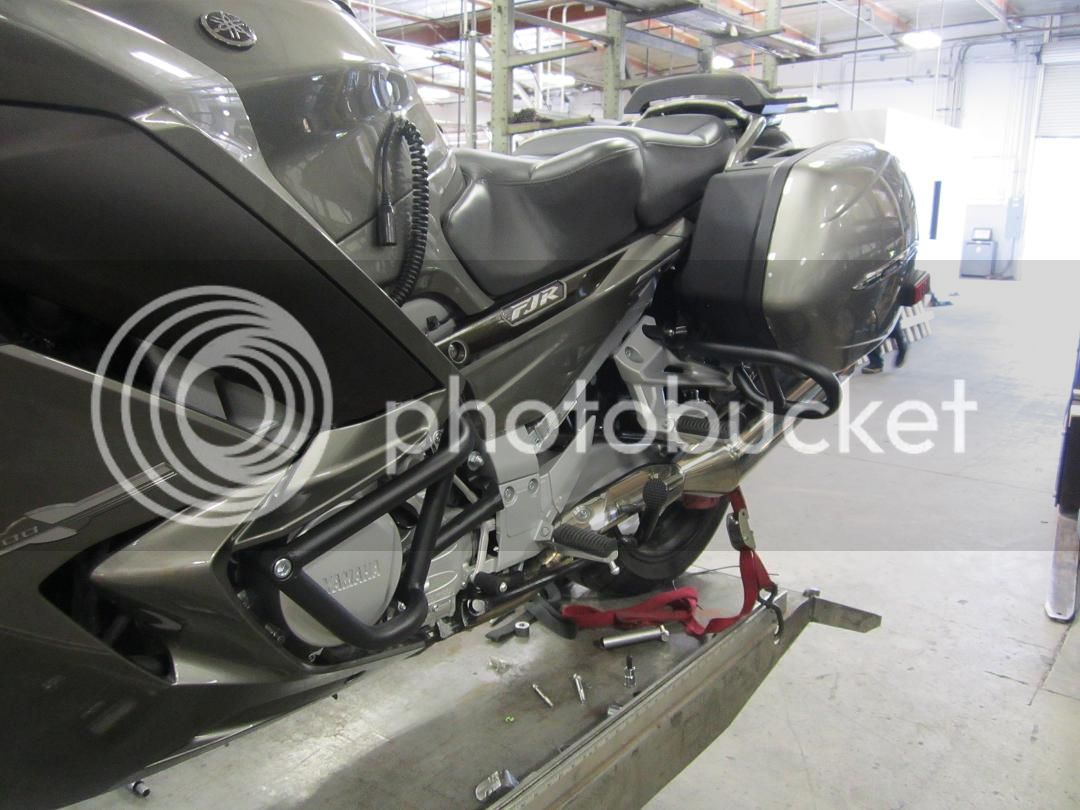
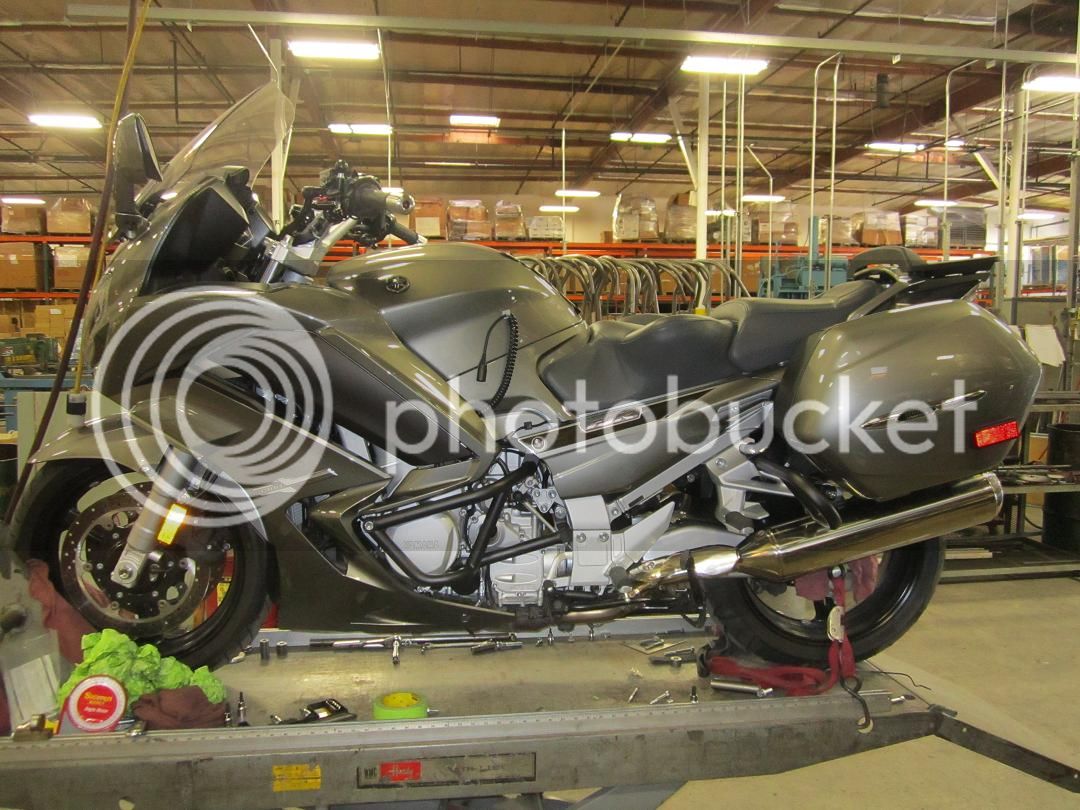
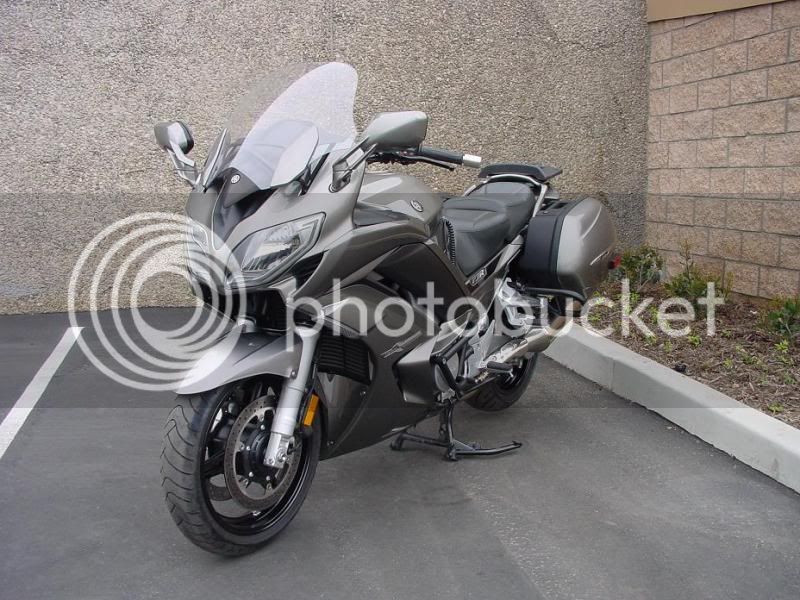
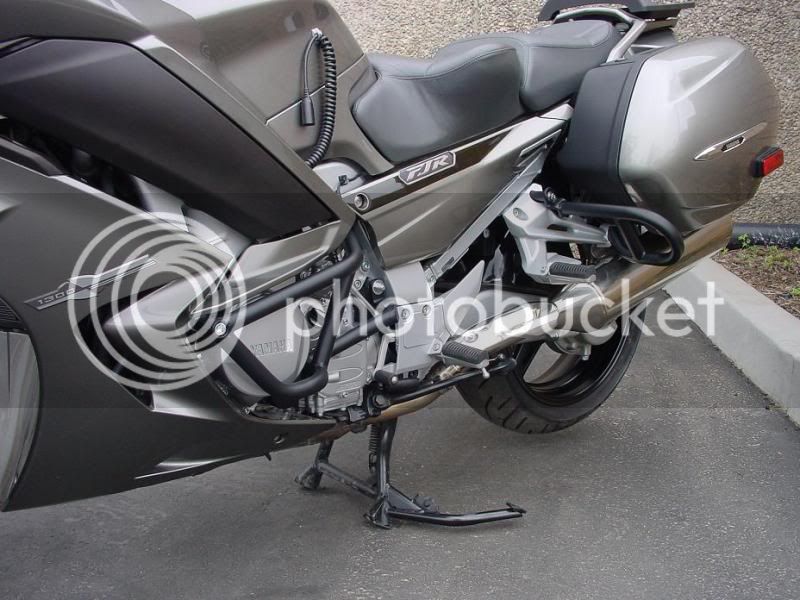
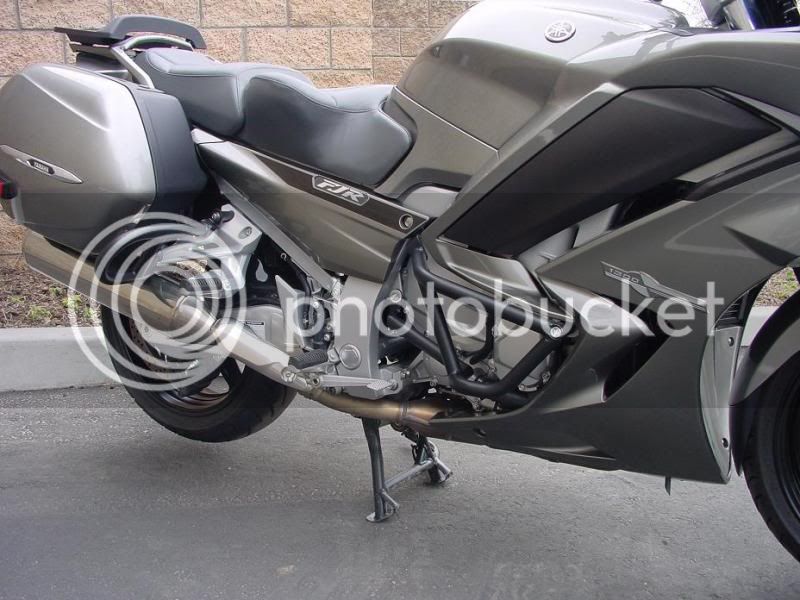
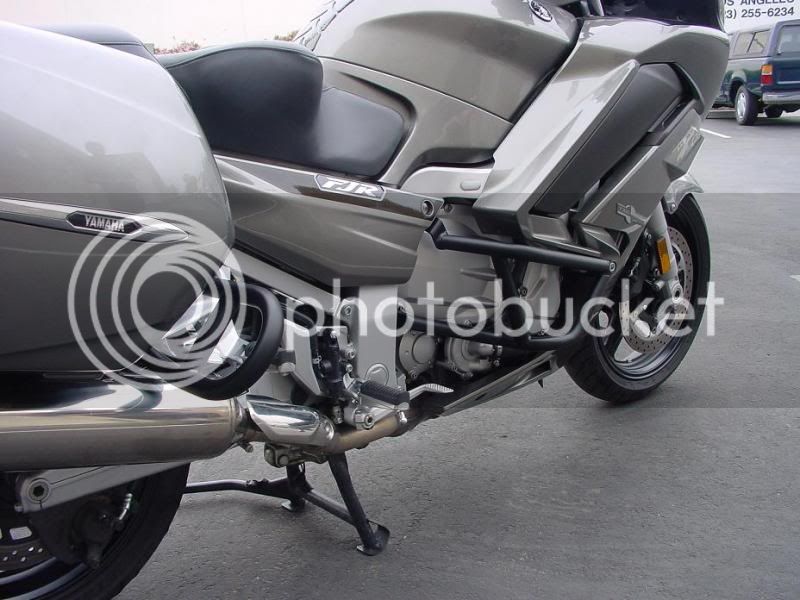
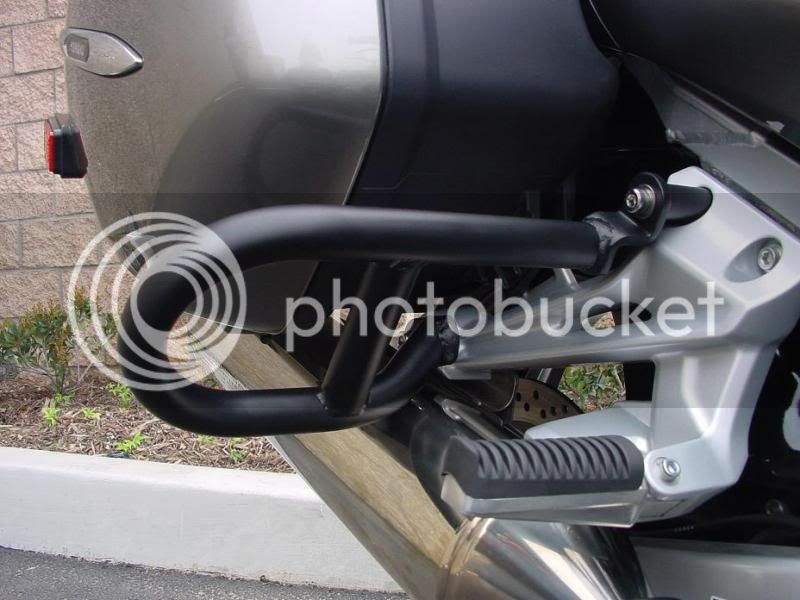
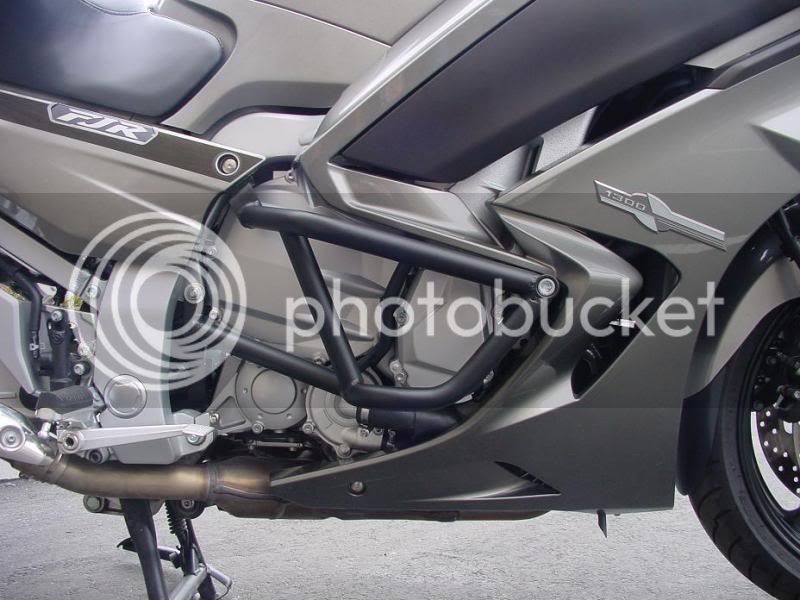
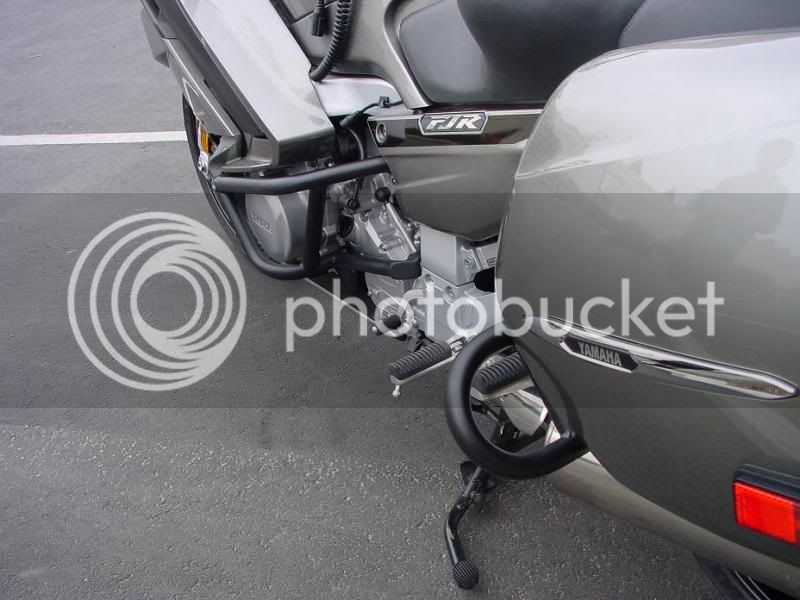
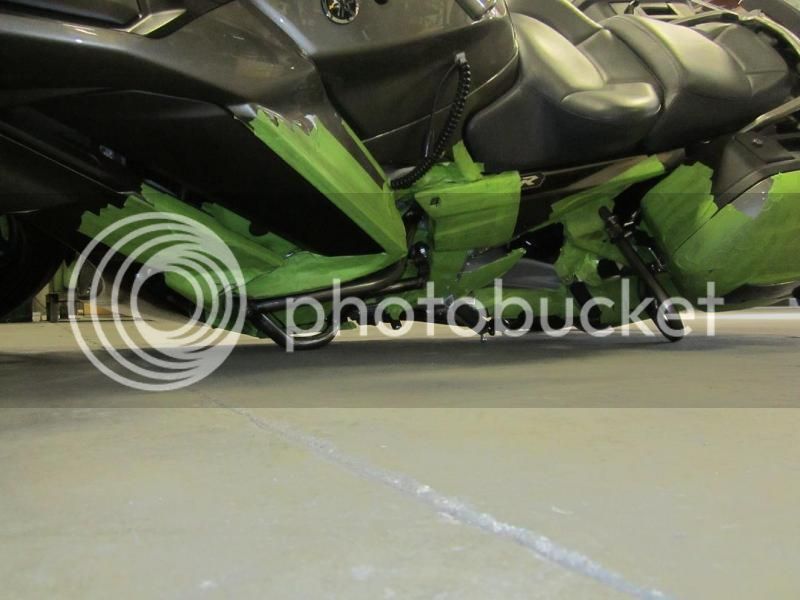
Good morning! We should be receiving your bars back today so I'll be sure to upload photos as soon as we get them installed! Also, we were working on the instructions yesterday and should have those finished this morning. So, if all goes as planned, your bike should be ready by late this afternoon or early tomorrow morning! However, I wanted to respond to the guy on the FJRForum who said the guards in the rear seem to stick out a bit. They're actually very close in if you look at the correct pictures, like the ones I've attached to this email (please add the photos to the post if you end up reposting this for me). You have to take into consideration that the bags are slightly rounded. The saddle bags' widest point is directly in the middle of the lid so it plays tricks with your eyes a bit. If you compare the widest point of the bags to the very tip of the Saddle Bag Guard, you'll notice the guard only sticks out about 1" from the widest point of the saddle bag. Also, if you look at the photo of the bike on its side, you'll notice the exhaust is getting quite close to the ground. If we were to move the guard in any, the exhaust would be way too close for comfort and probably sustain damage in some real-world wrecks due to uneven pavement, cracks in the road, etc.

Thanks!

Ryan Nichols
MCE

file_zpse87dc79d.jpg

file_zps1710d8f0.jpg
R

 
Last edited by a moderator:
Richard and Ryan, thanks. Understand the reasons now. When I first saw that upper photo I thought hmmm, that is kinda out there a ways, but I see there is method to your madness.
smile.png


Final Update from Ryan......

Richard,
I have to say, the finished guards look really, REALLY trick! They came out even better than I had imagined! These pictures don't even come close to doing them justice. We just got the bars installed and all the tape removed so when we have some time tomorrow morning we'll wheel the bike outside and take some nicer shots with a better camera to really show them off. I just wanted to get these pictures quick so you can get a rough idea of what the finished product looks like. So, the bike is pretty much ready to roll for tomorrow! Bill will probably be the one to take the higher quality photos and he doesn't usually arrive til 930-10 so it'd be best if you got here around 11-12 if that will work for you?

Thanks again for letting us use the bike! You've been a tremendous help. When you come in tomorrow you're welcome to a shirt and a parking sign or two if you'd like for all of the trouble you've gone through (as well as the guards, of course!).

Ryan Nichols

MCE

file_zps0a90999a.jpg


file_zps7dc42005.jpg


file_zpsb7e9cd98.jpg


file_zps54af4120.jpg


file_zpsbb81aa04.jpg


file_zps9130ba8f.jpg
Nice....

R

 
What a cool way to design an accessory to get the best possible result, and involve the forum. Brilliant all around.

 
These are pictures from Ryan before i picked it up......

I finally have some nicer shots of the finished product for you guys to check out!

DSC00001-1_zps89042f65.jpg


DSC00002_zpsa2e53425.jpg


DSC00003_zpsab66f906.jpg


DSC00004_zpsec4cec62.jpg


DSC00005_zps2611051d.jpg


DSC00006_zps61aa14e3.jpg


DSC00007_zps5dcc11a5.jpg


DSC00008_zps0b9f5f68.jpg


DSC00009_zps5ea792ef.jpg
Now it is back in my garage I have to test fit the light brackets from Gerauld.

R

 
Top