H4 telescopic HIDs w/ super slim ballasts

Yamaha FJR Motorcycle Forum

Help Support Yamaha FJR Motorcycle Forum:

This site may earn a commission from merchant affiliate links, including eBay, Amazon, and others.
Sunlight is 6500°K (Kelvin), which we see as 'white'. As the numbers go up light shifts towards blue and as the numbers go down light shifts toward red.

In terms of vehicle lighting, 5000°K (slightly yellow) provides better contrast and better visibility, IMO anyway.

 
Last edited by a moderator:
ON the "Color Temperature" what is the difference? As the number goes up, are the lights going to have more of a blue tint? Sorry, but I am a little color blind, and can't tell the difference on the E-Bay listing page. What color temperature HID's have people been using?
It is somewhat subjective. Many prefer 4300K for riding or maybe 5000K. I have a set of low only 6000K for my '05 and they are a bit more blingy.

There's also another important measure when the color changes...and that's lumens. The highrt the kelvin rating...the LESS lumens that are produced. 4300K are better because they put more photons down the road. Hindsight I would have gone for 4300K low beams. I'd have to dig around to find that documentation.

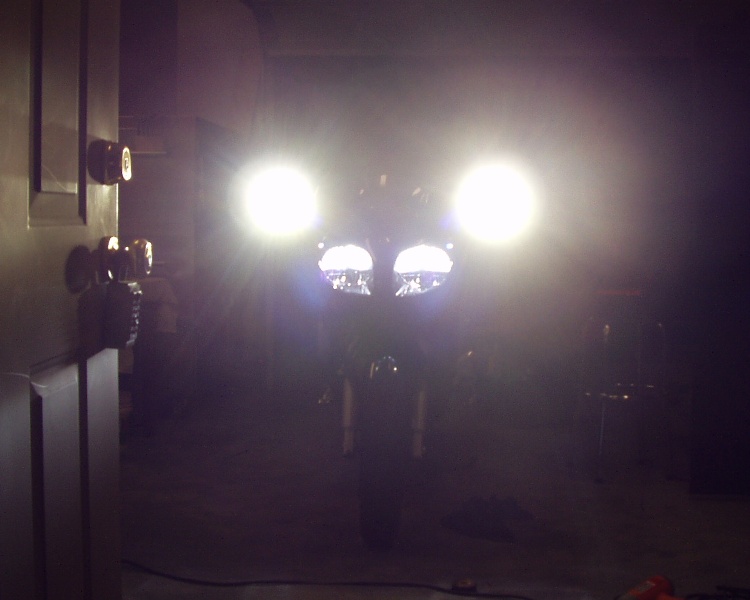
6000K low beams and 4300K auxiliary (FF200 HID) high beams

elecalllightslit.jpg
Agreed, I think the optimum HID light for street use is the 4300K because it will draw the least attention from LEOs and you will get the maximum lumens. That is unless you want everyone to notice that you put aftermarket HID lights in your bike...

One thing that is somewhat misleading about your picture above , Matt, is that the camera is above the horizontal cut-off for your low beam HIDs, which makes the high beam aux lights appear disproportionately bright. If you took another picture with the camera lens down in the area of the low beam it would make them look a lot brighter. But it does demonstrate that there is less glare from the low beams by a long shot.

 
Agreed, I think the optimum HID light for street use is the 4300K because it will draw the least attention from LEOs and you will get the maximum lumens. That is unless you want everyone to notice that you put aftermarket HID lights in your bike...
One thing that is somewhat misleading about your picture above , Matt, is that the camera is above the horizontal cut-off for your low beam HIDs, which makes the high beam aux lights appear disproportionately bright. If you took another picture with the camera lens down in the area of the low beam it would make them look a lot brighter. But it does demonstrate that there is less glare from the low beams by a long shot.
Yes, you're very observant and I did this picture on purpose to show that the effect of low beam HID lights is a VERY crisp cutoff....I think even more so that halogen bulbs. That's often why pictures are so subjective. A slightly different exposure, slightly different angle, slightly different color range of the camera taking the picture. This picture though is good at showing the relative difference of a 4300K and 6000K light source. Also, that half-lit low beam window is a tell-tale of HID's....or that batch of shielded low-only HIDs we bought in a Group Buy several years ago.

If one were to dip down a few more inches the bluish hue of the low beams would be closer in dazzle to the high beams....although not nearly as much. Those FF200 reflectors are far superior to the reflectors of the FJR and only exceed in my experience by Solteks.

One thing to remember when one converts to well cutoff HID lights...that in the rain the reflection from the road is actually brighter than the lights.

 
Last edited by a moderator:
ON the "Color Temperature" what is the difference? As the number goes up, are the lights going to have more of a blue tint? Sorry, but I am a little color blind, and can't tell the difference on the E-Bay listing page. What color temperature HID's have people been using?
It is somewhat subjective. Many prefer 4300K for riding or maybe 5000K. I have a set of low only 6000K for my '05 and they are a bit more blingy.

There's also another important measure when the color changes...and that's lumens. The highrt the kelvin rating...the LESS lumens that are produced. 4300K are better because they put more photons down the road. Hindsight I would have gone for 4300K low beams. I'd have to dig around to find that documentation.

6000K low beams and 4300K auxiliary (FF200 HID) high beams

elecalllightslit.jpg
The lumens are lower due to the eye's response. The eye is most responsive in the yellow and less so in the blue and red. This is why filament lamps, which produce mostly red light, are seen by the eye as yellow.

The telescoping lamps I have use a spring to push out and hold the arc tube in the low beam position. The selenoid pulls the arc tube to the high beam position. If the selenoid fails, you have low beam.

jim

 
The lumens are lower due to the eye's response. The eye is most responsive in the yellow and less so in the blue and red. This is why filament lamps, which produce mostly red light, are seen by the eye as yellow.
Interesting. Do you think that the various temp bulbs all have the same radiant flux density and the only reason for the lower luminosity is the temperature?

The telescoping lamps I have use a spring to push out and hold the arc tube in the low beam position. The solenoid pulls the arc tube to the high beam position. If the solenoid fails, you have low beam.
Good to know. I figured it was something like this.
There is some difference due to slight chemical changes in the lamp, but it's not a real large change.

 
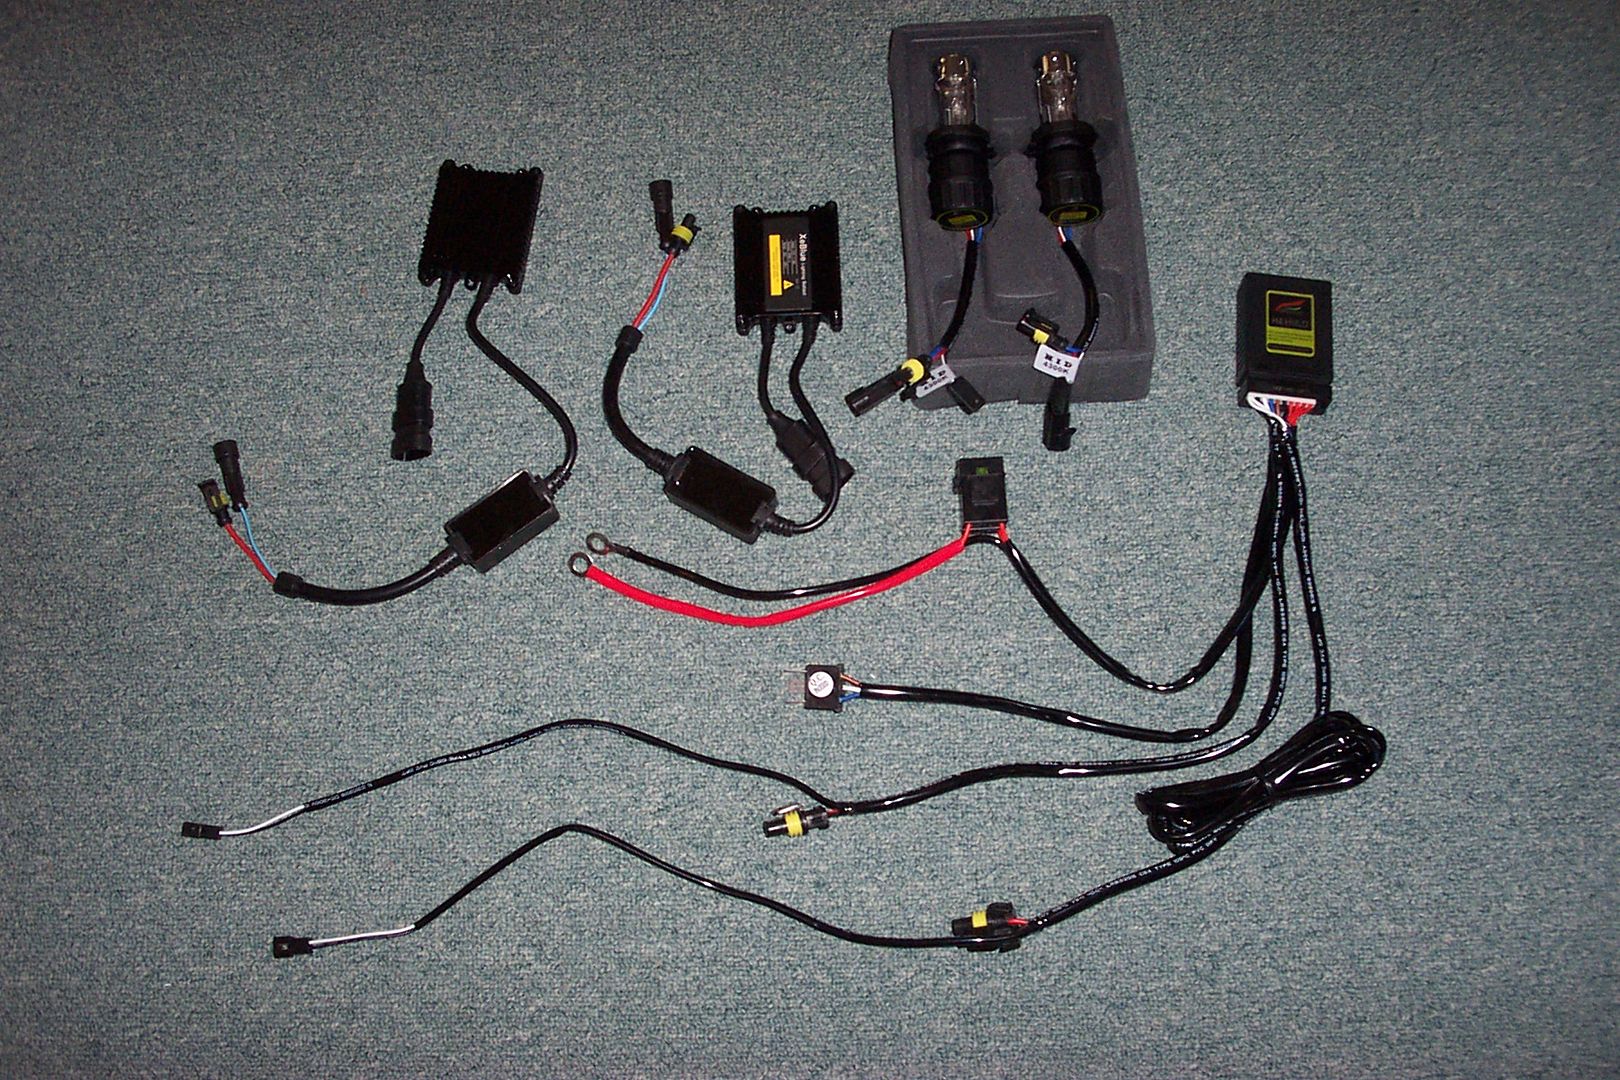
First follow up on this thread for anyone watching. My order was placed with the aforementioned eBay retailer (see 1st post) on 1/21. Received my upgrade kit today. One week shipping time from China doesn't seem too bad to me. Here are some pictures of what you get from this guy:

The complete kit and kaboodle:
DCP_1831.jpg


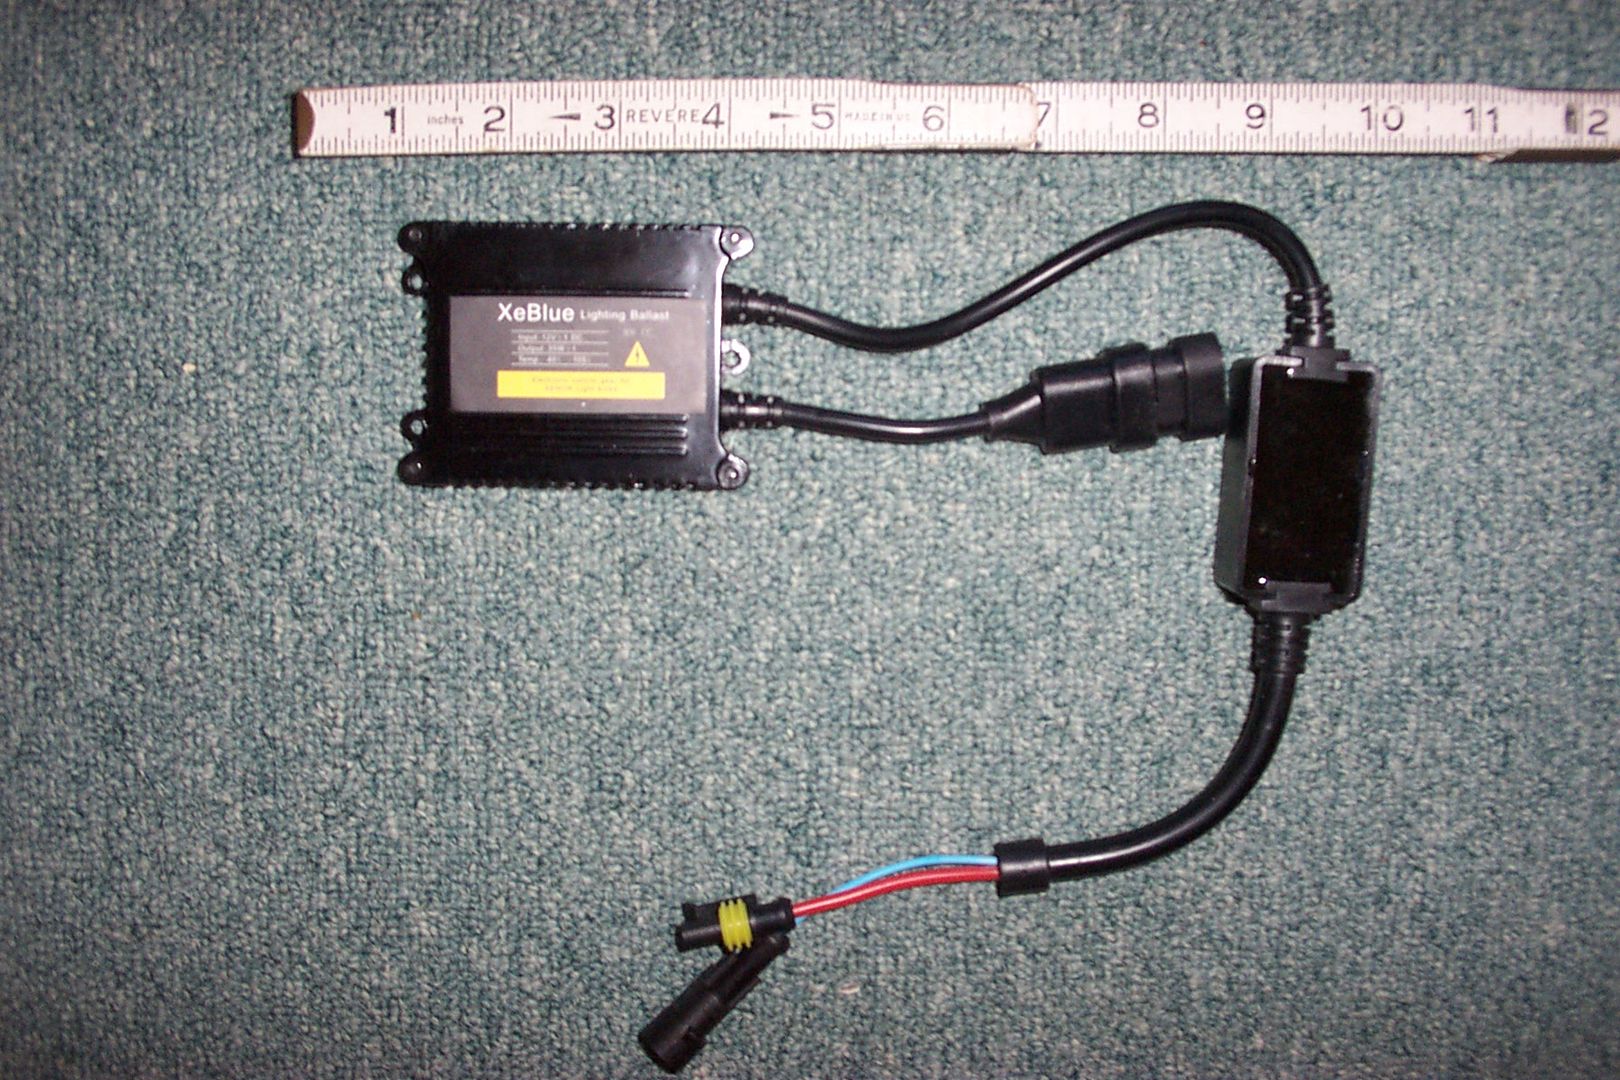
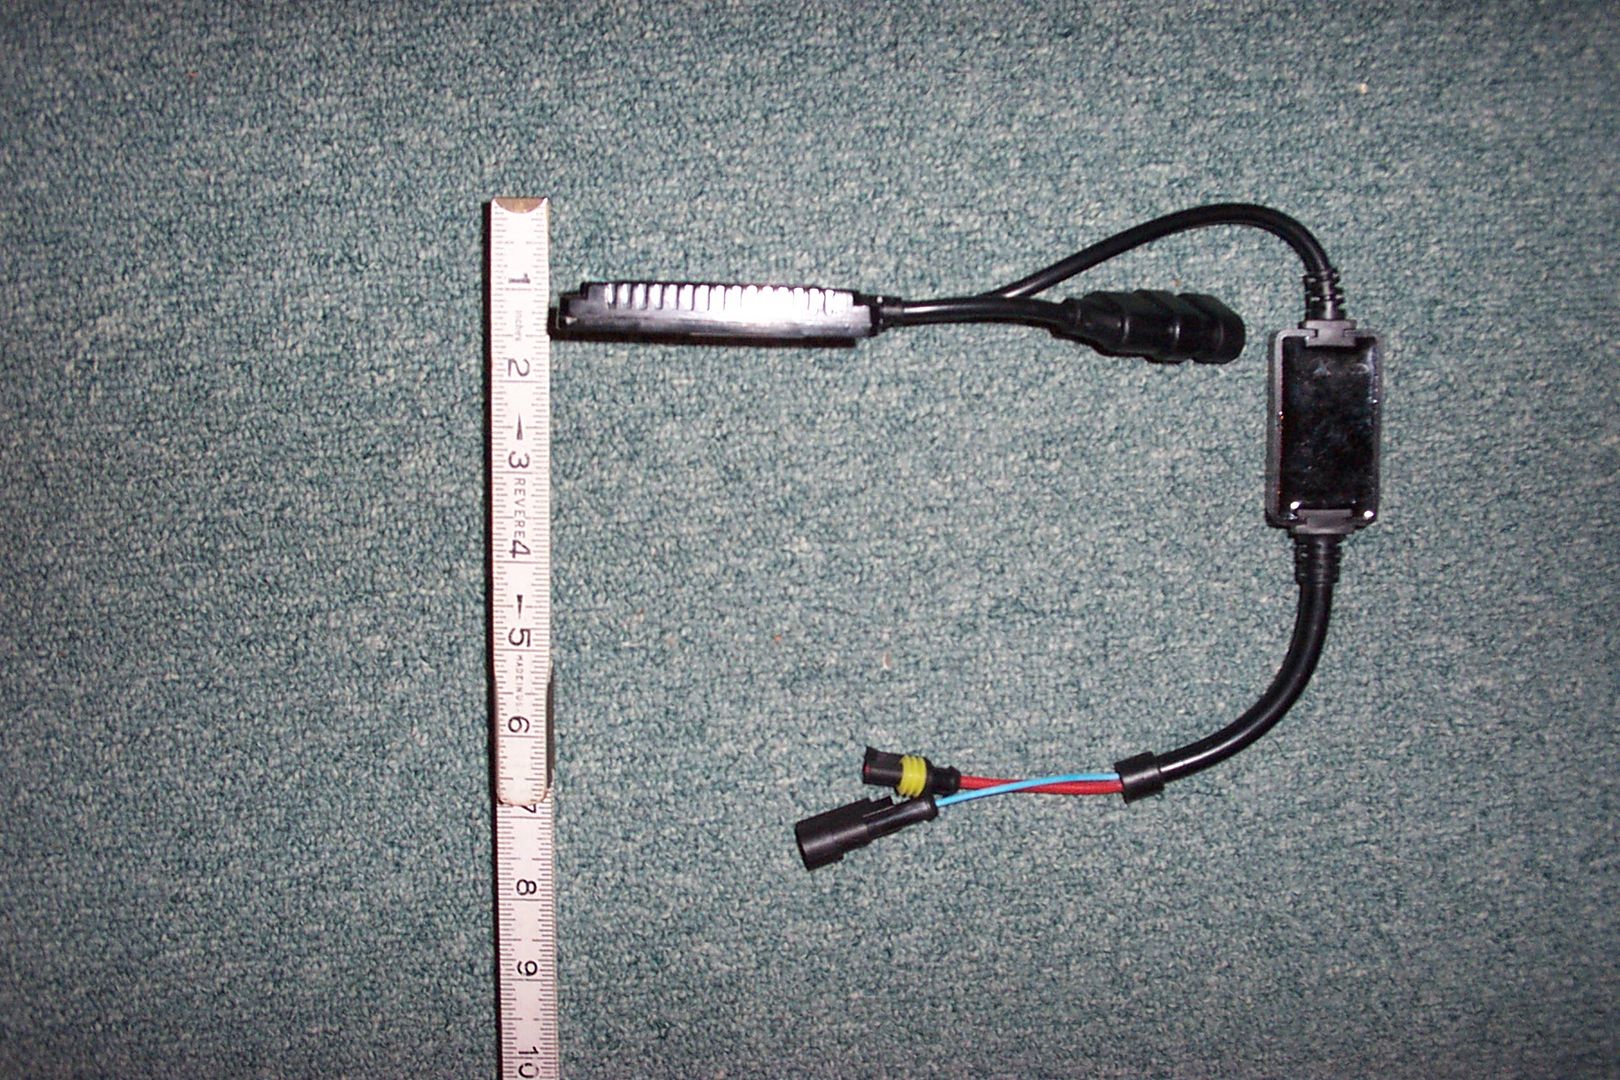
You can see that these "super slim" ballasts are coupled with some ignitors. And the high voltage cables (the ones with the ignitors inline) are relatively short, meaning these ballasts will need to be located close to the headlamps in the nose area. Good thing they are small.

You can also see the harness and relay box that was provided with the kit. It has a single input connector that gets hooked up to one of the unplugged stock headlight sockets. That is only used to command the relay logic in the "relay box" The relay box has some heavy gauge power wires complete with 2 inline fuses that are supposed to go directly to the battery. I will be re-terminating these with smaller ring lugs and hooking them up to some sort of a power strip.

The long thin wires coming off the relay box running along the bottom of the picture are the wires that control the lamp assembly solenoids. They plug directly into the lamp assemblies. The yellow connectors part way up the same cables are the relay controlled low voltage to the ballasts.

The lowermost of these two cables that gets hooked to the ballasts is very long (it's bundled up in the picture). This is for use in a car install. Since these are just low voltage wires you could cut that one down and splice the 4 wires to a shorter length for bike use. That would reduce the crap that would need to hide in the faring. But I will probably be just tie wrapping the bundle somewhere out of the way in case I decide to remove them from the bike at a later date. They will still be usable in a car.


Here are the super slim ballasts:


DCP_1838.jpg


DCP_1841.jpg


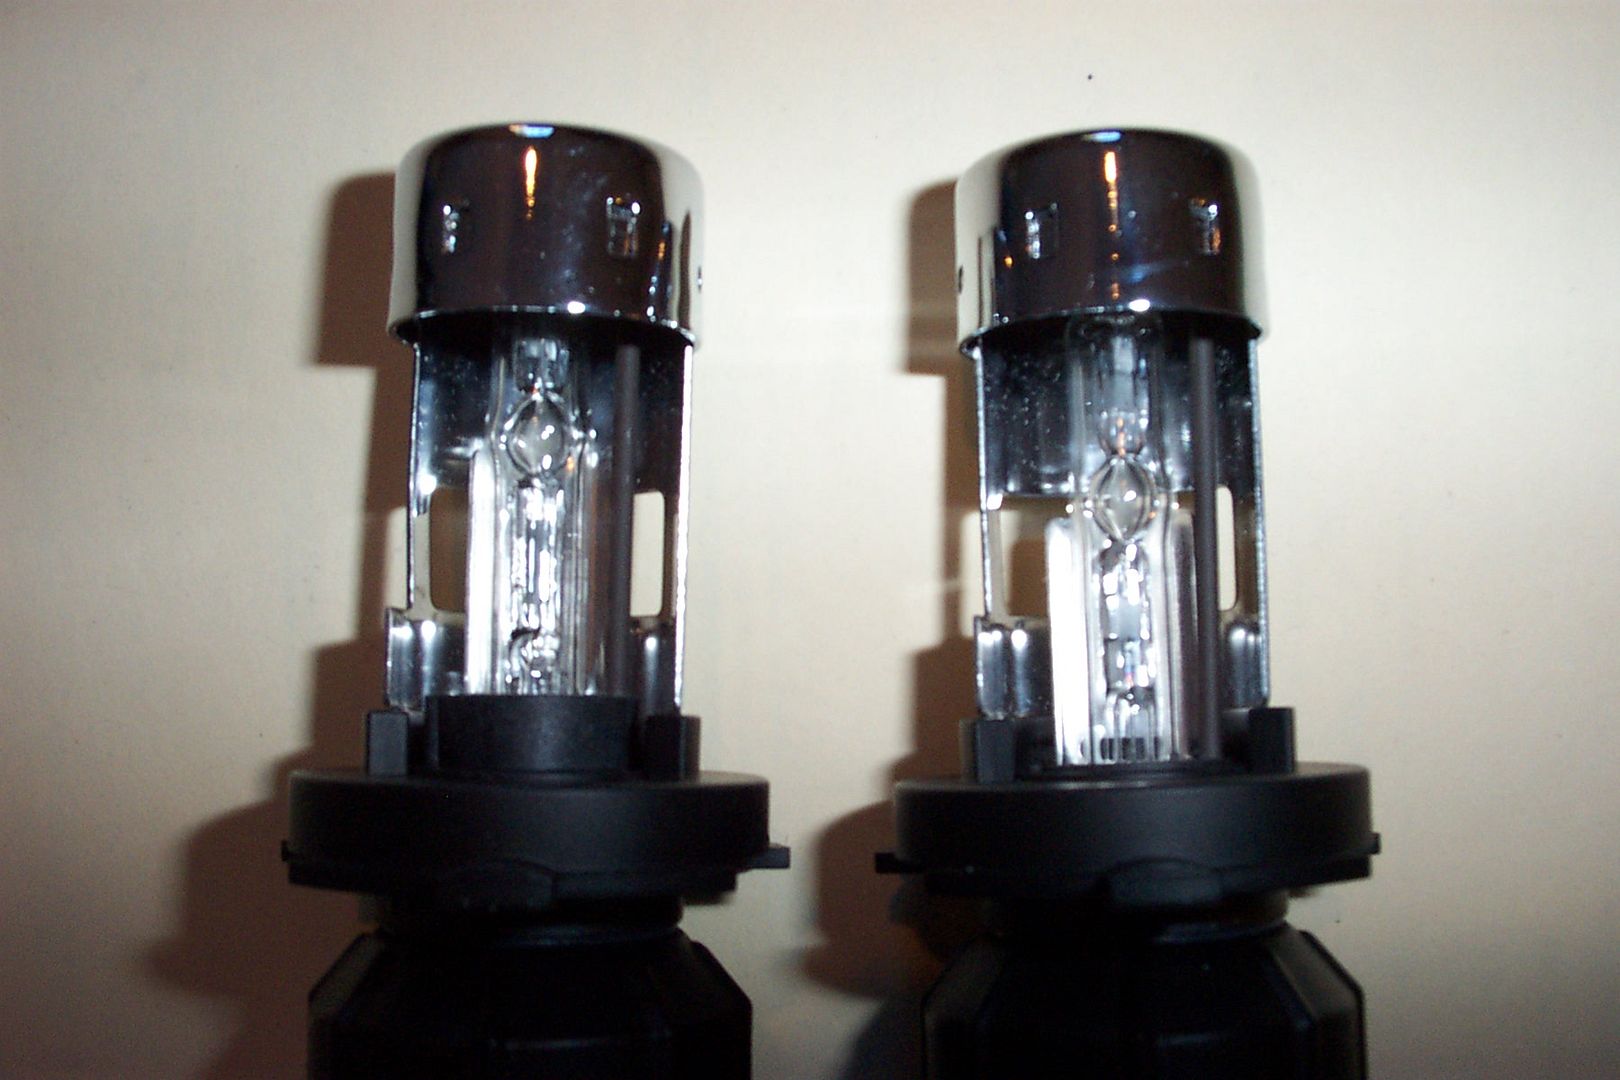
And a close up of the actual HID capsules:

DCP_1836.jpg
2273982320098858932S600x600Q85.jpg


The capsule on the left is shown in the "Low Beam" position and the one on the right is in "High Beam". Contrary to some other kits that have been reported to have "spring loaded" telescopic action, these most certainly do not. I don't know if that is a good thing or a bad thing just yet. I'm guessing that there will be a voltage applied to the solenoid to hold it in the in and out position, the polarity reversed by the relay box. I'll investigate this further during install and find out how much power this feature draws.

The lamp assemblies seem pretty substantial and do not feel flimsy. The super-slim ballasts are well sealed units, and the Ignitors and Relay box are completely potted in epoxy. The high voltage and high current supply connections have rubber gasketed connectors.

I 'll be taking some before and after beam pattern photos with the headlamps shooting at the garage door from 25'. Not to show relative brightness, with an automatic exposure digital camera that would be kind of hard to do. But I think the pattern of the light should be detectable.

 
Last edited by a moderator:
Thanks for the update, Fred. I've been watching this thread, despite having one of the original HID conversion kits (with the big mongo ballasts) sitting in my garage awaiting installation.

Looking forward to an install update with accompanying pix!

 
Fred, I've got a light meter if you want to measure lumens, beam dispersion and beam area intensity. I did a big headlight evaluation with my car club a few years ago. How do you explain to the police what 6 cars are doing in the back of a pitch black parking lot behind businesses at midnight. Well ossifier, we were just testing headlights, uhh, no we haven’t been drinking (yet), no, no drugs, no burglary tools... Hmmm, how do I explain this to the FJR forum, also – Mr Wizard meets gearhead in an ugly collision of technology and greasy wrenches.

LMK if you are interested, I’ll start looking for it.

 
Fred, I've got a light meter if you want to measure lumens, beam dispersion and beam area intensity. I did a big headlight evaluation with my car club a few years ago. How do you explain to the police what 6 cars are doing in the back of a pitch black parking lot behind businesses at midnight. Well ossifier, we were just testing headlights, uhh, no we haven’t been drinking (yet), no, no drugs, no burglary tools... Hmmm, how do I explain this to the FJR forum, also – Mr Wizard meets gearhead in an ugly collision of technology and greasy wrenches.
LMK if you are interested, I’ll start looking for it.
That sounds like it would be kind of a fun and worthwhile thing to do (in a nerdly way) sometime this spring. I guess there's no rush since we could get the halogen beam pattern measurements from pretty much any FJR with halogen lights. Even a certain '04 due to have a running engine by springtime. I think I remember seeing that Charlie Hoss has some low beam only HIDs? Those would make an interesting comparison, and maybe throw in someone with a set of OSRAMs and/or any of the other "overclocked" halogen lamps.

Of course this is all predicated on these being installed OK and working as expected. :unsure:

Oh, and I'm not sure this could be done properly without just a little EtOH lubricant. :rolleyes:

 
That sounds like it would be kind of a fun and worthwhile thing to do (in a nerdly way) sometime this spring....we could get the halogen beam pattern measurements from pretty much any FJR with halogen lights....I think I remember seeing that Charlie Hoss has some low beam only HIDs? Those would make an interesting comparison, and maybe throw in someone with a set of OSRAMs and/or any of the other "overclocked" halogen lamps...Oh, and I'm not sure this could be done properly without just a little EtOH lubricant. :rolleyes:
I guess we can put out a call for any New England FJR owners with altered headlights that are interested in a midnight rendezvous with a light meter :unsure: Last time Charlie Hoss and I spoke I believe he had a set of the "overclocked" halogen lamps.

When we did the car headlights we had 6 different systems, ranging from simple harness upgrades with relays to a full blown HID system (new at the time). The HID system was installed in the car of an OSRAM-Sylvania engineer that helped develop the first HID systems for Mercedes and Lincoln cars. Hard core car buff Scott Mueller from Chicago actually flew out to participate and used the results as fodder for the book he is writing about how to upgrade, customize and hotrod cars. Scott is also a motorcycle nut.

Nothing like a little celebratory C2H5OH contaminated with controlled amounts of either Humulus lupulus or Hordeum vulgare to improve sensory delight.

 
Last edited by a moderator:
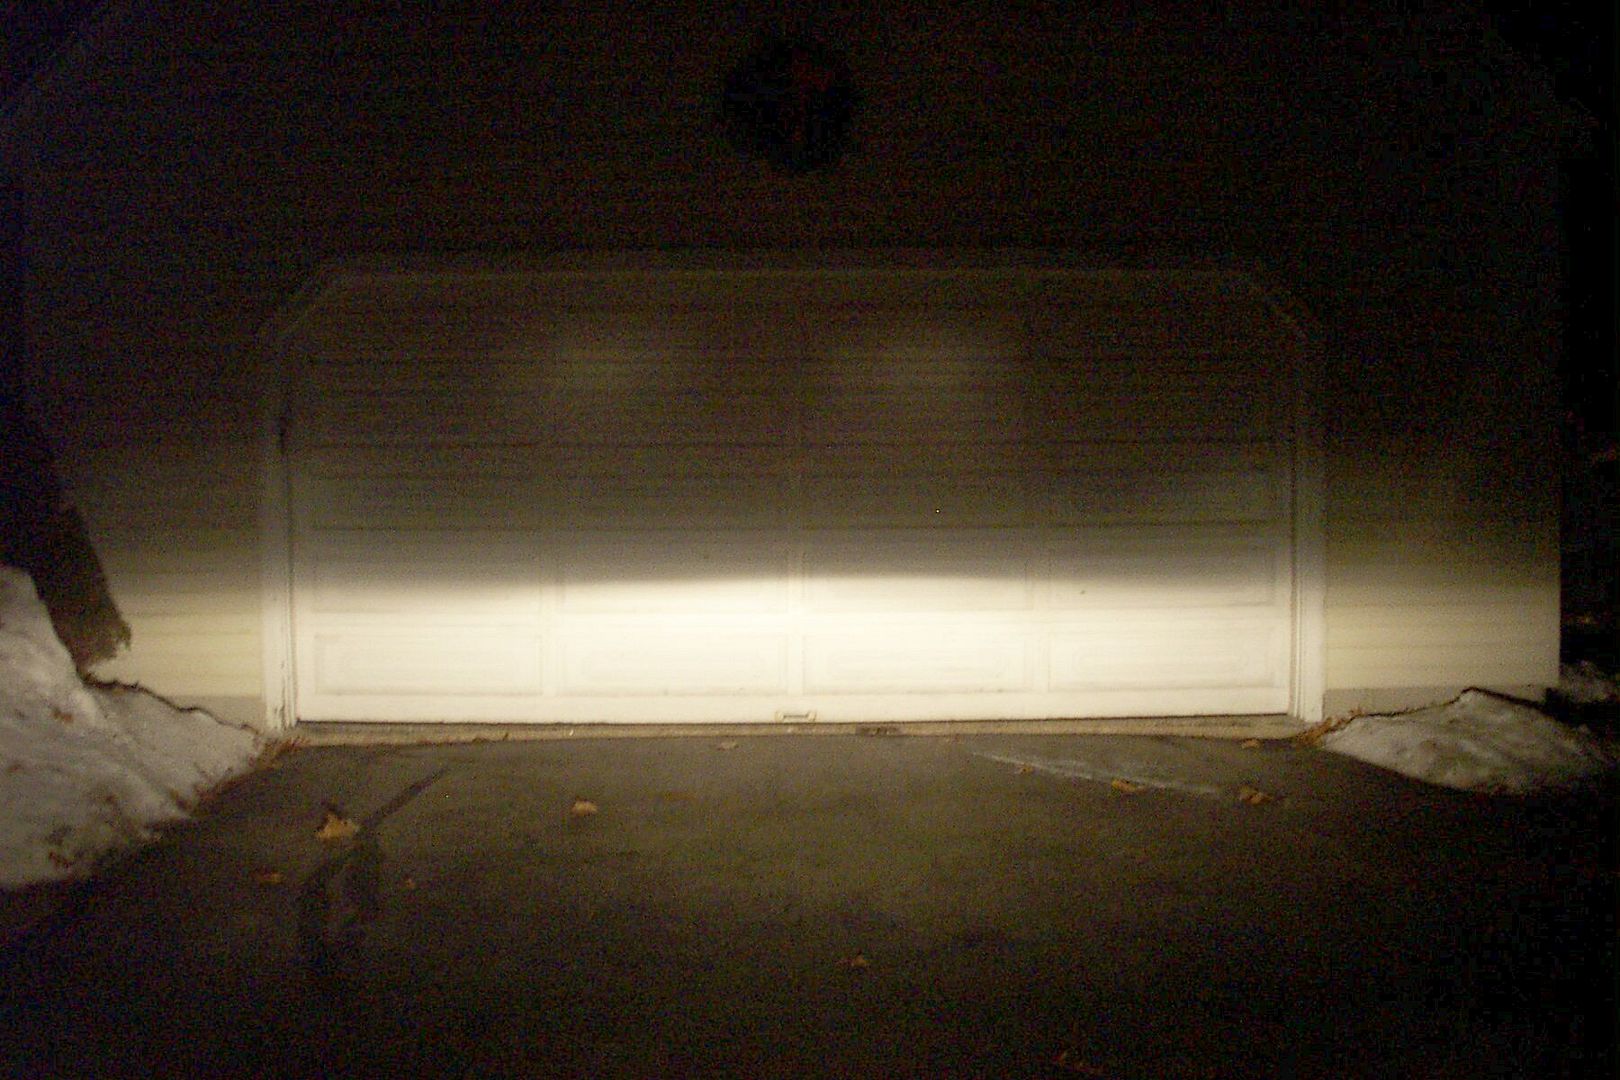
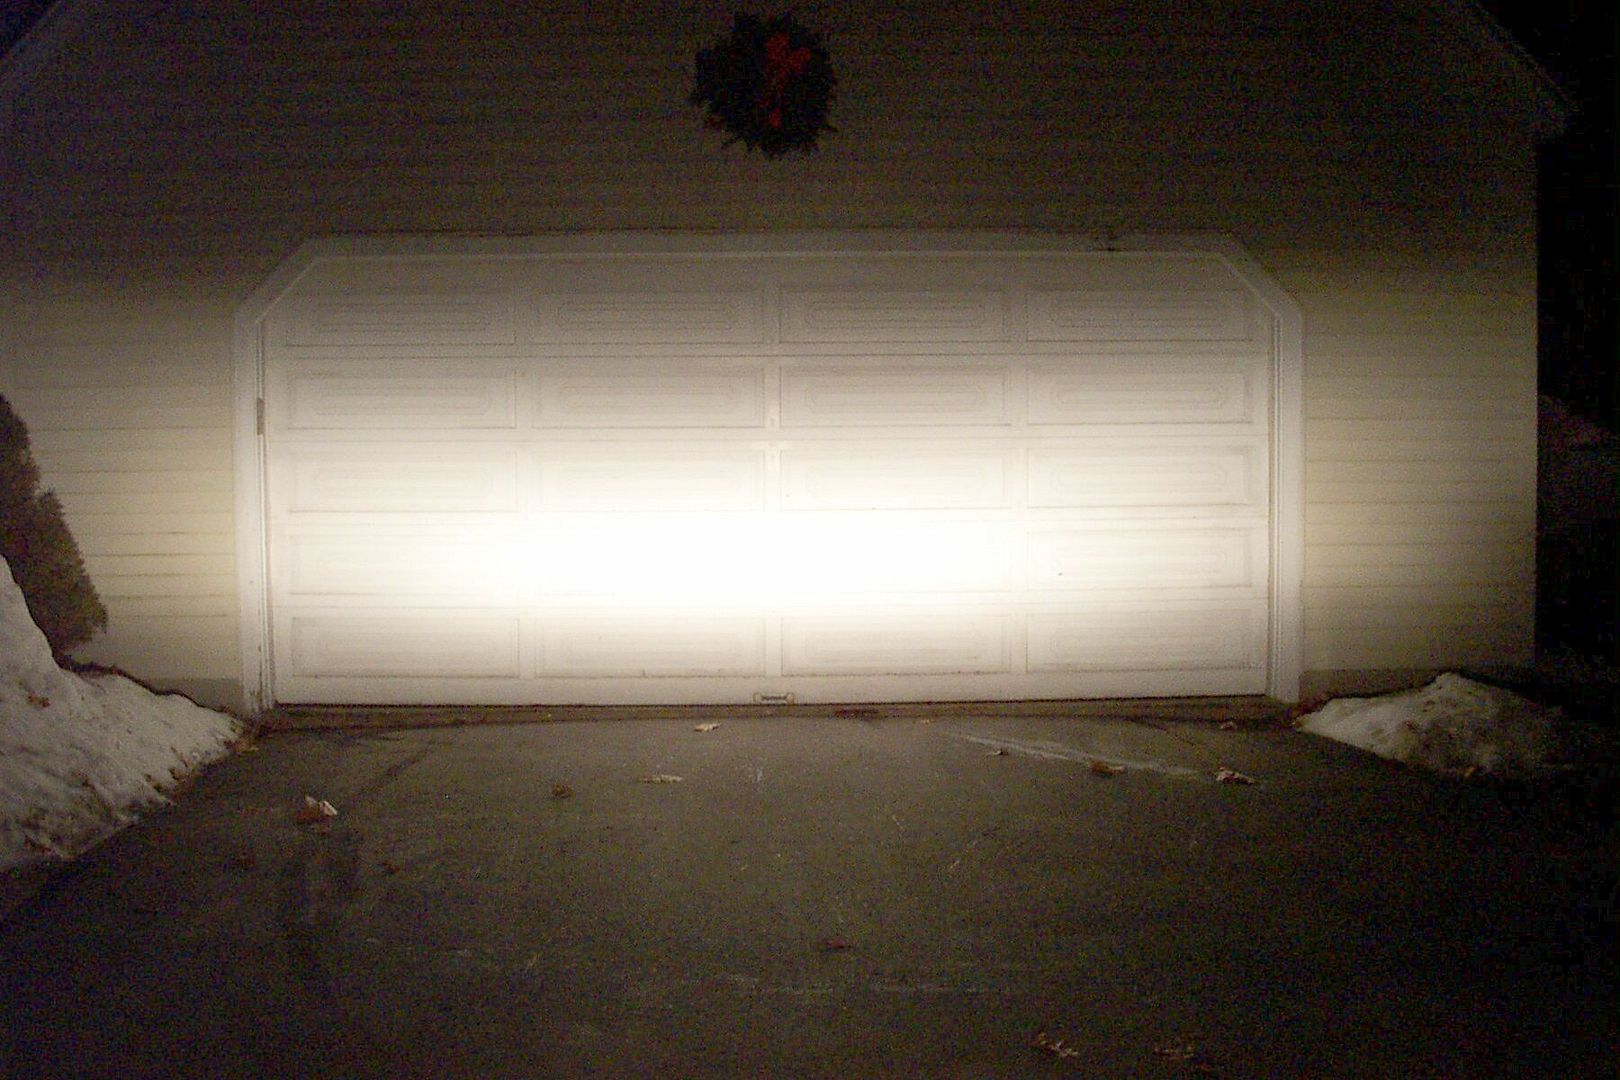
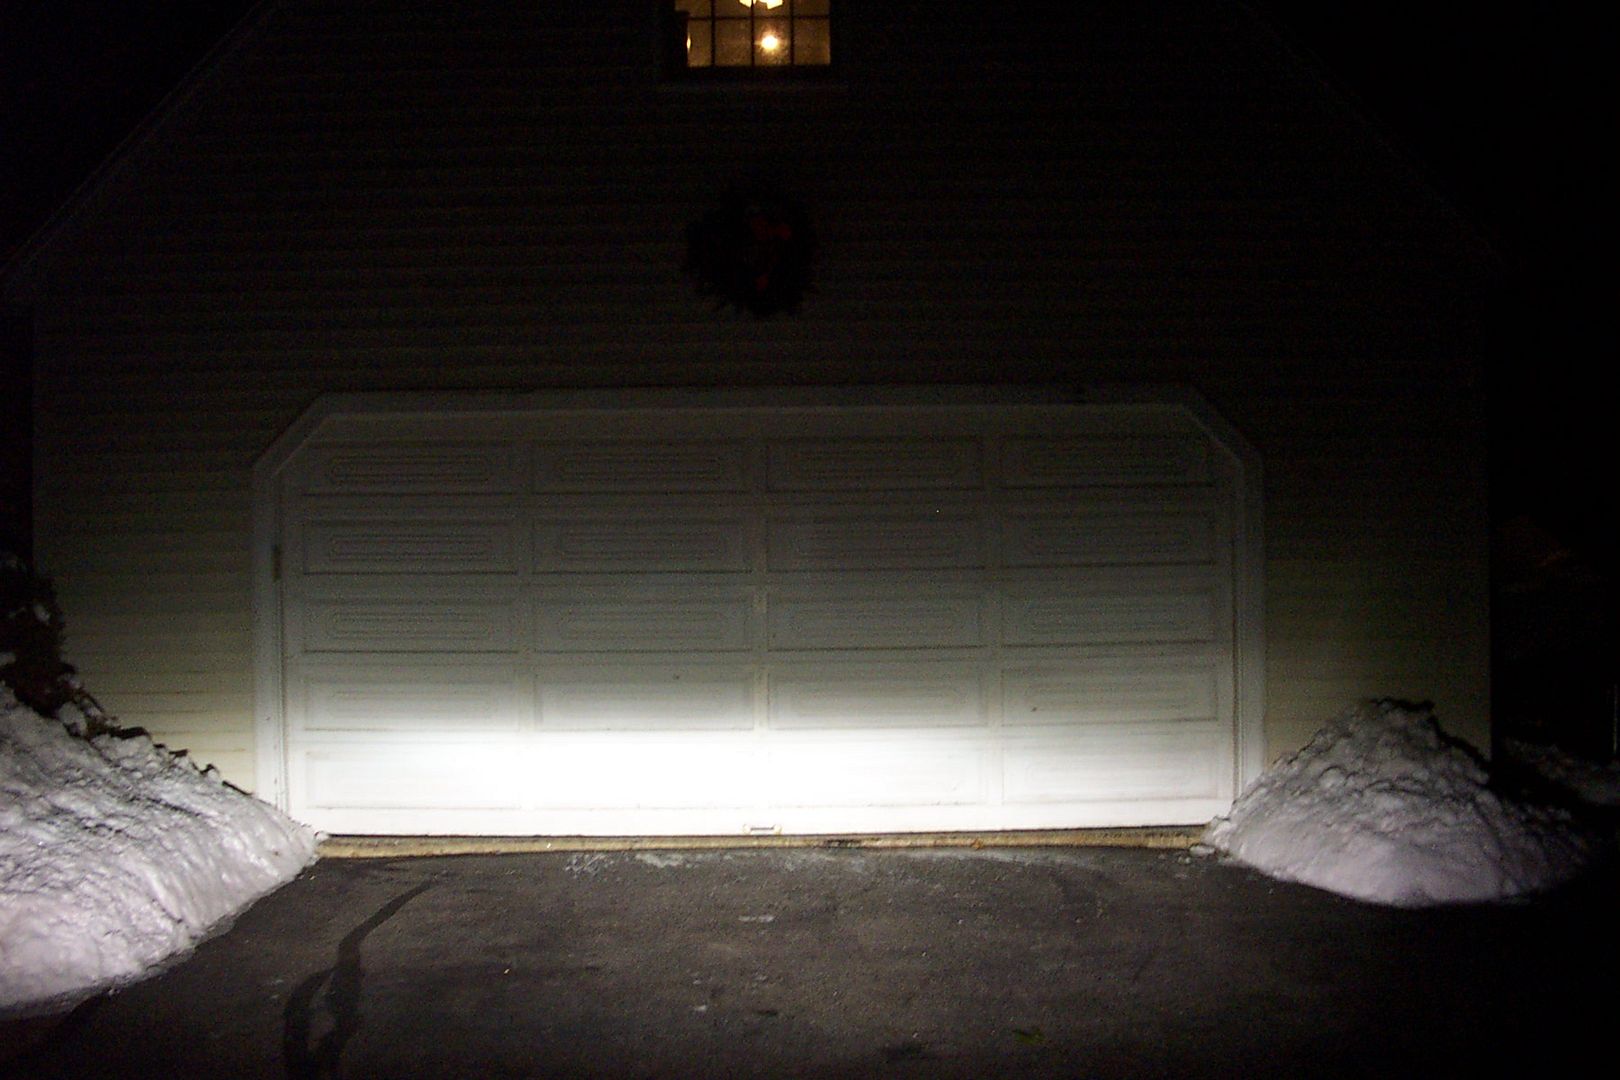
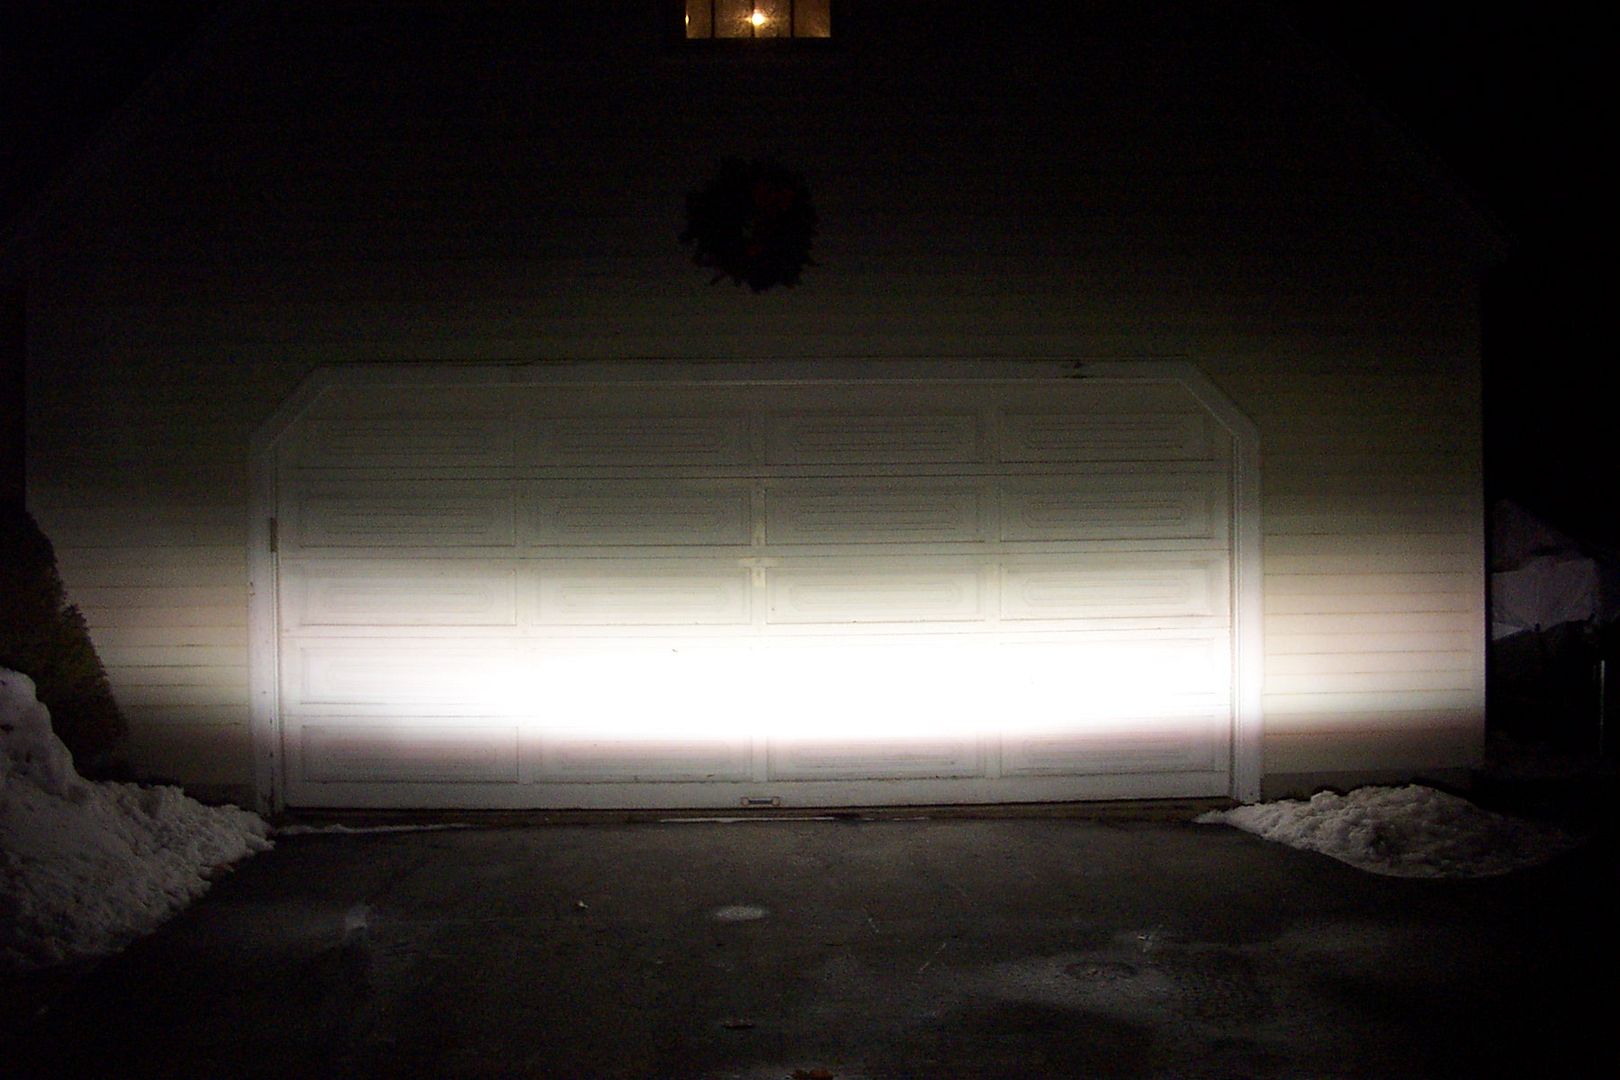
I halfway installed the telescopic hi-lo head lamps today, just installed the bulbs and wired up the rest temporarily for testing purposes (to make sure I wanted to finish the install) then took some pictures of the head lamp beams. I had also taken some pictures 2 days ago of the halogen beams from the same spot in my driveway. However, be aware that I think the bike was pointing a bit to the right in the HID pictures. Here they are:

The first 4 pics are taken from the same spot, 25 foot from the door, which is where I usually align my headlights from

Halogen Low Beams:
HalogenLowgammacorrected.jpg


Halogen High Beam:
HalogenHighGammacorrected.jpg


Now the HID Low Beams:
HIDLowBeam25ft2.jpg


And HID High Beams:
HIDHigh25ft.jpg


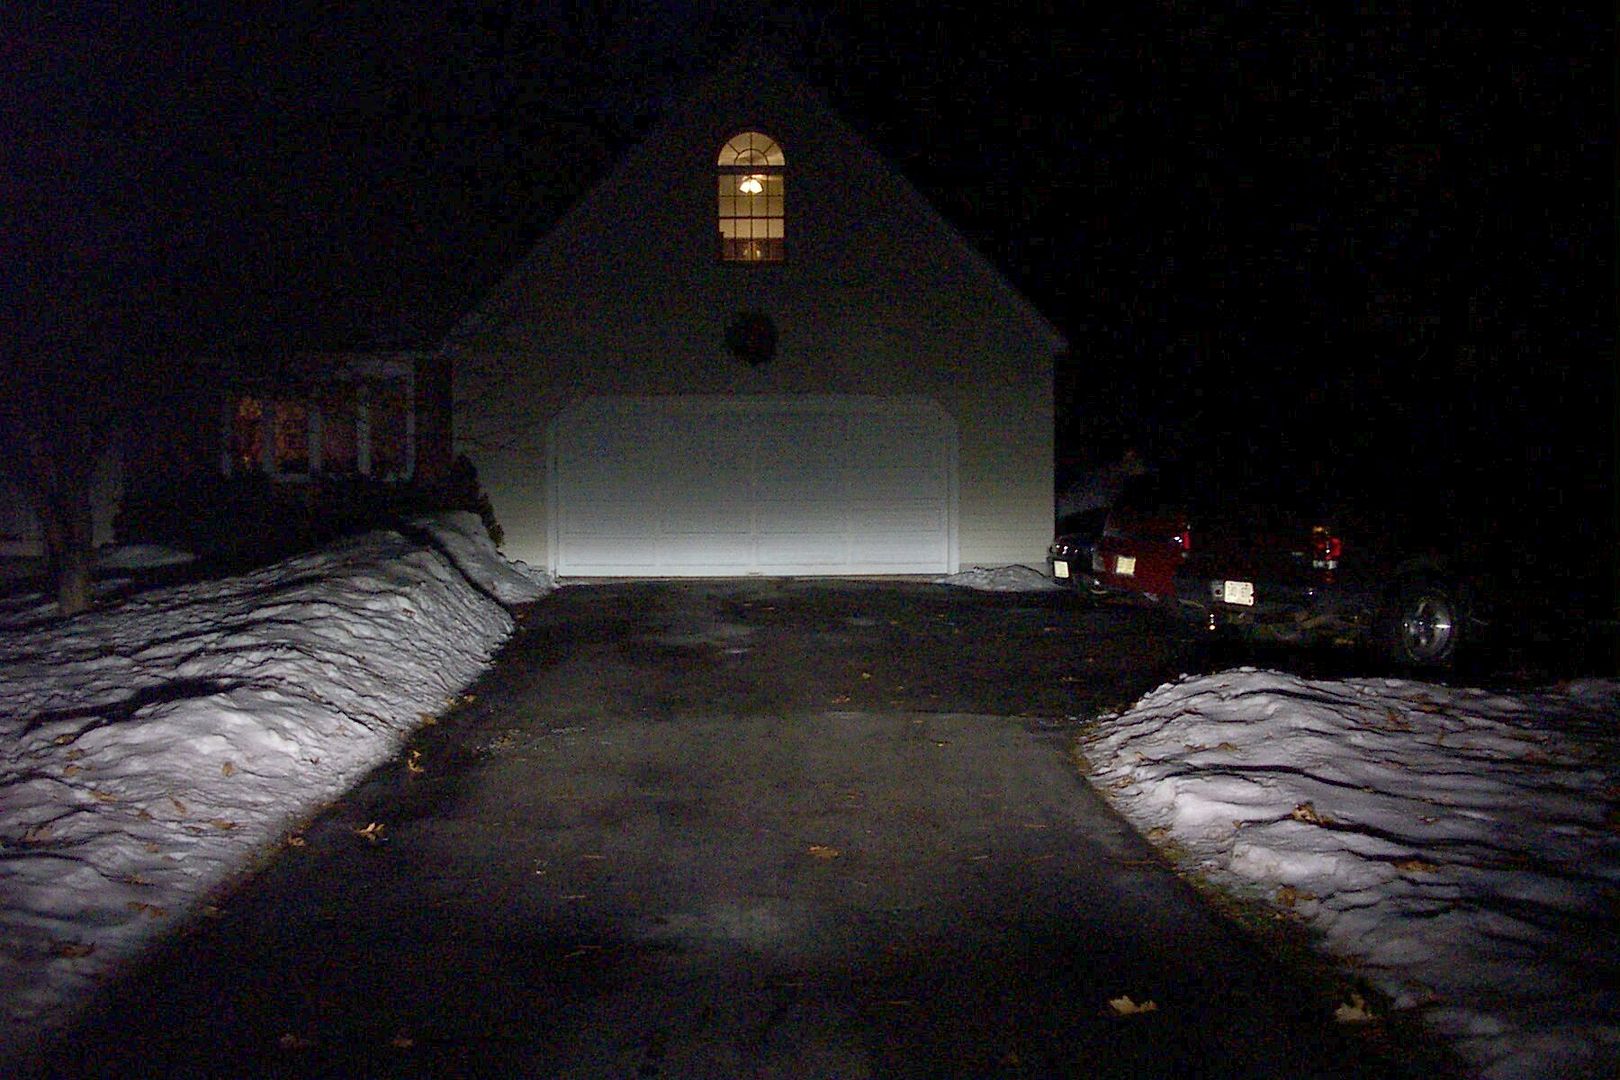
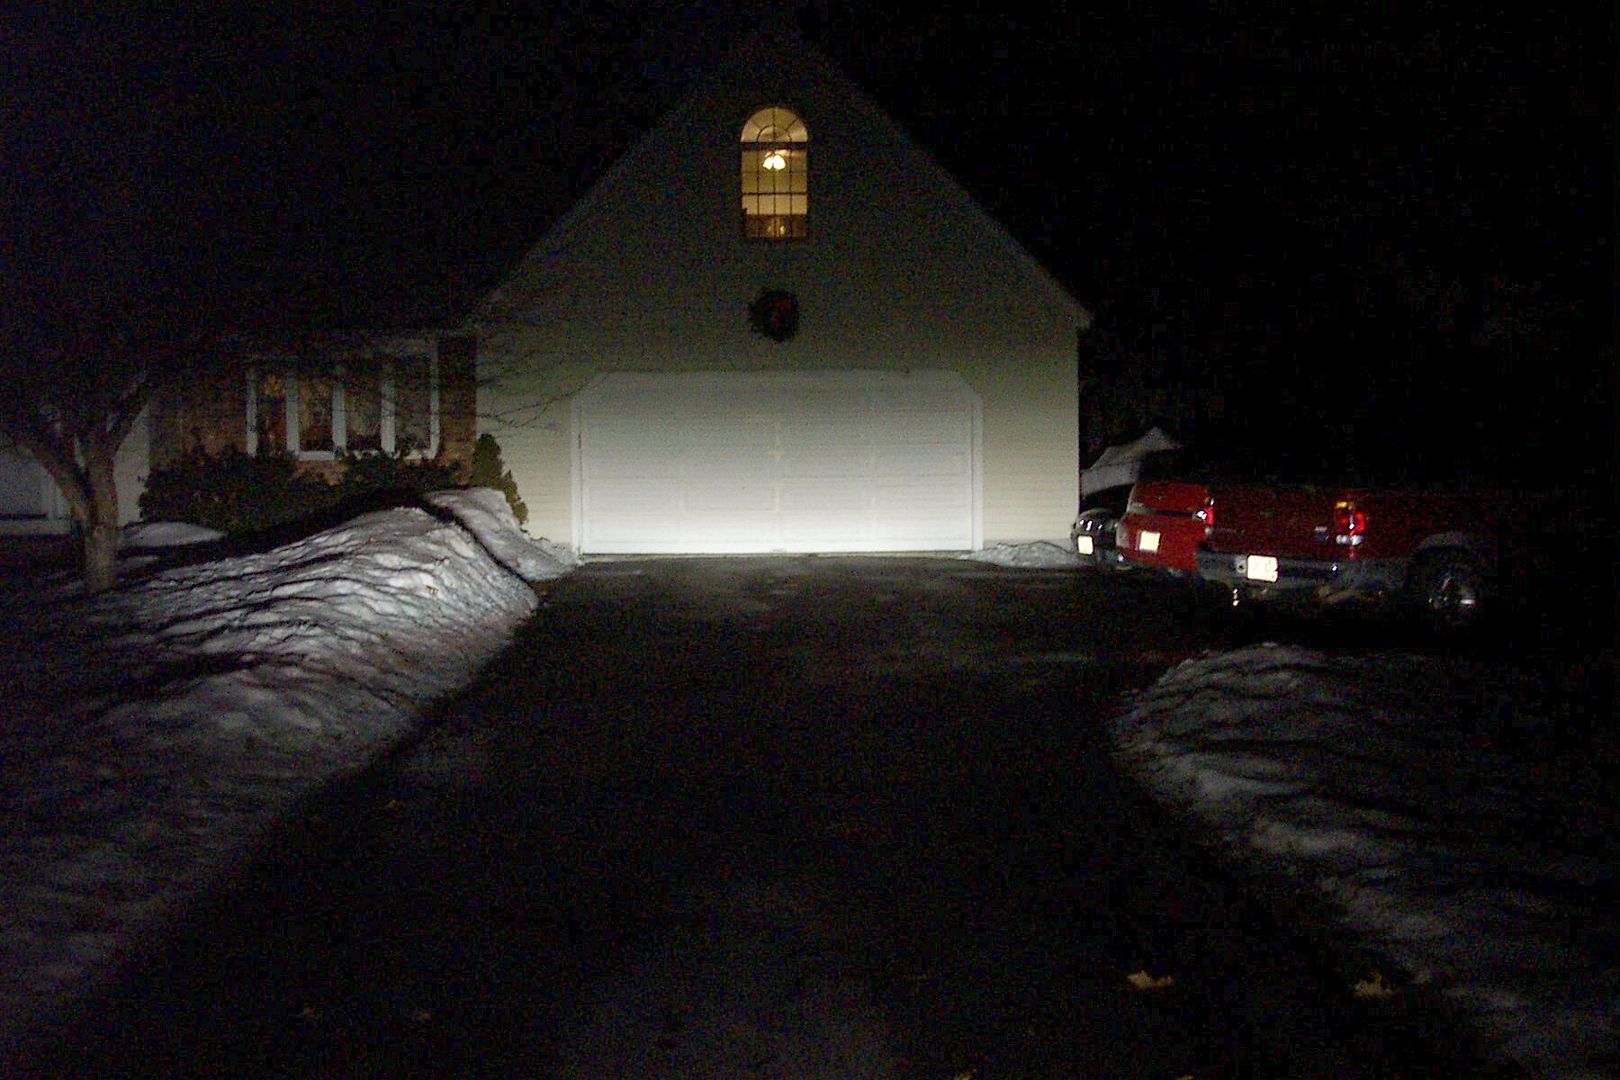
When I saw how sharply the bottom of the high beam is cut off I was initially dismayed. I thought that I should have some fill light in the foreground as well as the high intensity light being thrown down the road. But then I figured that 25 feet is not really a reasonable test distance of how the high beams would perform in the real world, so I backed up further from the wall to approximately 75 feet. Unfortunately, I don't have any halogen pictures from that distance.

HID Low Beams from ~75 feet
HIDLow75ftgammacorrected.jpg


HID High Beams from ~75 feet
HIDHigh75ftgammacorrected.jpg


To complete the install I need to find some places to stash all the wiring, ballasts, ignitors and the relay control box. That is going to be kind of tricky without removing the whole nose of the faring. How tough is it to remove the nose? I could do a nice job sticking down the boxes and tying down the excess wiring with the nose removed.

I did have to trim the rubber boot around the head lamps as the diameter of the solenoid is considerably bigger than an H4 bulb, but I managed to get a nice tight seal around the solenoid so I shouldn't have any problems with contamination in the headlamp assembly.

Lucky for me I still have another month or two to finish this up before the weather gets half way decent and the crap is off the roads.

 
Last edited by a moderator:
I halfway installed the telescopic hi-lo head lamps today, just installed the bulbs and wired up the rest temporarily for testing purposes (to make sure I wanted to finish the install) then took some pictures of the head lamp beams. I had also taken some pictures 2 days ago of the halogen beams from the same spot in my driveway. However, be aware that I think the bike was pointing a bit to the right in the HID pictures. Here they are:
The first 4 pics are taken from the same spot, 25 foot from the door, which is where I usually align my headlights from

Halogen Low Beams:

2473775280098858932S425x425Q85.jpg


Halogen High Beam:

2945302830098858932S425x425Q85.jpg


Now the HID Low Beams:

2563019840098858932S425x425Q85.jpg


And HID High Beams:

2865888890098858932S425x425Q85.jpg


When I saw how sharply the bottom of the high beam is cut off I was initially dismayed. I thought that I should have some fill light in the foreground as well as the high intensity light being thrown down the road. But then I figured that 25 feet is not really a reasonable test distance of how the high beams would perform in the real world, so I backed up further from the wall to approximately 75 feet. Unfortunately, I don't have any halogen pictures from that distance.

HID Low Beams from ~75 feet

2843230090098858932S425x425Q85.jpg


HID High Beams from ~75 feet

2991979070098858932S425x425Q85.jpg


To complete the install I need to find some places to stash all the wiring, ballasts, ignitors and the relay control box. That is going to be kind of tricky without removing the whole nose of the faring. How tough is it to remove the nose? I could do a nice job sticking down the boxes and tying down the excess wiring with the nose removed.

I did have to trim the rubber boot around the head lamps as the diameter of the solenoid is considerably bigger than an H4 bulb, but I managed to get a nice tight seal around the solenoid so I shouldn't have any problems with contamination in the headlamp assembly.

Lucky for me I still have another month or two to finish this up before the weather gets half way decent and the crap is off the roads. :angry2:
I had enough room in the nose of my '03 under the headlights to place the ballasts without removing anything. I "glued" the ballasts in place using RTV, silicone bathtub caulk. I have had to change one of the ballasts and was able to do so by cutting the RTV......sounds worse than it was. Double check the shield over the arc tube and make sure that it uncovers at least 1/2 the arc tube so that the light can get to the high beam portion of the reflector when the telescoping selenoid is actuated.

Your lights look pretty good to me.

Jim

 
That sounds like it would be kind of a fun and worthwhile thing to do (in a nerdly way) sometime this spring....we could get the halogen beam pattern measurements from pretty much any FJR with halogen lights....I think I remember seeing that Charlie Hoss has some low beam only HIDs? Those would make an interesting comparison, and maybe throw in someone with a set of OSRAMs and/or any of the other "overclocked" halogen lamps...Oh, and I'm not sure this could be done properly without just a little EtOH lubricant. :rolleyes:
I guess we can put out a call for any New England FJR owners with altered headlights that are interested in a midnight rendezvous with a light meter :unsure: Last time Charlie Hoss and I spoke I believe he had a set of the "overclocked" halogen lamps.

When we did the car headlights we had 6 different systems, ranging from simple harness upgrades with relays to a full blown HID system (new at the time). The HID system was installed in the car of an OSRAM-Sylvania engineer that helped develop the first HID systems for Mercedes and Lincoln cars. Hard core car buff Scott Mueller from Chicago actually flew out to participate and used the results as fodder for the book he is writing about how to upgrade, customize and hotrod cars. Scott is also a motorcycle nut.

Nothing like a little celebratory C2H5OH contaminated with controlled amounts of either Humulus lupulus or Hordeum vulgare to improve sensory delight.
Ion, you're correctamundo. I'm running PIAA Super Plasma bulbs, apparently "overclocked" halogens. They claim twice the light with the same current draw. A definite improvement over stock.

 
I had enough room in the nose of my '03 under the headlights to place the ballasts without removing anything. I "glued" the ballasts in place using RTV, silicone bathtub caulk. I have had to change one of the ballasts and was able to do so by cutting the RTV......sounds worse than it was. Double check the shield over the arc tube and make sure that it uncovers at least 1/2 the arc tube so that the light can get to the high beam portion of the reflector when the telescoping selenoid is actuated. Your lights look pretty good to me.

Jim
Thanks for the suggestion on ballast placement. I think with the super-slim ballasts there are plenty of spots to stick them down, it's more finding a place that makes sense to route, bundle and tie down all of the superfluous wiring with the ignitors and also the relay box.

I think that know what you mean about the shield. You're talking about the small one that travels with the bulb, right?

When I first looked at that shield it didn't make sense that it would block nearly 1/2 of the arc tube when it was in the high beam position so I made sure they were properly seated. But both that shield and the larger stationary shield sit physically underneath the arc tube when installed, so it should be masking the upper reaches of the projected beam. The high beam seems fine in the upper area, I just would have liked more light down low to accompany it.

If you look at the high beam photos from 25 foot, the halogen and HID beams both seem to have that same attribute, which makes me think it is a result of the headlight bucket's reflector shape, not the bulb shield. I'd like to see a similar beam pattern photo from someone that has installed a low beam only bulb with the shield cut off and adjusted to the high beam focal spot. That would be the clincher.

 
Last edited by a moderator:
I had enough room in the nose of my '03 under the headlights to place the ballasts without removing anything. I "glued" the ballasts in place using RTV, silicone bathtub caulk. I have had to change one of the ballasts and was able to do so by cutting the RTV......sounds worse than it was. Double check the shield over the arc tube and make sure that it uncovers at least 1/2 the arc tube so that the light can get to the high beam portion of the reflector when the telescoping selenoid is actuated. Your lights look pretty good to me.

Jim
Thanks for the suggestion on ballast placement. I think with the super-slim ballasts there are plenty of spots to stick them down, it's more finding a place that makes sense to route, bundle and tie down all of the superfluous wiring with the ignitors and also the relay box.

I think that know what you mean about the shield. You're talking about the small one that travels with the bulb, right?

When I first looked at that shield it didn't make sense that it would block nearly 1/2 of the arc tube when it was in the high beam position so I made sure they were properly seated. But both that shield and the larger stationary shield sit physically underneath the arc tube when installed, so it should be masking the upper reaches of the projected beam. The high beam seems fine in the upper area, I just would have liked more light down low to accompany it.

If you look at the high beam photos from 25 foot, the halogen and HID beams both seem to have that same attribute, which makes me think it is a result of the headlight bucket's reflector shape, not the bulb shield. I'd like to see a similar beam pattern photo from someone that has installed a low beam only bulb with the shield cut off and adjusted to the high beam focal spot. That would be the clincher.
I found that the extra wiring length was more than I was willing to try and find a place for, so I spent a fair amount of time triming and splicing wires.

I removed the small shield that traveled with the arc tube as it moved as it wasn't needed.

Jim

 
I found that the extra wiring length was more than I was willing to try and find a place for, so I spent a fair amount of time triming and splicing wires.
I removed the small shield that traveled with the arc tube as it moved as it wasn't needed.

Jim
OK, I just finished the install. I stacked the 2 super slim ballasts and stuck them together with doubles-sided stick foam tape, then stuck the pair on top of the left side headlight. I ran the HV wires down between the headlights which put the 2 ignitors captive between the headlights. I tie wrapped the bottom of the HV wires to the frame that runs across between the two headlights and then ran the wires up to the capsules. It worked out pretty neatly. I put the relay box and bundled up excess wire in front of the glove box. There's a pretty good sized cavity on 1st gens right there.

So in summary, it was a fairly easy install on a 1st gen. I would expect that a 2nd gen should be just as easy as long as you can find a spot for the relay box and excess wires.

I may remove that shield eventually too, as I think it does interfere with the high beam pattern some, but it looks like it is there to seal off the big hole in the stationary shield when in low beam. Did you notice the low beams leaking any light above the cut-off after you removed the shield? Also, when you removed it did it look like you could put it back if you had to?

 
Last edited by a moderator:
Top