Taking it to a machine shop that has a press and the dies to do it right. I debated doing what you're doing myself several months ago. Guessing an hour of their time to press out and in the bearings on the arm and swingarm (assuming you're doing it too).Before I F-up another one, is there a better method for seating them?
You are using an out of date browser. It may not display this or other websites correctly.
You should upgrade or use an alternative browser.
You should upgrade or use an alternative browser.
Relay Arm Service
- Thread starter FJReady
- Start date

Help Support Yamaha FJR Motorcycle Forum:
This site may earn a commission from merchant affiliate
links, including eBay, Amazon, and others.
Auburn
Well-known member
best method is to press them so you use constant pressure, not sharp force from poundingArise again, oh zombie thread.
Installing the first bearing in the rearmost part of the relay arm, I seated the bearing by putting a block of wood against it and hit the wood until the bearing was flush with the outer surface of the arm. Then I switched to a 16mm socket to seat it deep enough to make room for the oil seal. Except, when I stuck my pinky in there to see if the bearing spun...it didn't. I think I crushed part of the outer rim of the bearing. Before I F-up another one, is there a better method for seating them?
Queensland Ken
Well-known member
Pull the bearing in using threaded Booker Rod and a few right size sockets.
Too late for this now, but if the outer shell of the bearing is (was) in good shape it is also possible to just "re-load" it withy he new rollers and use the new inner sleeve. It means destroying the waxy plastic bearing retainer that holds the rollers in the new bearing, but those things just take up space that could better be occupied by waterproof grease, anyway.
08FJR4ME
-WYNPRO-
With the right combination of a long screw washers and a nut you should be able to slowly tighten and bring the bearing into place. That would be my process. You could also tighten between a good set of vise jaws. (machine vise)Arise again, oh zombie thread.
Installing the first bearing in the rearmost part of the relay arm, I seated the bearing by putting a block of wood against it and hit the wood until the bearing was flush with the outer surface of the arm. Then I switched to a 16mm socket to seat it deep enough to make room for the oil seal. Except, when I stuck my pinky in there to see if the bearing spun...it didn't. I think I crushed part of the outer rim of the bearing. Before I F-up another one, is there a better method for seating them?
Dave
Last edited by a moderator:
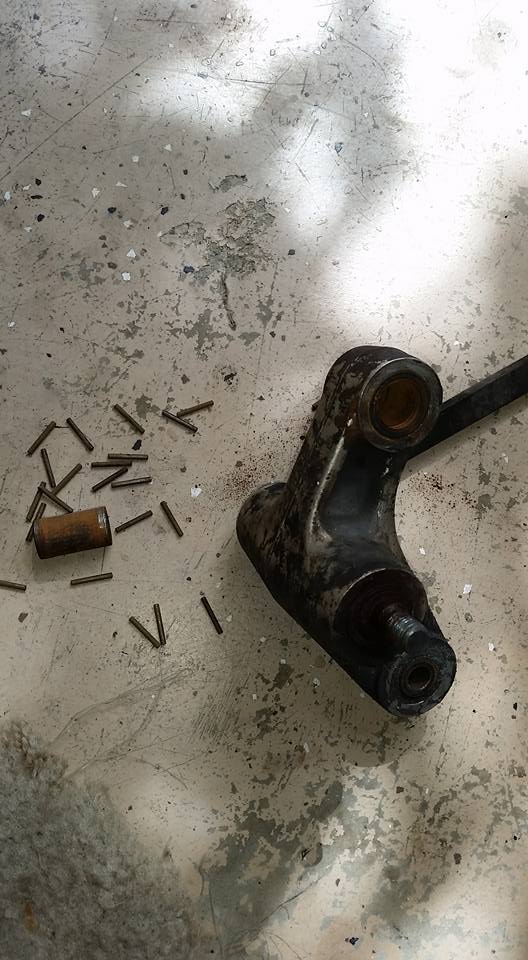
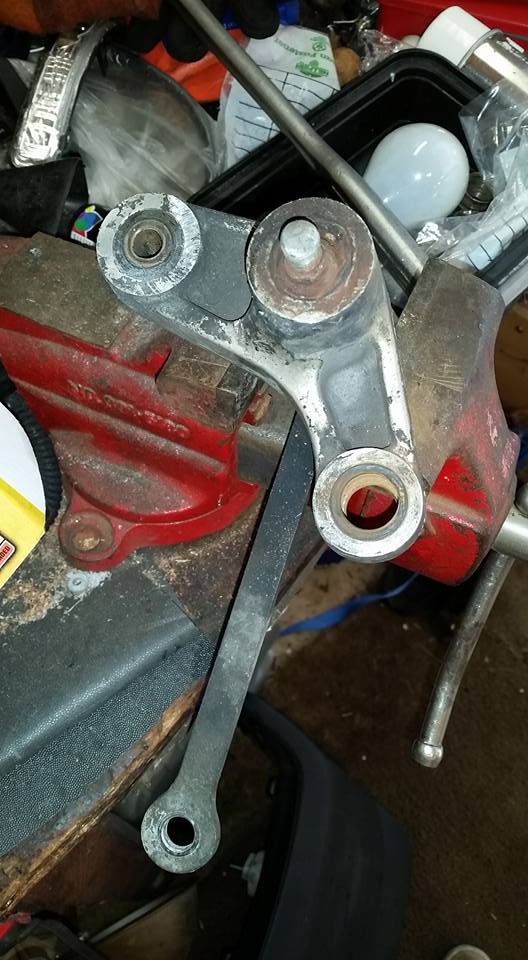
Here is another data point for the relay arm. Noticed about two weeks back that the shock mount was sloppy as I was pulling the rear wheel to patch the tire. Last weekend I pulled the relay arm. The inner race of the shock mount bearing fell out, as did the needles. They were dry, dusty and rusty. I never serviced the relay arm with 125K miles on the clock. I have another arm I got off ebay. But the center bolt is frozen in the bearing. Heated, beated without any movement. I have new bolts on order. Obviously, regular servicing will prevent this.
First time with Imgur posts. Couldn't get the embedded pics to work. Here are the links.
https://imgur.com/mNAjtqa
https://imgur.com/a/nQfUx
https://imgur.com/a/bEyBT
First time with Imgur posts. Couldn't get the embedded pics to work. Here are the links.
https://imgur.com/mNAjtqa
https://imgur.com/a/nQfUx
https://imgur.com/a/bEyBT

$11.98
$13.99
OSOCE Small Sling Bag for Men and Women with RFID Pocket, Anti Theft Crossbody Chest Bag Casual Travel Bag for Hiking,Black,Small
OSOCE RETAILER US

$11.99
$16.99
QUKOPSE Winter Leather Gloves for Men,Touchscreen Snow Driving Gloves with Cashmere Lining for Motorcycle Driving Riding
enshizhouchonglinshangmaoyouxiangongsi

$17.99
$19.99
MOREOK Winter Gloves -10°F 3M Thinsulate Warm Gloves Bike Gloves Cycling Gloves for Driving/Cycling/Running/Hiking-Black-L
MOREOK-US (Ships from USA)
RossKean
Well-known member
Image assist - Man, that thing looks like crap!!
I bought a low-miles eBay replacement but haven't gotten around to doing the swap yet.


I bought a low-miles eBay replacement but haven't gotten around to doing the swap yet.


Last edited by a moderator:
Thanks!!!
I know a guy who installs Zerk fittings in these relay arm to make regular servicing very easy. Maybe get that replacement relay arm from Ebay upgraded before you install it.
PM me for more info
PM me for more info
eflyguy
Well-known member
FWIW, the same parts are virtually dry from the factory for both Gens of FZ1. As are the swingarm pivot shafts.
Donal
Well-known member
This has been talked about before.....I know a guy who installs Zerk fittings in these relay arm to make regular servicing very easy. Maybe get that replacement relay arm from Ebay upgraded before you install it.
PM me for more info
The problem is getting the grease through the needle bearing housing (outer) to where it is needed (the rollers).
I would be interested to see how this has bee achieved........
Donal,
PM me an email address. I will send you some photos. I've done many of these modifications. Not difficult but it is time consuming.
PM me an email address. I will send you some photos. I've done many of these modifications. Not difficult but it is time consuming.
RossKean
Well-known member
FJReady's post on the Zerk fitting subject - with pictures!!
https://www.fjrforum.com/forum//index.php/topic/170658-relay-arm-modified-for-easier-lube-service/?hl=zerk
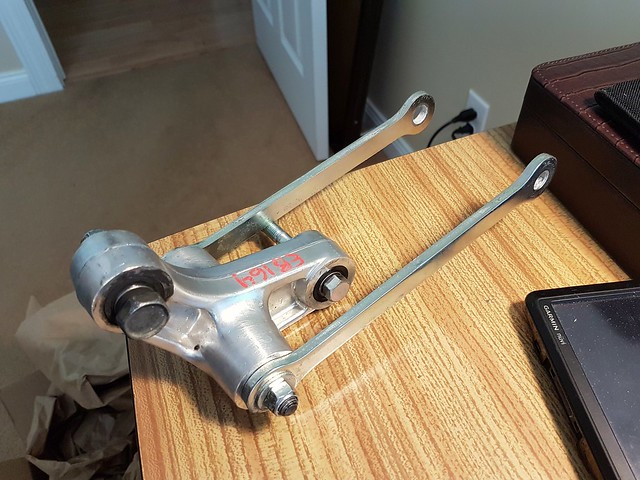
My relay arm has not been bad, despite the large number of miles and lots of times in the rain! I have maintained the middle and lower bearings a couple of times but never the front one (it does move reasonably freely). That is why I bought a low-mileage eBay arm (cost less than replacing the bearings, collars and grease seals on my current relay arm). It even came with a spare set of dogbones and shock mounting bolt! I am going to grease it very well with a waterproof grease and call it good for the remaining life of the bike. If the first one lasted almost 200,000 miles, I figure the replacement is good for at least another 100,000 miles! If the bike lasts longer than that, I'll refurb the original and continue...
This one came off a bike with 9,000 miles - looks pristine

Last edited by a moderator:
want2ride
Well-known member
I just finished the service on the relay arm for my 2009. It was the first service for this area. Now I remember why I regretted this on my 05. The bolts holding the dog bones were corroded in place. Had to drive them out with oxidizing dust falling out. Then came getting the center stand off. That required my sailor language and time with some flesh. Those two bottom bolts are why engineers need to work on what they design.
I did manage to flex the exhaust pipes down low enough to get those bolts out. Needless to say the went in backwards when I put it back together. Used some fine grit sand paper to remove the oxidation from the two dog bolts and slathered them in some lithium based grease. The sleeves and bearing looked good so they just received some lube on them.
Was surprised to see how they had oxidized in place as my 05 did not look like this. Reading about how to do the service was helpful which is why I frequent this forum. Fabulous people leading the way.
Similar threads
- Replies
- 5
- Views
- 902
- Replies
- 15
- Views
- 2K


