Smokers (BBQ - not grilling)

Yamaha FJR Motorcycle Forum

Help Support Yamaha FJR Motorcycle Forum:

This site may earn a commission from merchant affiliate links, including eBay, Amazon, and others.
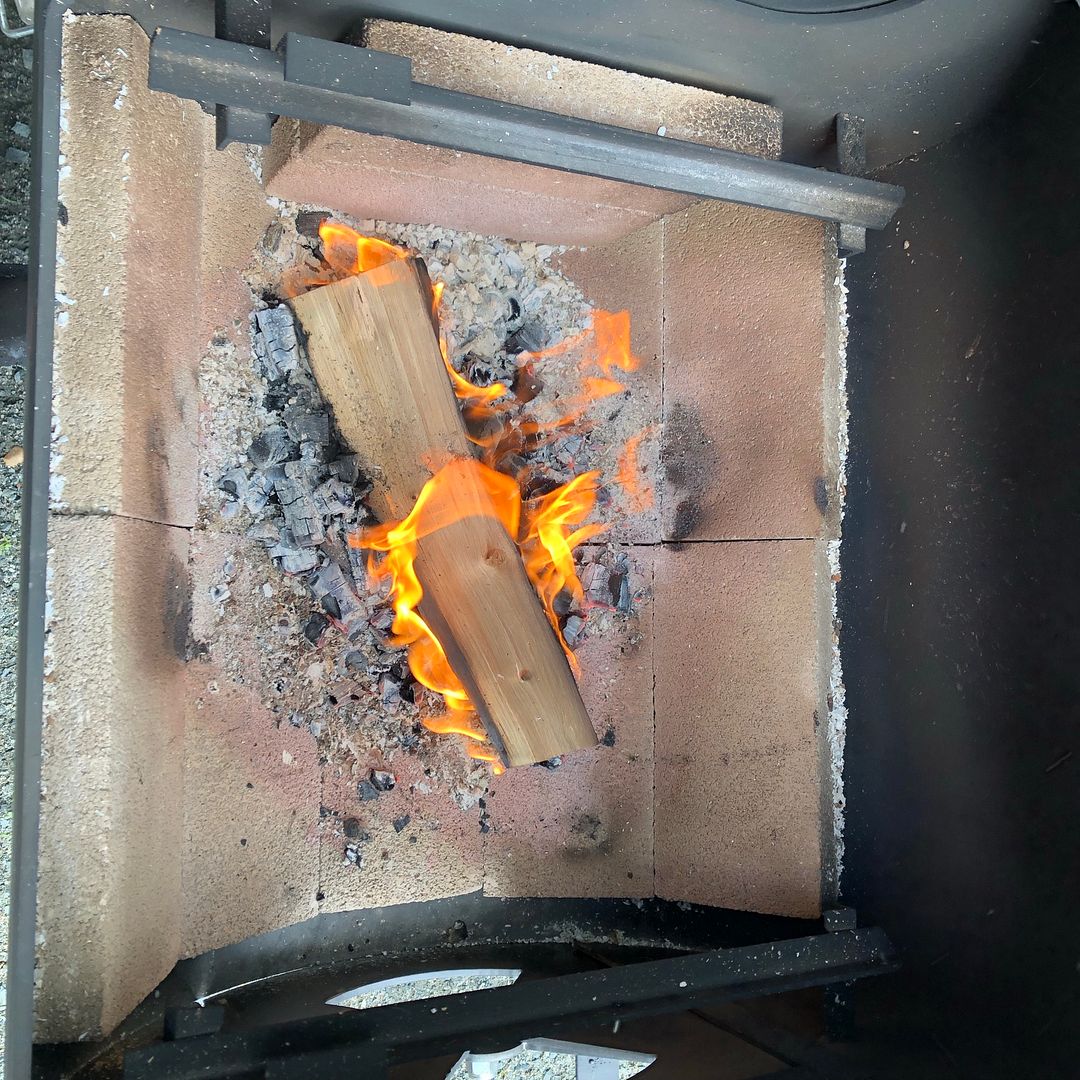
Yep, even if just grilling some weenies on the Weber kettle I use lump. 

  Ive tried some of the “natural” briquettes and the “lump briquettes “ ..... and they all give off odd smelling smoke (at least at first)

 
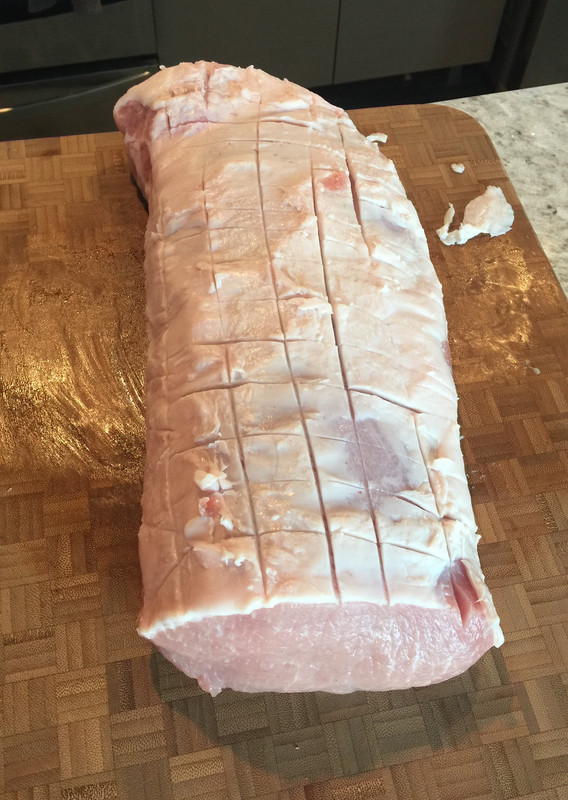
Well, here’s what’s going in the offset tomorrow. I got a 4.75lb pork loin, trimmed some fat and scored the rest: 

80-F0-B431-ED9-D-414-B-B375-0-CB5-D72544-D6.jpg


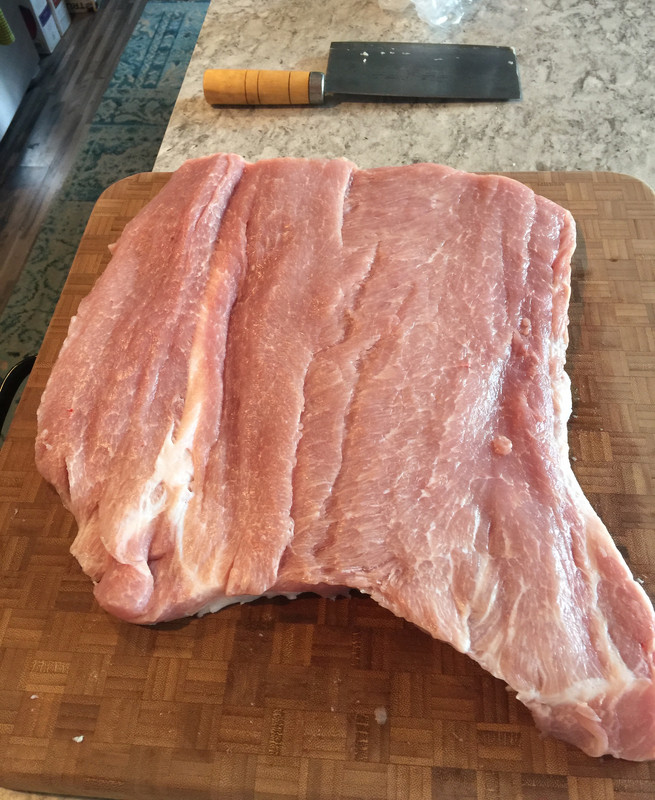
  I then butterflied it:

692-B0-DF0-C30-C-4-AD3-B299-1-EF19-DE731-B7.jpg


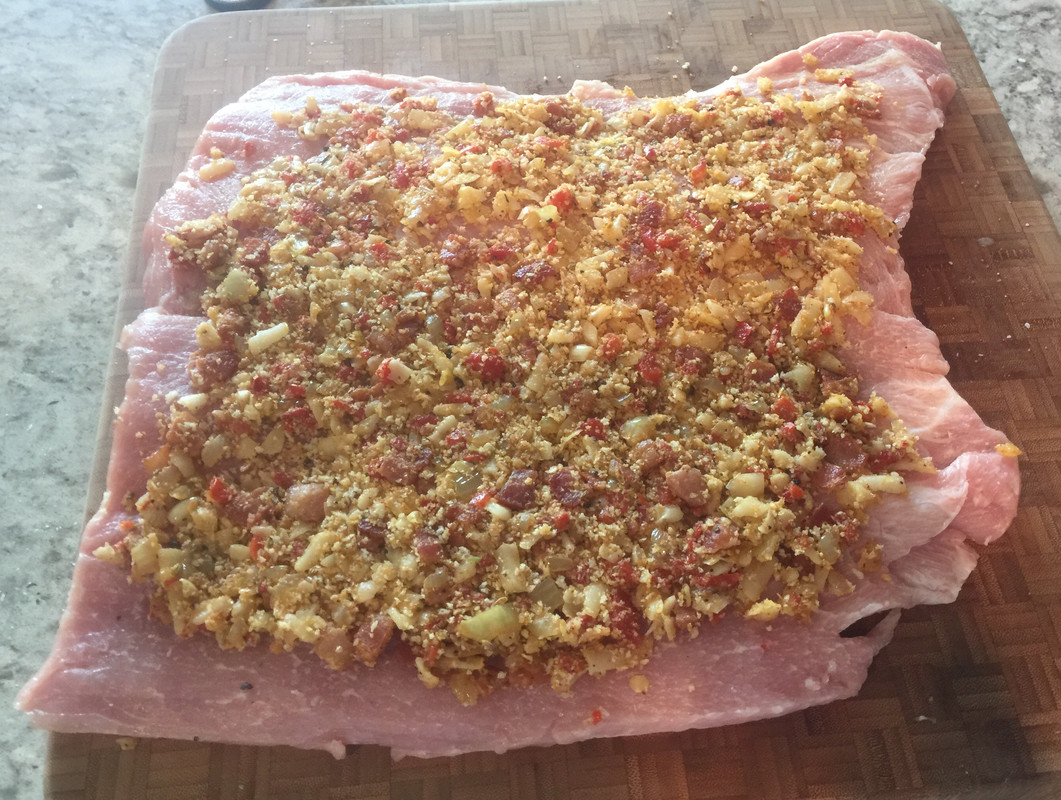
  Then coated the top with a filling:

9043-F16-A-8-D6-C-4-EF0-BFBF-A793743-A04-BD.jpg


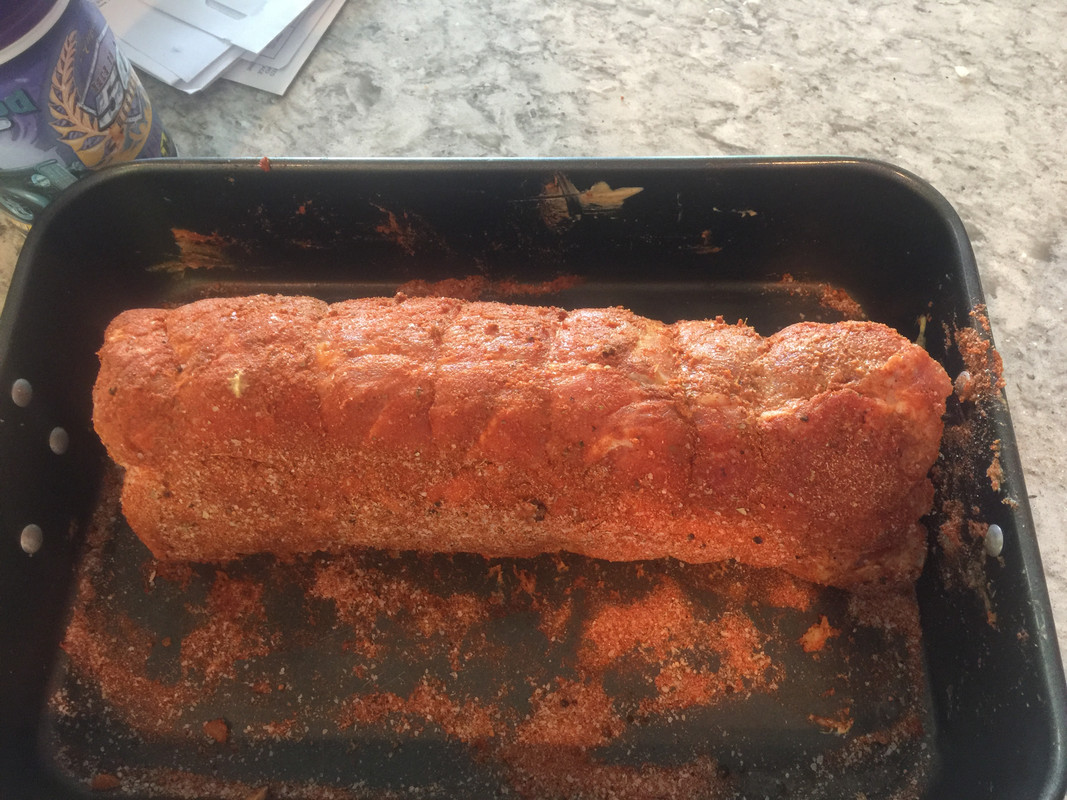
  Rolled it back up, tied it, and coated with rub:

B18-D3186-2-BC5-43-D3-851-A-2-EA05-E7-D7413.jpg


 Will chill overnight then put in sometime tomorrow afternoon.

   Filling:

  3 slices of thick cut bacon, chopped up into tiny pieces, rendered down in a pan, then added 1/2 cup chopped onion, a bit less than a 1/2 cup roasted red pepper(roughly diced), 4 cloves finely chopped garlic, 1/4 teaspoon freshly ground fennel seed, 1/4 teaspoon black pepper, just a pinch of salt (as I salted the loin after I butterflied it). After the above cooled down... 1/2 cup of shredded cheese (Gruyere), and 1/2 cup Panko breadcrumbs.  I also added a bit of Cajun seasoning. 

  The rub is my regular rib rub, but I added a bit more white sugar, and some more of the Cajun seasoning. 

  I figure it will take about 2-1/2-3 hours to smoke @ 225. Will be using mesquite and applewood. More photos to come...

 
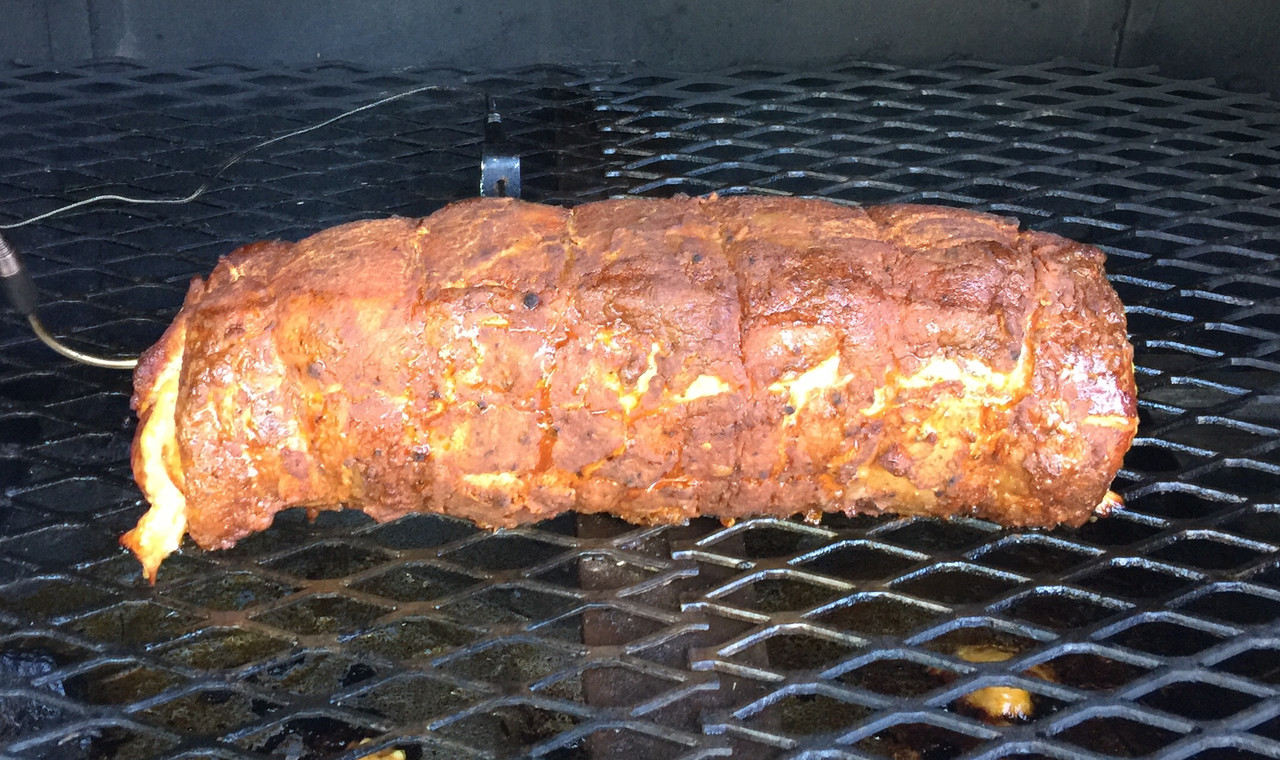
Update. Loin has been in the smoker for 2 hours. It’s at 227F right now. I’m pretty happy with the new lump. Been tossing in several fist sized chunks of mesquite and applewood periodically.        

Burning a bit hotter than I originally planned, chamber temps have stayed between 248 and 263. (255 average) Have consumed several glasses of scotch and 3 cigars. 👍 Looks like I’ll be pulling it 140 and wrapping it up to rest in my cooler for about an hour.

  Will post pics when I go to cut it. I’ll eat some, give a chunk to my neighbor, and put the rest in the freezer for when the wife returns (she’s in MN to visit her brother who just had heart surgery yesterday) 

   Added...Photo in the smoker when I opened it to pull it out:

58-C7-E9-BB-1107-42-EB-AB76-19711621-BAD7.jpg


I did a bleu cheese stuffed pork tenderloin once that came out nice and once that came out dry. Since then I've shot for rare temps and let it coast up any more.  I like the "holiday roll" of this.

 
Never tried a rolled pork loin.  Generally just cook it whole and pull it at 140F as you did.  It always comes out so nice and juicy.  And it's so cheap!

Those beef ribs were "Back Ribs", bought in a vacuum pack at the local supermarket.  I've got the back ribs at Walmart in the past and they aren't all that meaty either.  Going to have to go in to the local butcher one day and ask them to get 'hold of a couple of short rib "plates" for me to get some good meaty ribs.  Damn beef is so expensive these days...  but it's so good, too.

I've been using lump for my starter fire in the offset.  I can generally find Cowboy brand, which is OK.  Still use briquettes in the UDS for the long burn on pork butts.  Have used the Royal Oak or Cowboy brand briquettes and they don't seem to have that Kingsford taste.   

 
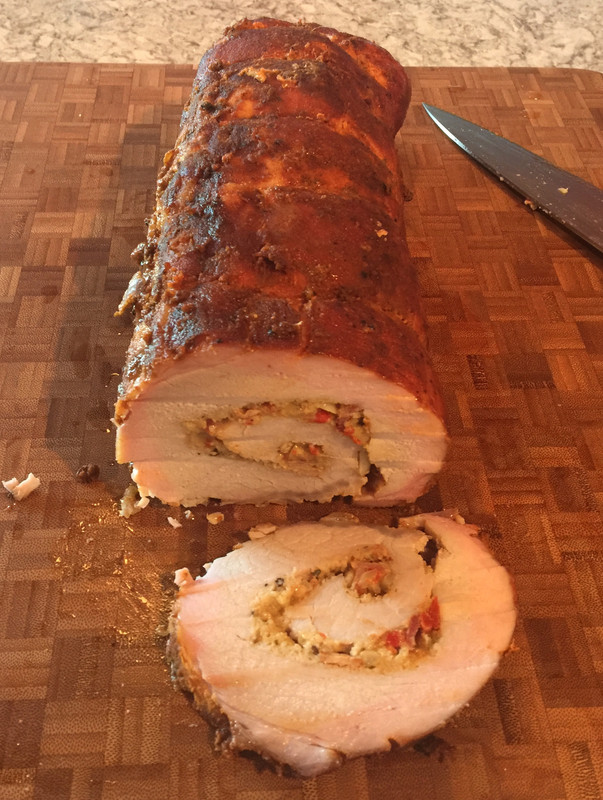
The end was a bit dry, which one might expect, but the middle was fine. I just happened to see a recipe for stuffed loin and thought I’d give it a try. That recipe also  layered Prosciutto ham and thin apple slices along with the fried bacon filling.  I had the butcher cut the loin in half, as I didn’t want to cook a 10 pound loin. Butterflying it was easier too.

  Hard to see in the photo, but there was a good 1/4” smoke ring, and the end piece did seem to pick up more smoke flavor.

  I hear Kingsford also makes all wood (no fillers) pellets for pellet smokers. I did like their “all natural” briquettes over standard Kingsford briquettes, but can’t find them now. 

  I’ll likely ask my local butcher (where I got the brisket point) to get me some meatier beef ribs too. Pork is still fairly cheap here, but beef is definitely up in price. 😠

 
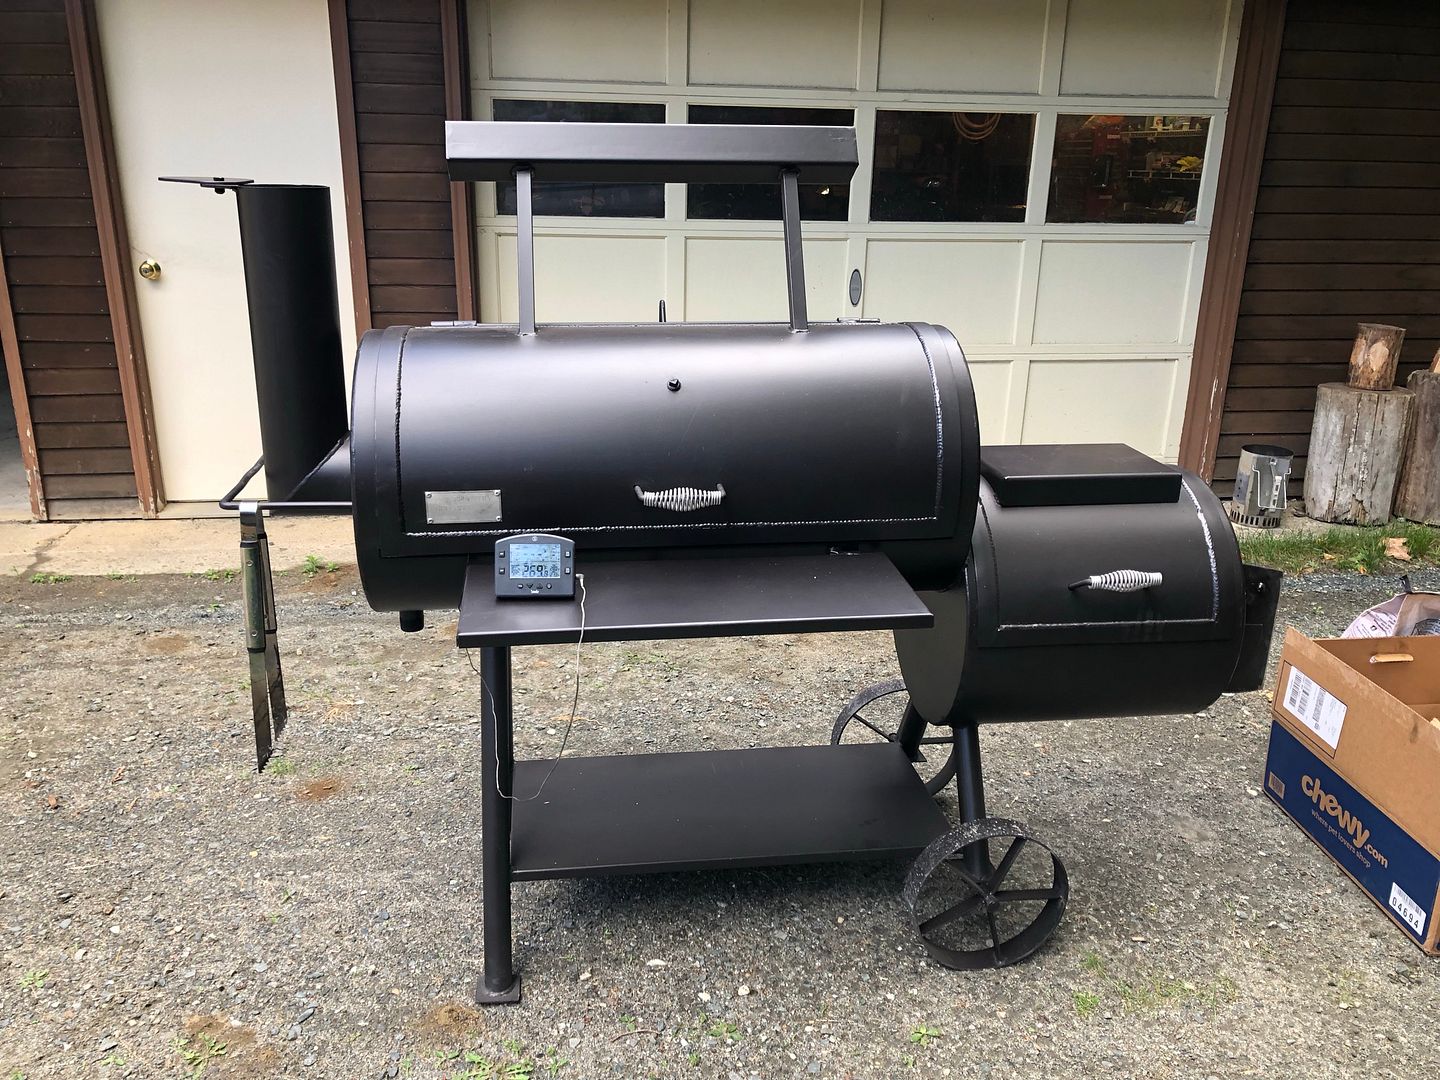
Well, my new Old Country Brazos offset smoker finally showed up today.  Truck drove here from Albany where it picked it up from the freight company.  When the driver rolled open the rear door, I could see the smoker was plastic wrapped and strapped to a pallet.  But the pallet was broken and the whole thing was sitting on a second pallet, the top of which was also broken with the left feet (ones without wheels) sunk all the way to the floor.  Driver wrestled it back onto the top of the lower pallet and used a pallet jack and the lift gate to get it down onto my driveway.  He was nice enough to help me get it unwrapped and off the two busted pallets and then take all of that away with him.  
 

The only damage was the handle on the chimney end had been whacked and was bent inward a little.  Everything else looks fine.  So I bent the handle back into place roughly, put on the lava-lock gasket on the cook chamber door, and fired it up!

79FD8288-2406-4760-A0E6-11BB34FB27AE.jpeg


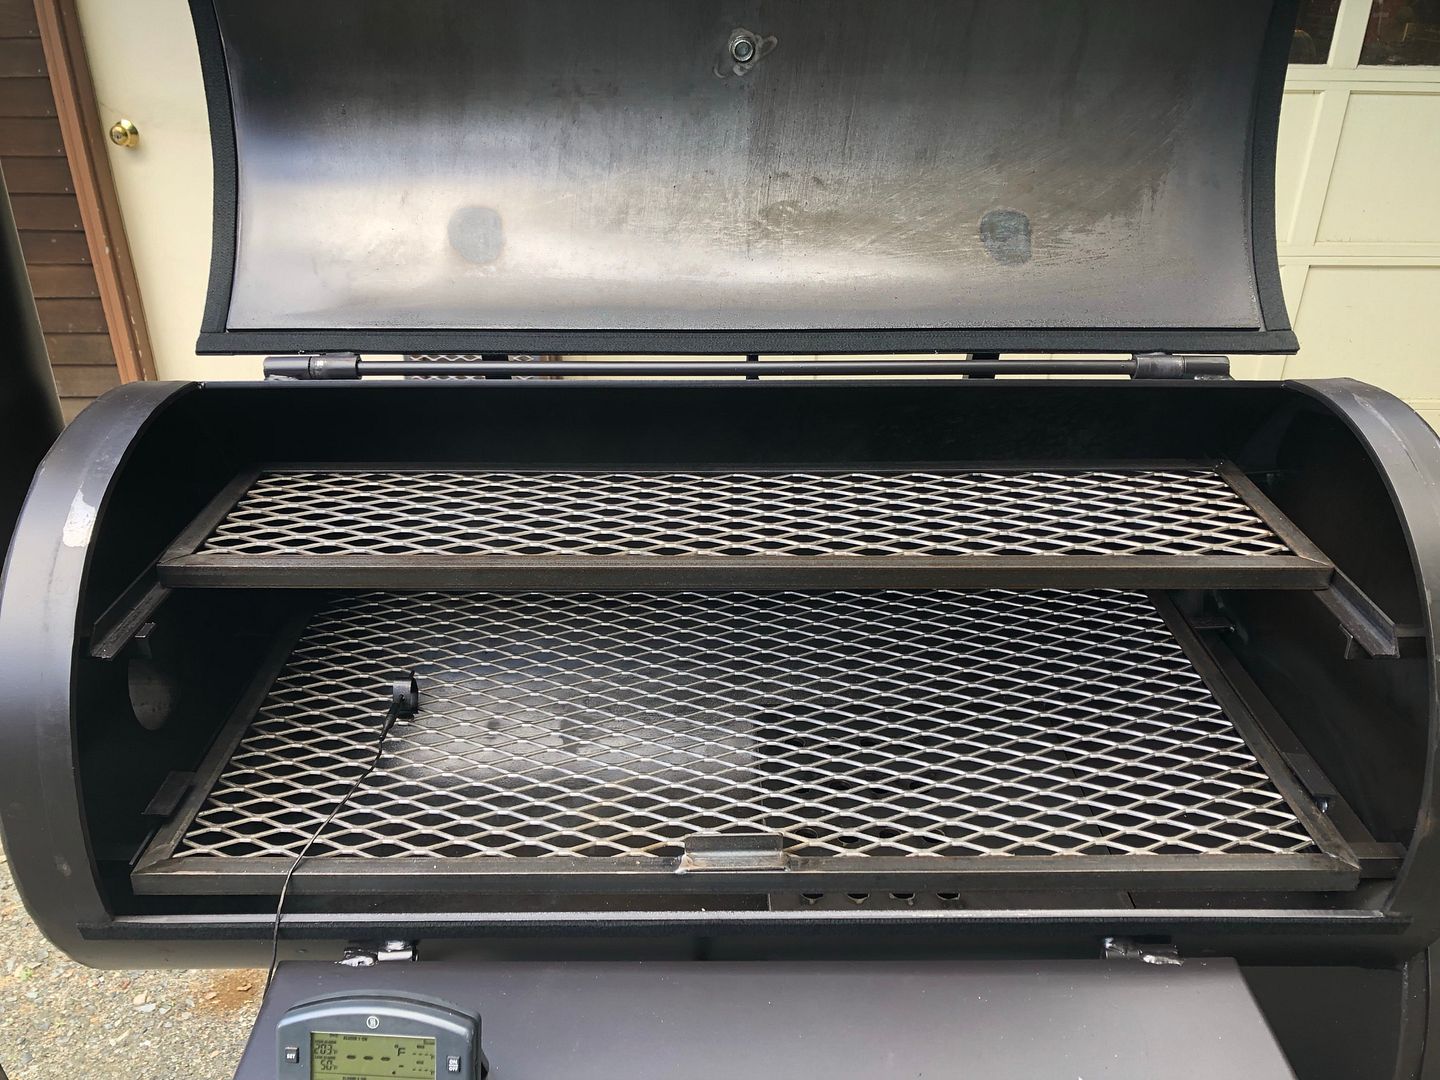
I got the DLX version, which gives you the big counterbalance on the lid, a half width tuning plate, and an ash hoe.  I also got the smaller second grate above the big main grate, but that may come with the standard Brazos too.  The cook chamber is 40” long and 19” diameter.  The firebox is 20” long and also 19” diameter.  And the chimney is 6” diameter..  Everything is 1/4” thick steel

30637286-D0A5-4D1E-9410-30367902C9EE.jpeg


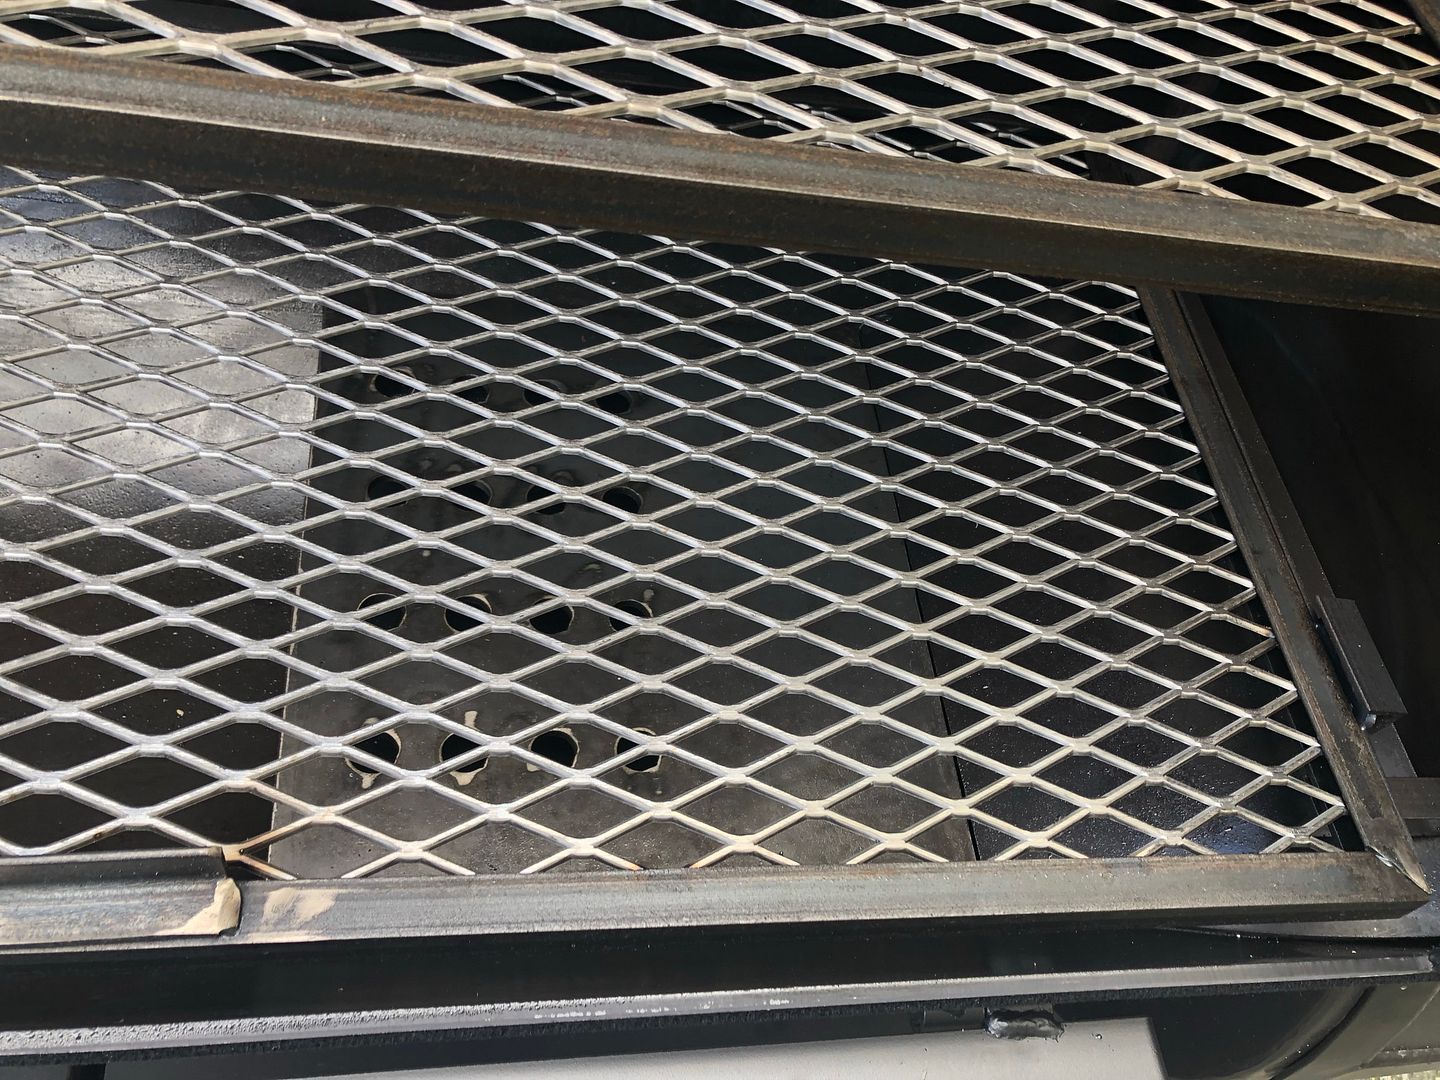
There is an angled deflector welded in on the firebox end, and you can see their version of deflector plate only goes 1/2 way across the cook chamber

002BEC38-310D-43BC-9B87-88335AD97C4E.jpeg


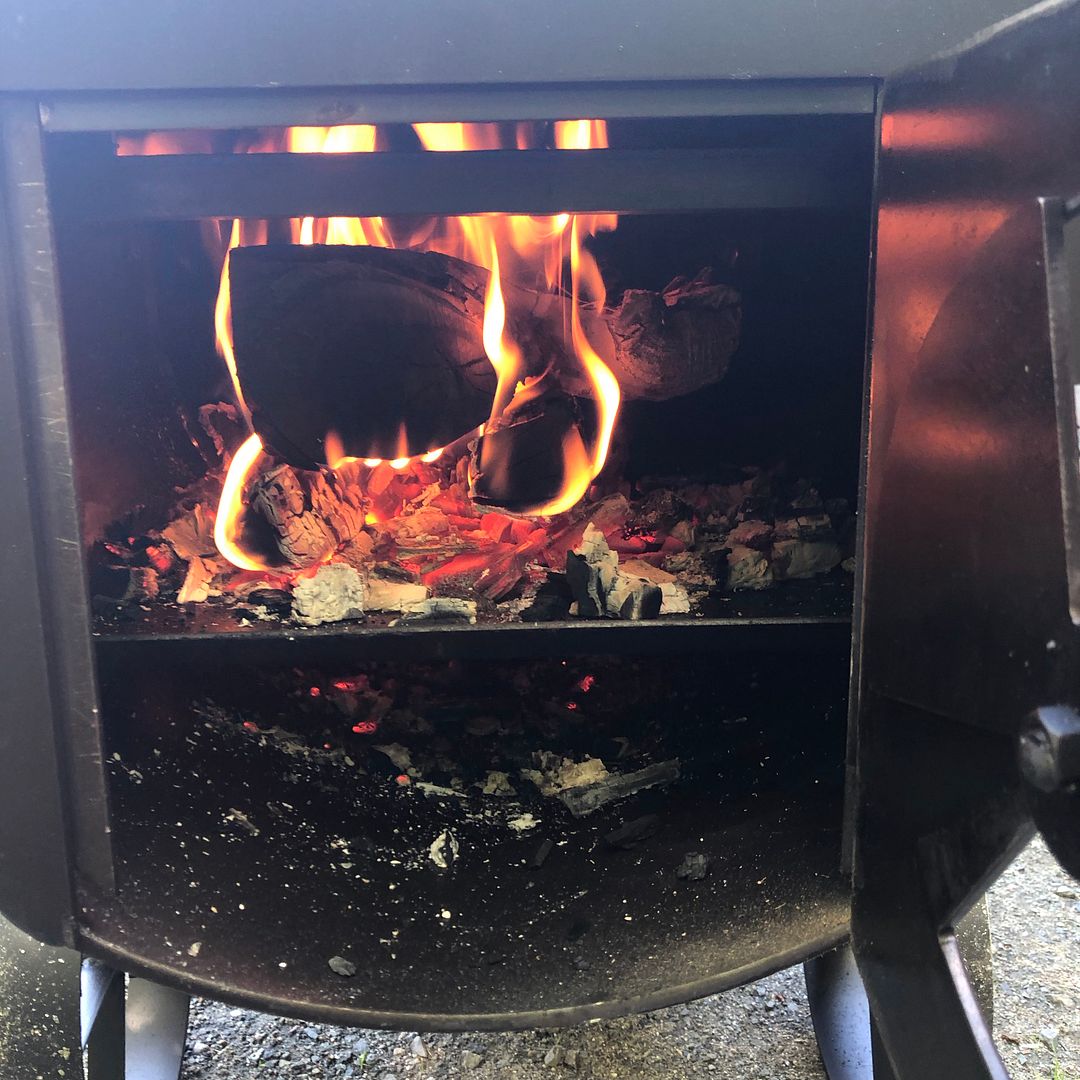
Built a nice fire to burn off the manufacturing grease and oil.  Takes a little longer to come up to temp than my little Oklahoma Joe did, and I think it’s going to burn more wood per cooking session, but it seems easier to maintain the larger fire required, and may be steadier heat.  
 

BA59389B-7B63-4C55-A199-1B4CA54E98A5.jpeg


Also, because of the bigger fire, it seems easier to maintain a clean burn with good clear smoke.  That was a constant battle with the smaller pit.  The lava-lock gasket worked well to seal up the irregularities of the big cook chamber door.  The firebox door leaks smoke, but who cares?  There’s plenty of smoke and heat from the fire.

After a while I sprayed down the entire inside of the cook chamber with some canola oil and gave that a while to bake in.  Going to go out later and pick up a dial gauge thermometer for the lid, even though I have the ThermoWorks Smoke digital, it’s nice to have two displays.

From what I’ve seen online, these pits are supposed to run better and more even temps without the tuning plate, but with a 16-18” extension on the chimney.  Might pick up a piece of 6” stove pipe while I’m out to try that next time too.

 
Thanks, Scott.

I’m loosely planning on getting a couple plates of Beef short ribs (Dino bones) from our local butcher shop sometime soon.  Got a gift card for fathers day that is destined to become short ribs.  But with the 4th upcoming, and a good crowd expected here, I’ll probably find something from a pig to cook, since pork is so very much cheaper.  I just made a few racks of St Louis cut pork ribs last weekend (not on this pit, obviously) so the locals are likely to want something besides ribs.
 

Me?  I could eat pork ribs every weekend myself, but my cardiologist probably would disagree. ;)  
 

I do have a bunch of that brisket down in the deep freezer that I scored when it went on sale for $3.99/ lb.   Could do a couple of flats and a couple of points for the holiday.

While I was burning the new pit in I started searching through my plumbing supplies and found that I already had everything I needed to put a ball valve on the grease drain.  1 1/4” to 3/4” reducer, 3/4” close nipple, stainless 3/4” ball valve, 3” length 3/4” nipple and the requisite grease bucket.  So that’s all set already. 

 
Looks pretty sweet Fred. My reverse has a 33X23” food grate, which gives me about 759 square inches of cooking area, close to what you got there. Have yet to fill it all up, but it’s nice to have that space. 

  Just about all the reviews I’ve read on your Brazos have been positive. Am sure the two of you will be very happy together ❤️😉

 
I was very happy with the LavaLock high temp gasket that I used on the cook chamber of my OK Joe Highlander.  It sealed that door up tight, and the surface was not at all even.  The same gasket that I put on there when I first bought it 6 years ago now (time flies) was still stuck on there doing its job when the new owner drove it away this week.  It was a melancholy moment.  Joe and I had some good cooks together.  I’m betting that Joe’s new owner, Mike, will make some good BBQ too.

So, anyway, that was why I ordered the Lavalock gasket for the Brazos even before it arrived.  In the case of the Brazos, the big overlap of the lid fits well all the way around, except along the bottom lip.  So I ran the 3/4” wide gasketing all the way around on the underside of the door, then a second piece on the bottom lip of the cooking chamber for double thickness.  That sealed up the bottom, and as a bonus it gives me two soft surfaces to run my thermo-probe wires through without fear of crushing or melting them.

I’ve run a few fires in the pit already, and the last one I cooked some wings in there as a means to test how even the temps are.  Advantage of wings over canned biscuits is I actually like to eat them after the testing.  One of the “mods” I used in the testing was a 2’ chimney extension, which gets a lot of recommendations from owners to improve the convection through the pit.  The chimney is a massive 6” diameter, but is only about 20” tall.  The tests I ran with and without the extension confirmed it is needed.  But the cheesy 6” stove pipe I used for the tests can’t be the answer.  I’ll have to connect with Old Country and see if they will sell me some of their chimney pipe to weld on permanently, and the move the damper up on top of that.

I’ve also realized that this pit is very, very heavy.  I can barely pick it up at one end by the handle and shuffle it around on the out-of-round steel wagon wheels, but just barely, and I’m not getting any younger.  So, I’m scheming on replacing the stock, eccentric wagon wheels with pneumatic wheels and tires of about the same diameter, and fitting some steerable wheels on the other end on some go-kart steering spindles so I can still wheel the smoker into the garage when it’s not in use.  
 

Sorry, not much in the way of photo documentary, but I’ll try to improve that as the build continues.

The wings were good too.


You know, when I looked at the photos of the Brazos I actually thought to myself, “4ft long, 19” wide, 1/4 inch steel?  Things got to weigh like 200 pounds. Why the rustic metal wheels? Gotta be a pain to roll around” 🤔

Had metal wheels on a wine cart and it only took one tiny almost invisible pebble to stop it from being rolled about. 

    My pit came with solid rubber ball bearing wagon wheels and ... was a bitch to move, and it’s made from thinner steel.  (And that’s why I built a concrete pad for it and parked it permanently.)

  Go cart steering?  Maybe you can go a step further and get a small motor to drive the wheels and a remote control for the steering so you can just sit on the porch and drive it into the garage after you’re done using it? 😜

 
I did a small brisket over the weekend (sorry, no pics) on my Camp Chef pellet smoker.  It came out good, but I did over-cook it a bit. It has been a long time since I have done a brisket. Let it get up to 204 before pulling. It was fall-apart tender. Next one I get I will pull at 198-200 range. 

 
@Knifemaker - Actually, the Brazos pit weighs about 400 lbs.  It really is a chore to move it around.  The steel wagon wheels wouldn’t be a problem if they were round, but unfortunately where they welded the strap to make the hoop there is a big weld joint.  I had read about that “feature” before I committed  to buying one.

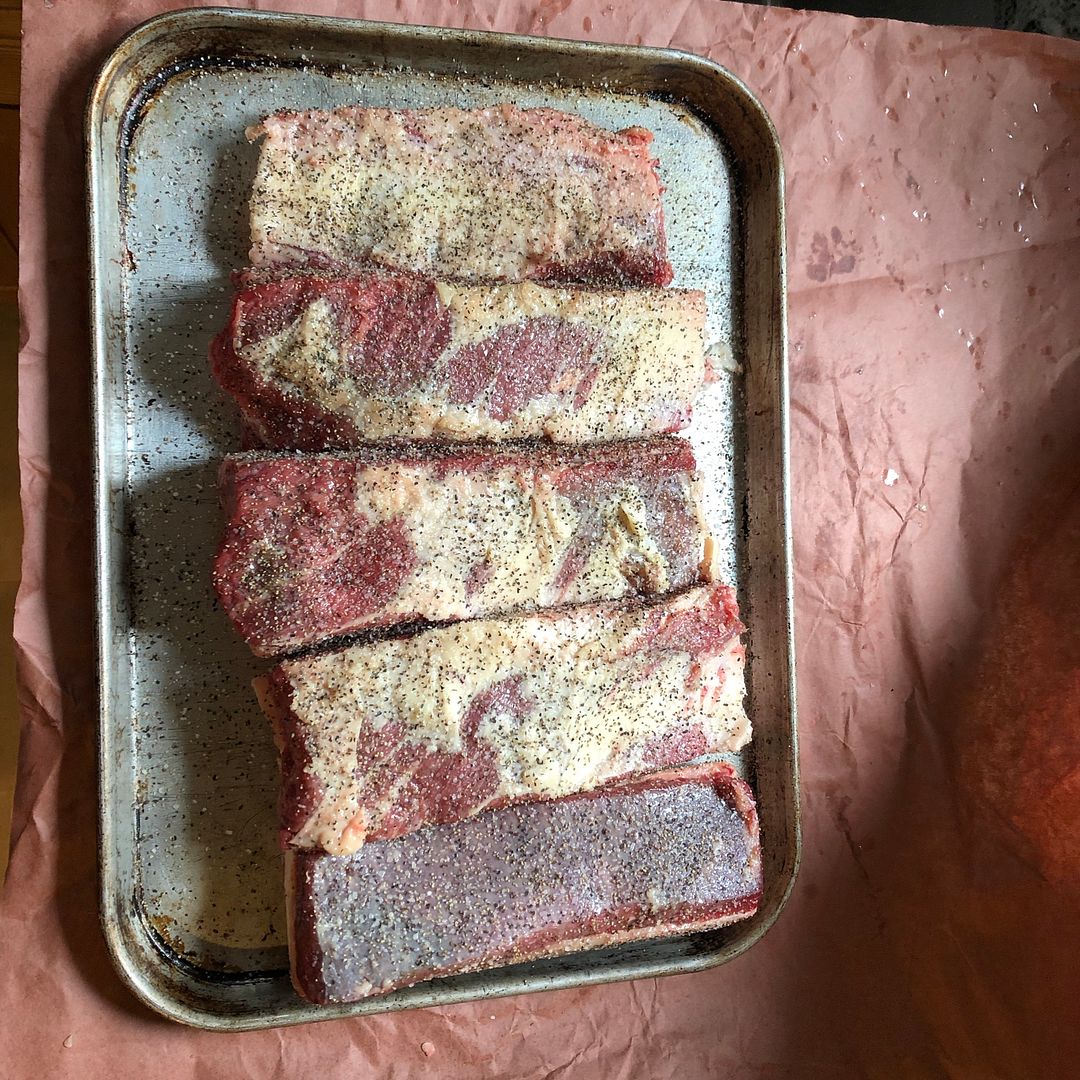
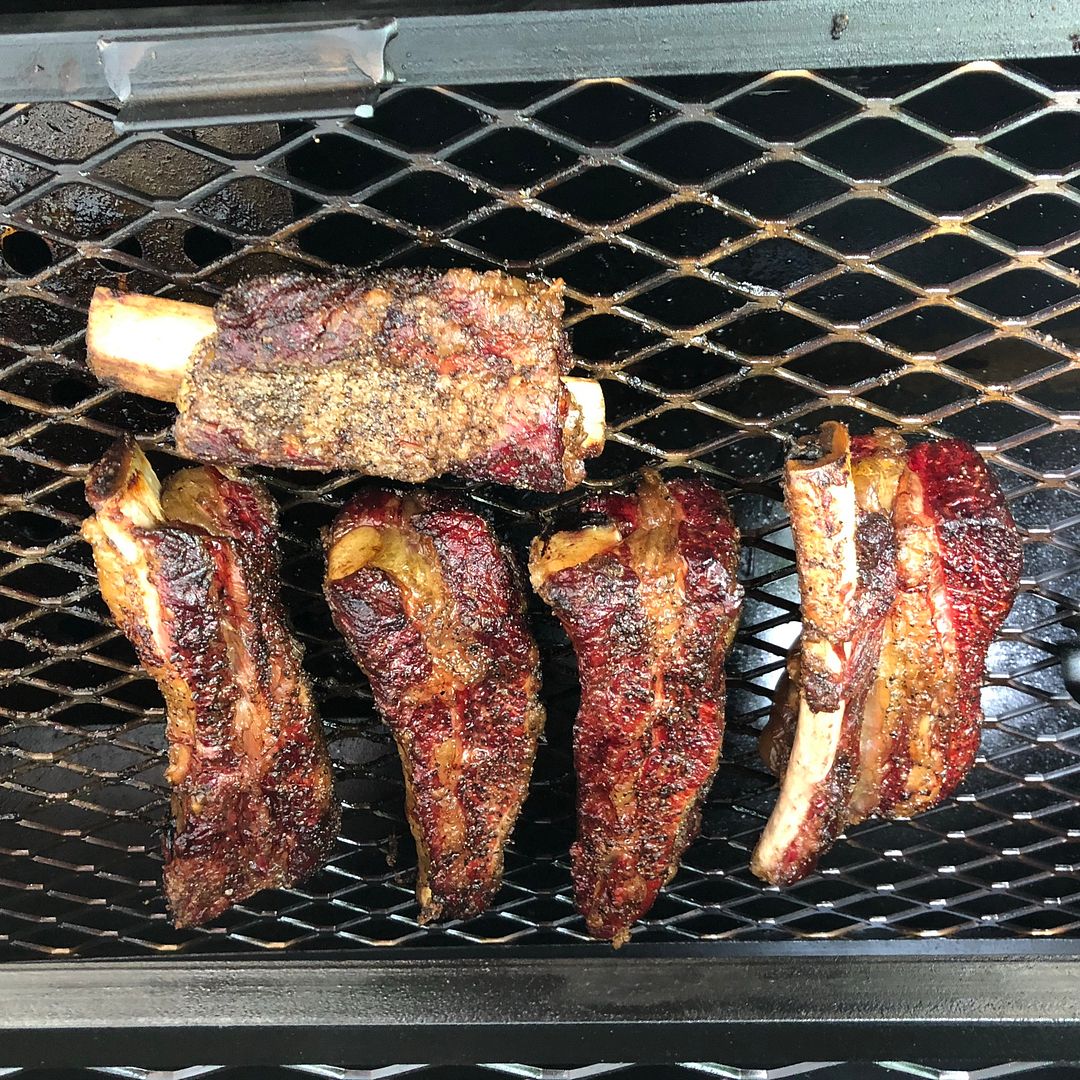
Went to the butcher this morning and picked up a 5 pack of dino bones.

C0F935F0-DEE9-43CF-8501-521CFC87C32A.jpeg


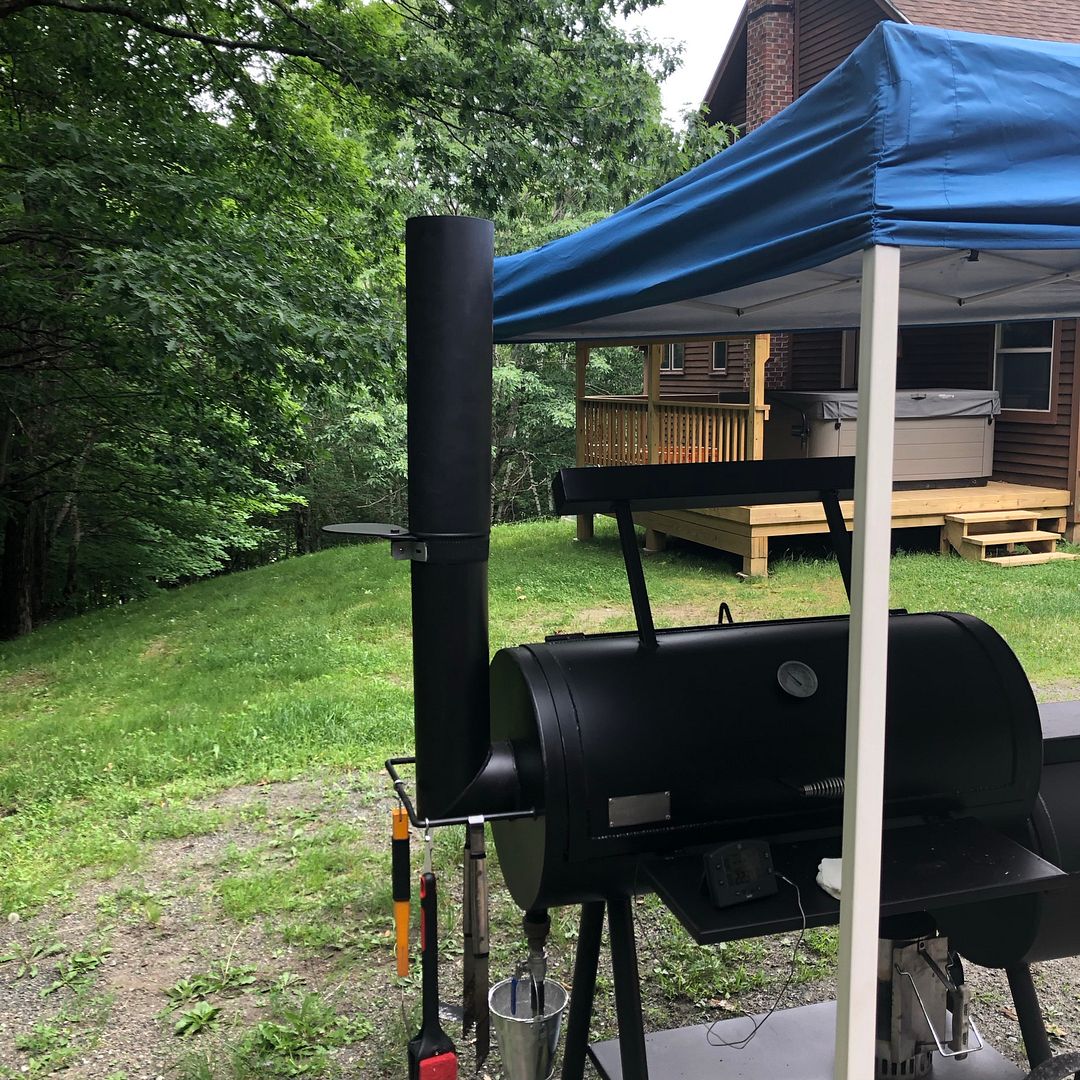
Salt n’ Pepper rub and onto the new pit.  Put up a canopy because we are slated for some sprinkles throughout the day.  Here’s a shot of the 6” - 2 foot tall stove pipe chimney extension mod

290AEC96-084C-444C-B329-66E89A808A36.jpeg


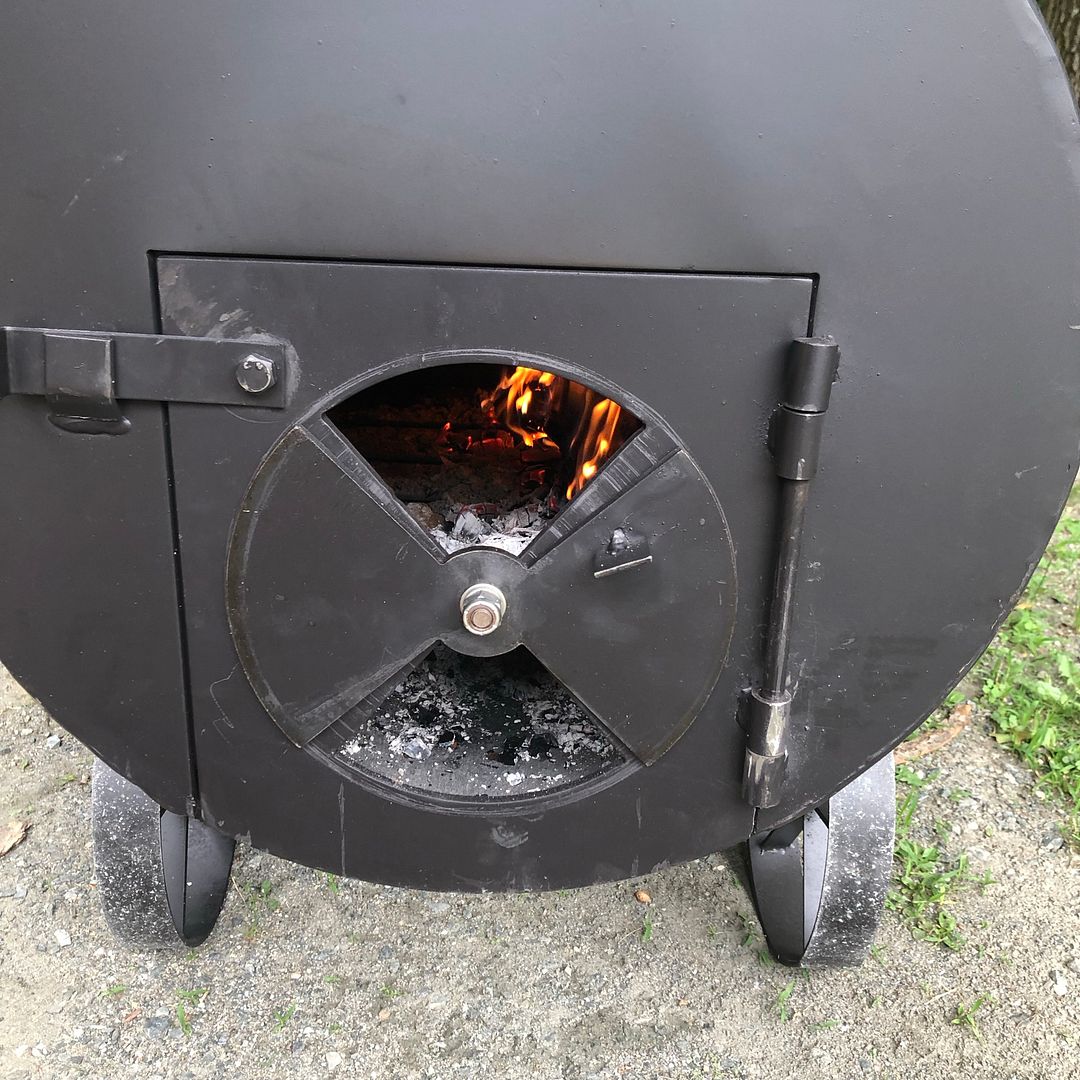
And at the other end, I cut the bolt off holding the butterfly damper and re-mounted it on the outside of the door so I can get maximum air in with the door closed.  
 

1A29BEB5-A841-4D05-A625-9596D3CC6F19.jpeg


With those two mods I’m getting really good flow through the pit and nearly even temps at grate level from right to left.  To raise the temp atvthe chimney end I just open the door a little.  To raise the temp at the firebox end I can close the door damper a little.  Works pretty slick.

Here we are 4 hours in.  Lookin’ pretty good.   I’ve got a couple more hours to go unless I want to wrap and braise, but should have time to go right through unwrapped.  Sorry about the iPhone image flip SNAFU.
 

EE503FE2-28CB-4B42-904A-9CE41FB93157.jpeg


(I had figured the pit weighed much more than just 200 pounds 😉)

   The ribs look great, even upside down.  Surprised they took more than 4 hours, (granted I have not done any yet) What temp you pull them at?  

   You now have me on a hunt to find some. (Beef short ribs right?) would Ike to do some for the 4th, maybe do up some of those ABT’s too👍

 
Yes, beef short ribs.  Very pricey, as is all beef these days.  And hard to find except at specialty butcher shops, which doesn’t help the price.  They were very good though and everyone enjoyed them.   I cooked them until I was reading well over 200 on the instant read thermo.  Mostly I go by feel.  Should probe like butter.
 

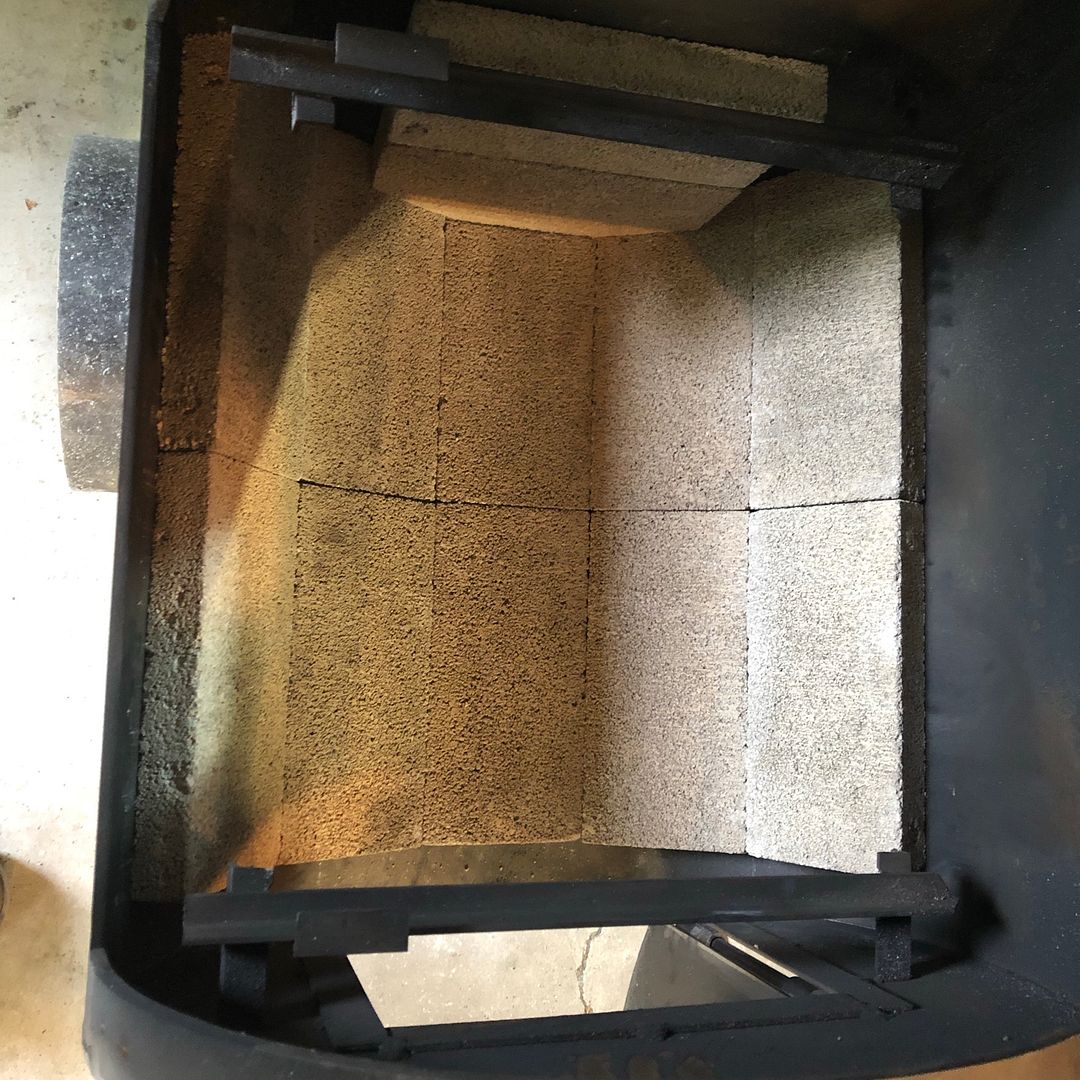
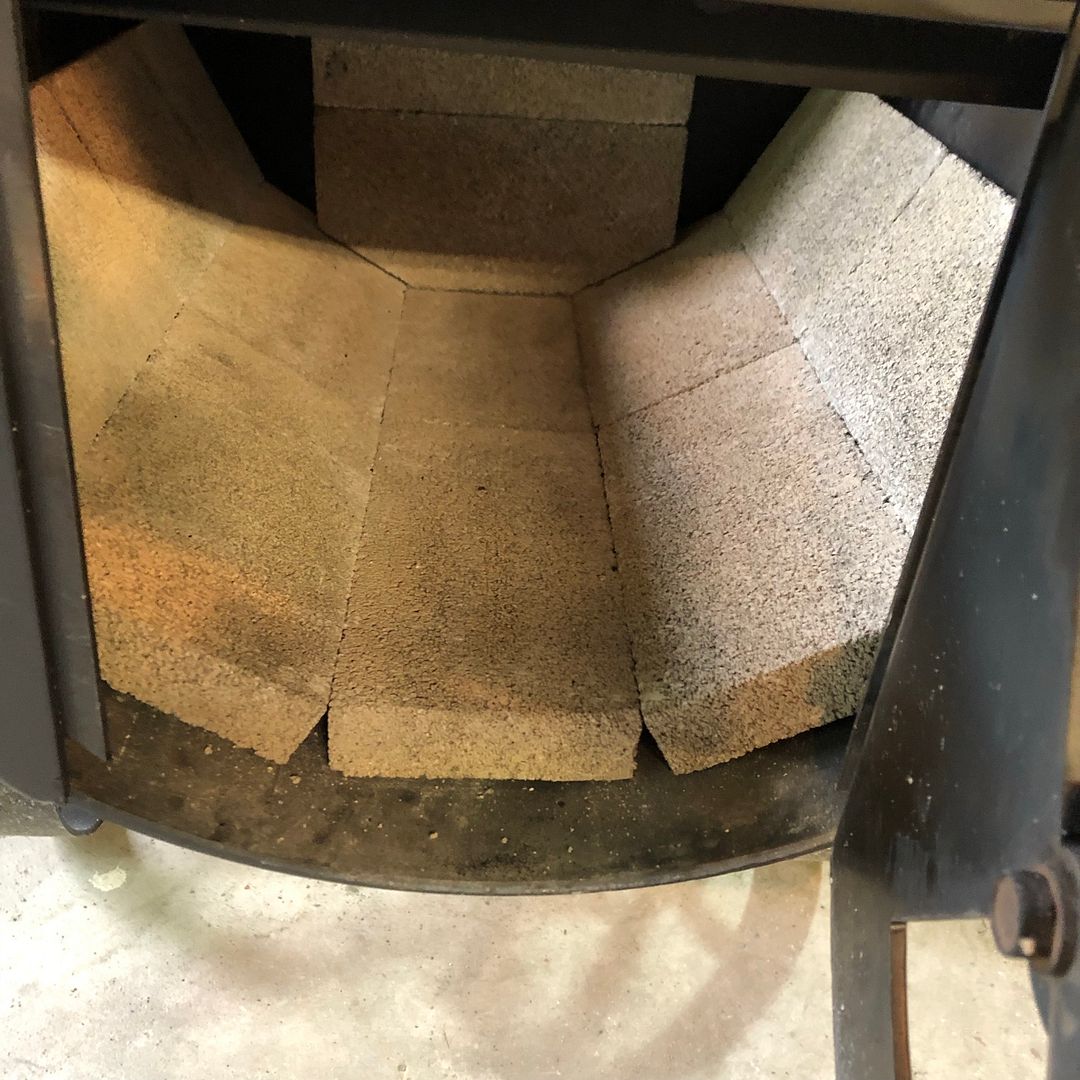
Made another mod to the Brazos yesterday.  Removed the fire grate/plate it came with and lined the bottom half of the firebox with fire bricks.

2E871226-89BD-4010-96C2-2423D61DE9BB.jpeg


E0C9DDA1-6123-4693-9540-1B537033C0C3.jpeg


 Built the fire right on the bottom, which is how most of guys with the really big pits do it.   No problem getting a clean burning fire with this.

ED783CD3-CA09-40DD-B7DF-4504FD09B40A.jpeg


The firebrick is very light weight.  It acts as an insulator / reflector of the heat.  Makes maintaining a small hot fire easier.

Cooked up a mess of ABTs and a couple butterflied legs of lamb for the holiday feast.  Lamb was just a short 3 hour smoke roast pulled at medium rare.  Used white birch (all de-barked) for the fire.  Gave a nice light smoke flavor.

 
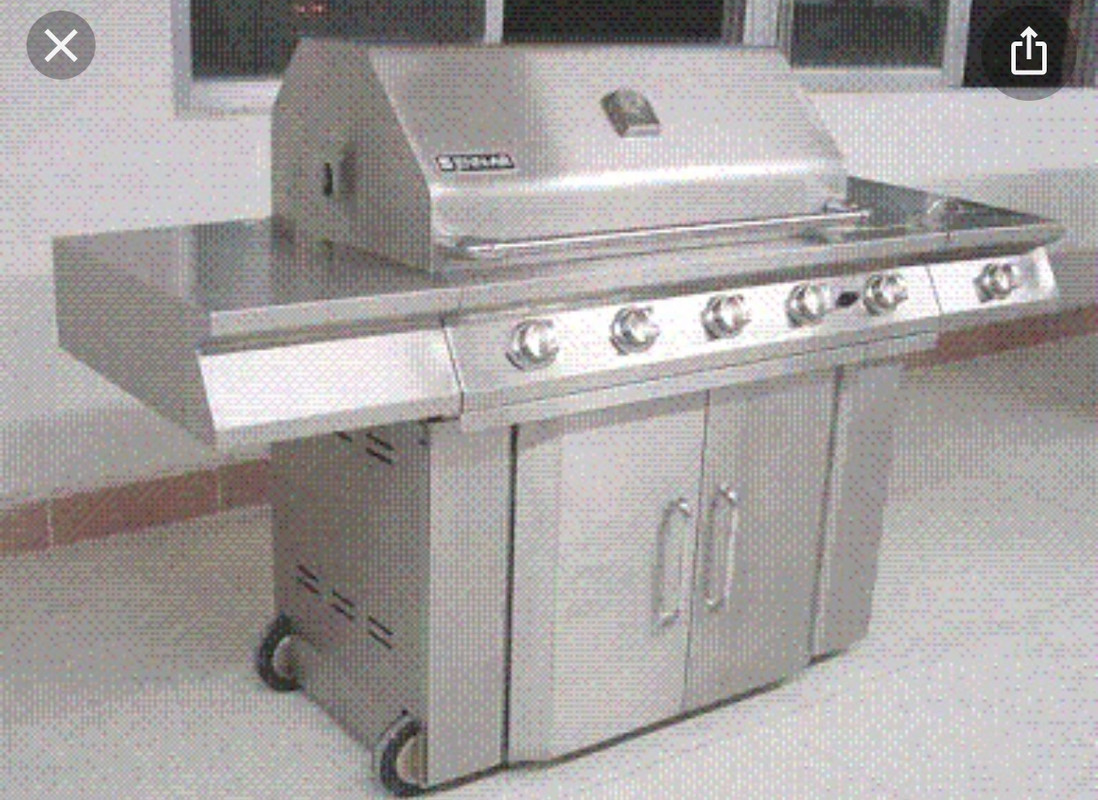
Awhile back I mentioned of not being sure about keeping my Jenn-Air gas grill. One of the burners crapped out, the grease trap’s mount broke off, and a wheel fell off. Otherwise, it still worked fine.

39951264-527-B-4-CA2-BDA1-6695-AD4-E28-EA.jpg


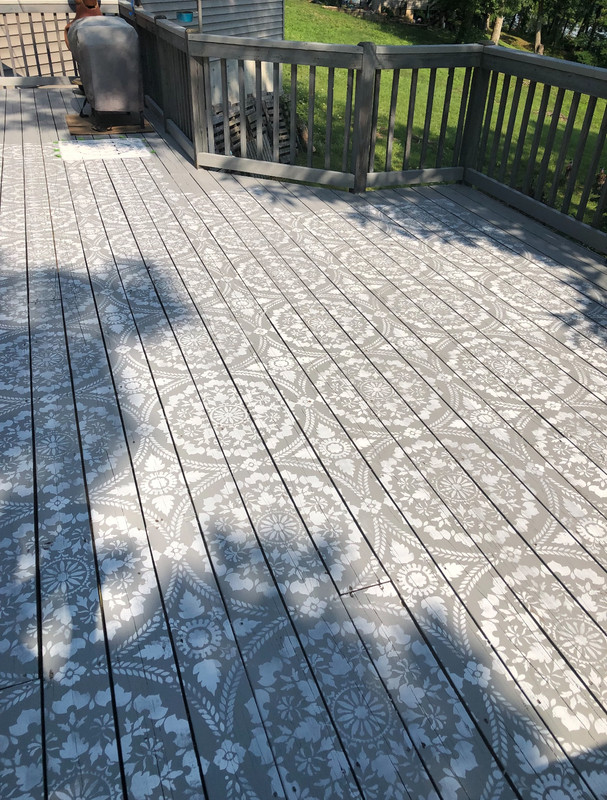
  Well as we have a hot tub on the way, which will be going on the deck, the wife decided to redo our deck, un- cluttering it and refinishing it ... by using an opaque stain and doing some stencil work:

73-E34-FD2-3228-45-D1-ACD6-52-F20-AA83491.jpg


   As I’ve only used the grill 2 times this year, and being it took up a bit of space, I decided to give it to a young couple who were grill-less. (The other objectionable aspect of the grill was it reflected the afternoon sun and blinded anyone on the deck that looked it’s way)

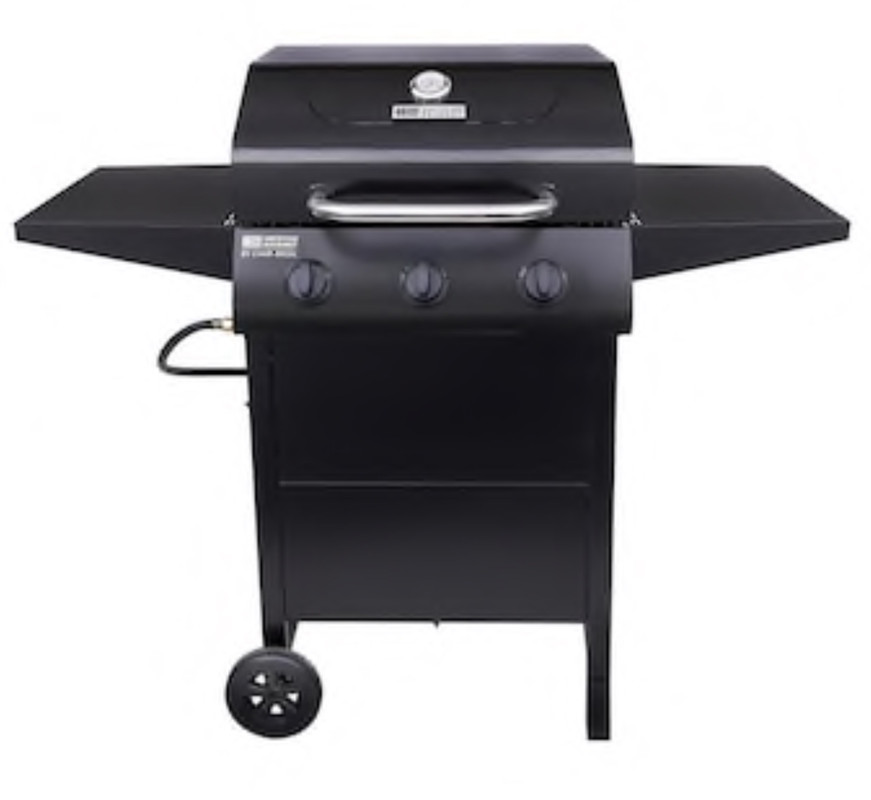
   I however did decide to replace it with a much smaller grill. (And one with a black surface) 

CAB33-CDF-C6-F8-4714-A022-C1-C94178818-E.jpg


 (Photo from a website, it sits in the garage unassembled in a box until I return from our vacation)   

    It’s an “American Gourmet” made by Char-Broil, and was on sale a Lowe’s for $129.00. Stainless steel burners, and porcelain coated grates. 360 square inches of cooking surface on the main grates and a 94 sq/in warming shelf, which is more than enough room for the two of us.  If we need more grilling area I still have my Weber Kettle Clone. 👍

 
Since we are already off topic anyway, I would assume that you know that you have to reinforce your deck before you drop the new tub on it, right?  The weight of the water in your tub will bring a standard construction deck to its knees.  

In our old home we had the tub on a cement slab on grade adjacent to the existing deck.  In our new home we had a new deck purpose built for the tub, which meant doubling up the floor joists in the area under the tub and adding an extra support beam and posts to carry the weight at the ledger board, as well as beefing up the main carrying beam.
 

We also put a roof over our new deck, but that is to eliminate the need to shovel it off in the wintertime, probably not a major concern where you are.

With the cost and unavailability of lumber right now I don’t envy you having to take on that project.

 
Top