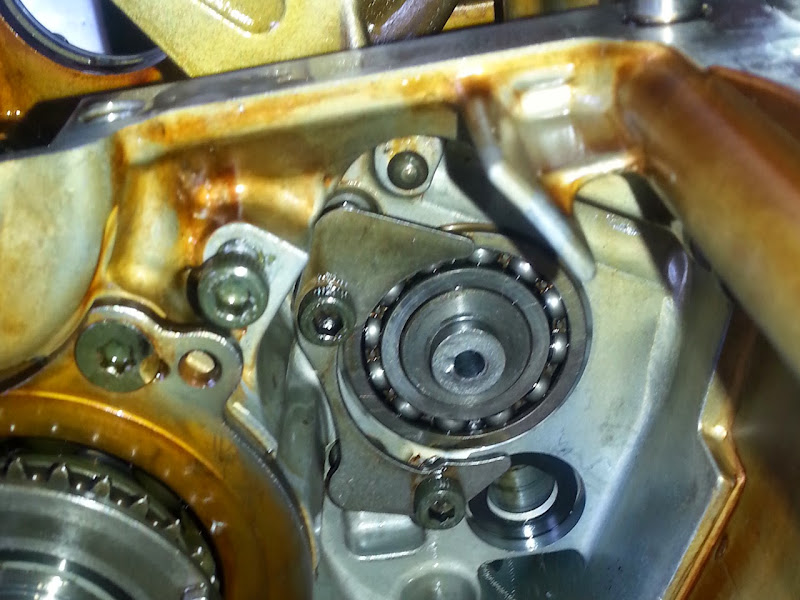
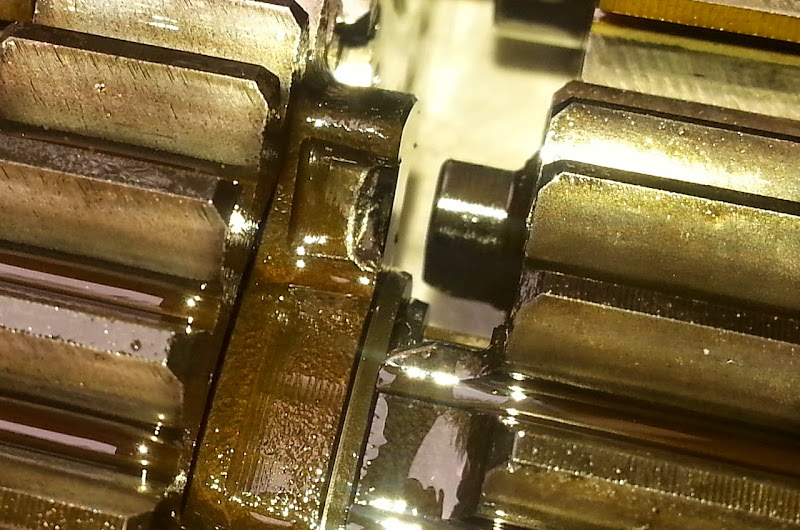
Tranny (shifter) bokerforked (Found: star cam broke off the shift drum!)

Yamaha FJR Motorcycle Forum

Help Support Yamaha FJR Motorcycle Forum:

This site may earn a commission from merchant affiliate links, including eBay, Amazon, and others.
Excellent work and very good description. That should give a lot of people (me included) the confidence to tackle an engine removal/swap on their own.

 
I'm working by myself, I have nothing with which to rig a hoist to get the frame off the motor, so I start taking stuff off with an idea to plan something as I go and hope for the best.
Bike is on the centerstand in the garage, with the centerstand on a pair of 2x4s for height. I removed the rear wheel and the drive shaft, which is all you have to do to free the engine mechanically from the bike. I put a board under the oil pan and jacked it up there, then I removed the front wheel and forks for clearance to the engine, and found that I could press down on the back of the bike and lift the front quite easily at that point. I stuffed the rear axle into the rear wheel, then put the stub of the axle into the swingarm, making a single-sided swing arm out of it. (Final drive is off, remember.) There's not going to be any serious weight on the wheel, it's just going to keep the bike from rocking too far back. Remember the centerstand is elevated about 3 inches or so. I put the top case on and put four bricks in it as a counterweight.

Disconnect electrical connections to the engine (easy checklist in the service manual) then start removing bolts (again, easy checklist.) Lowered the jack as far as it would go under the motor, then grabbed the frame and raised it. The motor tilted forward a bit as the frame came up, so I braced that with some more scrap lumber and tried again. Tilt the frame up, roll the motor forward. Engine out by myself, no lifting!!!!!

Pure Genius. Let me be the first to nominate you for the FJR "MacGyver" Award for that procedure!

Swapping the head from my motor to his should be much easier than turning this thing over and splitting the case, but OTOH I have the needed parts here on hand, including the shift drum and 2nd and 5th gears (and shift fork, just in case, to correct the skipping-under-load that I, too, have begun to experience in second gear.)
Stupidity retracted. You'll be getting a whole new trans when you do the head swap.

 
Last edited by a moderator:
Pure Genius. Let me be the first to nominate you for the FJR "MacGyver" Award for that procedure!
Yeah, well, thanks, but we'll see how it goes on installation......
weirdsmiley.gif


BTW, a mechanic friend of mine suggested I not use 'howie's engine, as he would not trust the pistons after they've hammered the valves. Cracks, whatever. But it seems I've read of cylinder head being repaired or replaced after such an event and the bike continuing along fine. Didn't Ionbeam go through that?? Thoughts??
 
Last edited by a moderator:
Very nice engine removal.

At this point, if you have at it and try to replace the parts in your engine, The worst thing that could happen is that you can't get it back together and then you would still have Howie's engine to fall back on. OTOH, if you do get the parts in correctly you'll have your engine back and no question in the back of your mind about how it will run.

 
BTW, a mechanic friend of mine suggested I not use 'howie's engine, as he would not trust the pistons after they've hammered the valves. Cracks, whatever. But it seems I've read of cylinder head being repaired or replaced after such an event and the bike continuing along fine. Didn't Ionbeam go through that?? Thoughts??
Good mechanic, I agree with his concerns. I had those same concerns with my valve killer. Since I was a leader in crushing valves there was no history to review so we chose to err on the side of caution and checked everything. My valve train was so crushed that it broke valves and damaged the head casting causing the casting to need replacement. This is just about the worst possible damage a no clearance cylinder head can have.

Short version: The reciprocating part of the engine is tough and almost certainly not damaged.

Details: We turned the engine over, uhh, flipped it upside down and removed the entire reciprocating assembly. We inspected the cylinder walls, no damage. We checked the crank with a run-out gauge and it was true. We inspected the plane bearing that the crank turns on and there was no evidence of contact or smearing, we also plastigauged the bearings and found them to be in spec. We inspected the piston wrist bearings and they were ok. We checked the rods and found them to be true. We inspected the piston tops and found no damage but independent of crushing the valves there were lots of stuck compression rings. Since we were there the rings were replaced.

Who knew: When we removed all the guts from the upside down engine, the balancers now being upside down spun around. Upon reassembly we very carefully aligned the balancer dots to the case lines per the FSM and put everything back together. When the engine was started it shook like a paint shaker. The engine was later taken apart but we couldn't find the problem. Finally a Yamaha tech was called in. In the Gen I engine it turns out that the balancers have TWO dots, a correct dot and a wrong (French?) dot. We didn't see the two dots, when we rotated the balancer we stopped at the first dot not knowing there was a hidden second correct dot. Once that was straightened out the engine ran like new. By the time we were done various engines had been removed and installed 3 times. OUCH.

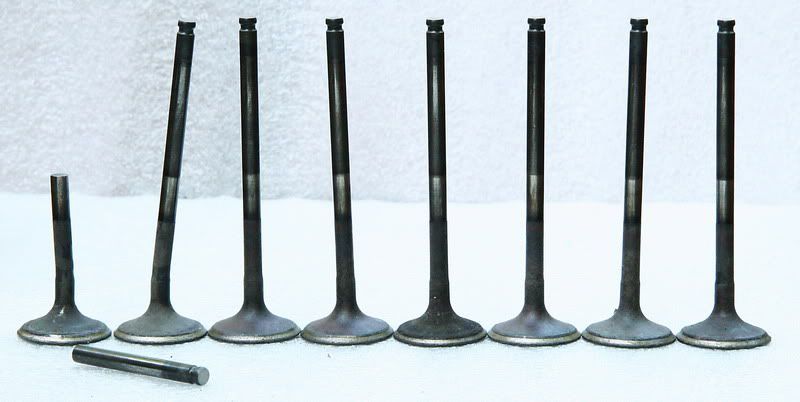
Exhausted valves:

ValvesSm.jpg


Last edited by a moderator:
By the way, we do not use terms like tranny here any more.... Will a mod please rename this thread to"

Alternative Lifestyle (shifter) bokerforked (Found: star cam broke off the shift drum!)
 
So as long as the motor's out, may as well check valve clearances. All are in spec except one tight exhaust on #2. .0071 is minimum, .006 fits but is rough.

Damn. Was really looking forward to knowing all was well and putting the cover back on!

EDIT: Nvr mnd.... Done. One of the others was loose enough (still in spec) that it had room to swap shims. Kept timing by tying the chain to the sprockets, and to the bottom sprocket, before I loosened anything. Buttoned up, turns over OK, all valves in spec.

Based on info from original owner, this is the first adjusted valve on this motor, well over 90,000 miles.
 
Last edited:
Well, since I've had so much trouble fetching Radiohowie's motor, and I have parts on hand salvaged by hppants from Patriot's bearing-failure motor, I've started in on the case split.

My car smells of anti-freeze every third time I drive it. Not every time, and it's losing coolant, but not a lot, so somehow I don't trust it for a 700-mile round trip. I've had co-workers down there twice during this time but they've not made the connection, so I PM'd 'Howie and let him know he was stuck with the lump for a while longer.

Today I got the motor turned over, the side covers off, oil pan off, oil pump and clutch basket out, and the shaft out that feeds the u-joint. I have to get another socket to get the middle gear shaft out, I already had to get a 30mm for the clutch basket nut, now I need a 36 for the middle gear axle. I think I'll just leave computers and open a bike shop.
 
Walt, You shoulda taken me up on my offer to take the lump to you. It woulda given me a real good reason for a ROAD TRIP!!!

I have two 36mm sockets. I only need one. PM me your address and I'll get it to you as fast as priority mail will allow. Good Luck. :)

 
Already bought one. Oops. When will I learn to check the forum first??!?!?!
smile.png


It was all of 8 bucks. Well, plus gas money to Sears, which is 4 miles away, so another 12 bucks for gas!!!!

 
Last edited by a moderator:
Well, since I've had so much trouble fetching Radiohowie's motor, and I have parts on hand salvaged by hppants from Patriot's bearing-failure motor, I've started in on the case split.
My car smells of anti-freeze every third time I drive it. Not every time, and it's losing coolant, but not a lot, so somehow I don't trust it for a 700-mile round trip. I've had co-workers down there twice during this time but they've not made the connection, so I PM'd 'Howie and let him know he was stuck with the lump for a while longer.

Today I got the motor turned over, the side covers off, oil pan off, oil pump and clutch basket out, and the shaft out that feeds the u-joint. I have to get another socket to get the middle gear shaft out, I already had to get a 30mm for the clutch basket nut, now I need a 36 for the middle gear axle. I think I'll just leave computers and open a bike shop.
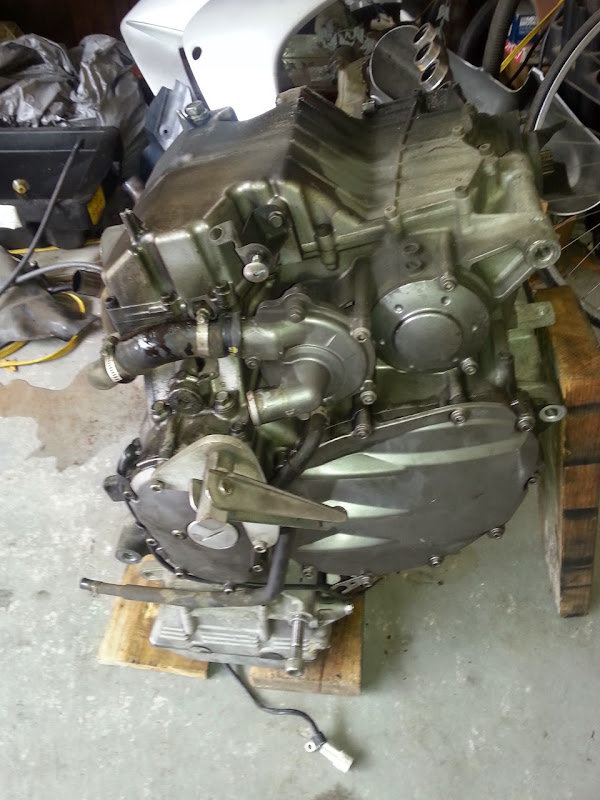
Damn Walt, you just rip into an engine like it was something as trivial as changing the oil, amazing. Can't wait for the pics
punk.gif


Your wish is my command!!!!

Got the case split today, and the gear shafts out. Found some issues, PM'd hppants, who autopsied Patriot's motor, to send me more tranny parts. I'll get to it momentarily, but I found some wear issues I was concerned about. Nothing that would cause the original problem, but stuff I want to take care of since the parts are there for the asking.
smile.png


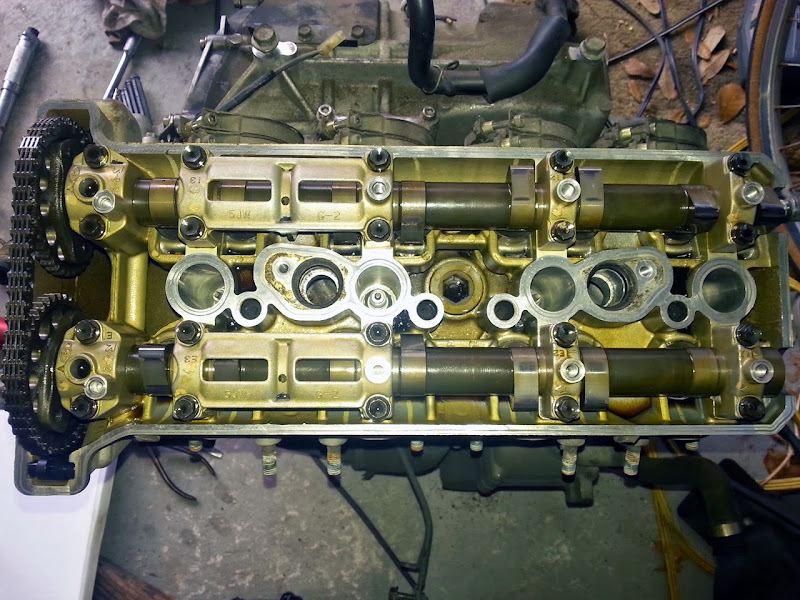
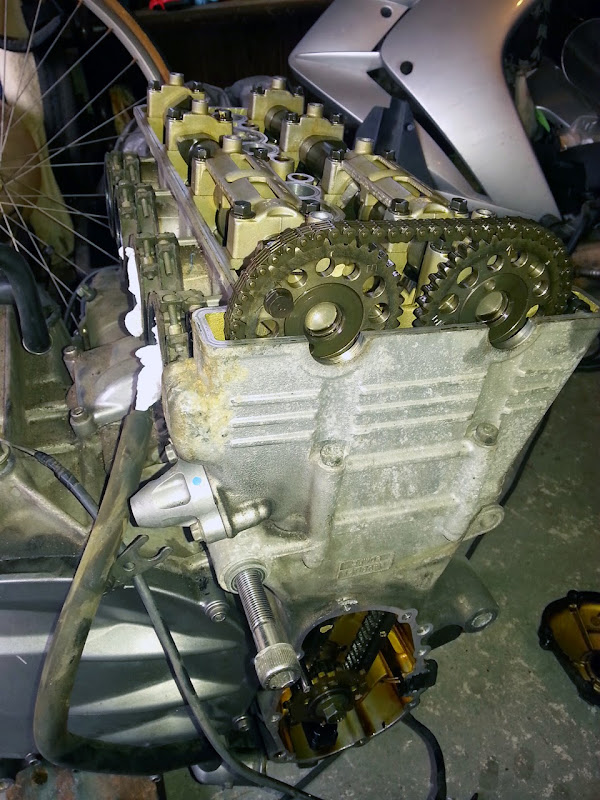
First, some pics of the valve cover off when I did the valve check last week. I must say, the process is far easier with the motor sitting by itself on the floor..... I don't think motor removal is worth the trouble just for a valve check, but if the motor's out, don't skip that!
smile.png


20140830_180824.jpg


20140830_180851.jpg


Now on with the job. This is not what they usually mean when they say, "Turn the motor over...."
20140906_151522.jpg


The PAIR blocks are resting on the thin board, and the valve cover is almost resting on the thick board. The gap between the boards clears the PAIR tubes so they don't get squished. The rear of the motor is actually resting on that vertical 2x4. It almost sits there by itself without being propped up but it's just a bit nose-heavy. Or tail-heavy, I guess.

Before we start, be aware that all of the bolts that are actually inside the case, like holding the shift drum bearing, the shift shaft cover plate, among others, are Loc-tited and require significant effort to remove. you will want to invest in a 5mm allen bit for your ratchet. The input shaft of the transmission is T30 Torx bolts, so get one of those, too, probably as part of a set.

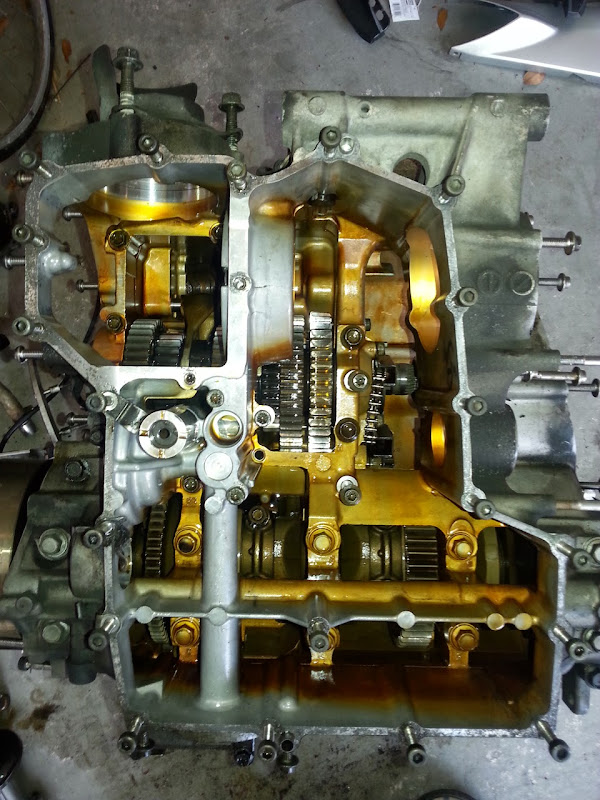
I pulled all the side covers off of both sides (crankshaft cover and clutch cover on the right, stator cover and middle gear cover on the left) and removed the water pump, oil filter, and the oil cooler. I got some fluid spills, but I'll clean up later. I'm not what you'd call anal about oil on the garage floor...... A few bolts and the oil pan comes off:

20140906_161031.jpg


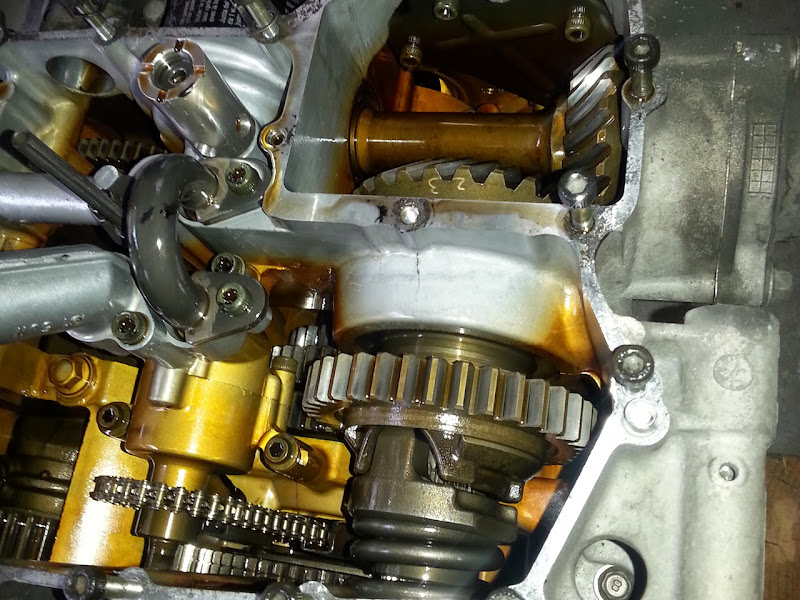
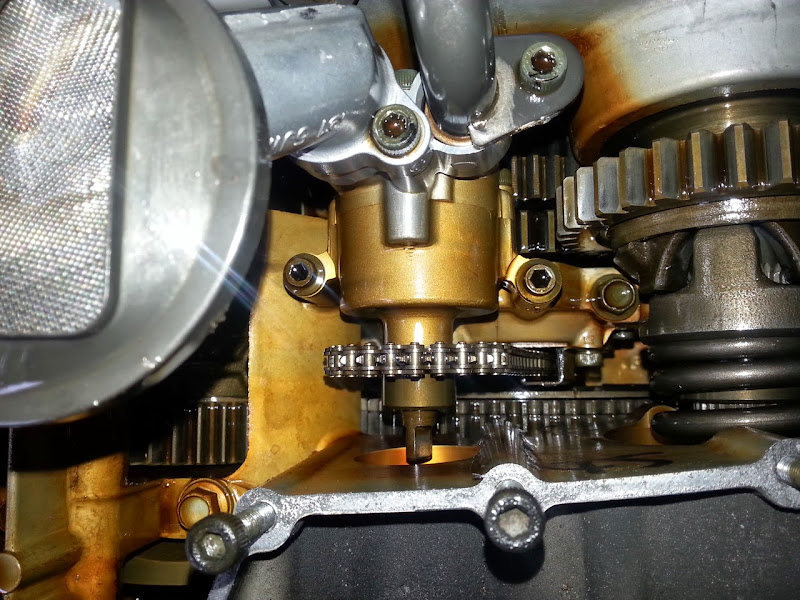
The chain at the bottom left is the drive for the oil and water pumps. It's driven off the transmission input shaft from behind the clutch basket. That "behind the clutch basket" is why you have to remove the water pump if you remove the clutch basket. You might be able to line the dogs up on the blind side of the clutch basket for the oil pump drive sprocket, but probably not! You have to be able to turn that shaft by reaching in where the water pump was.

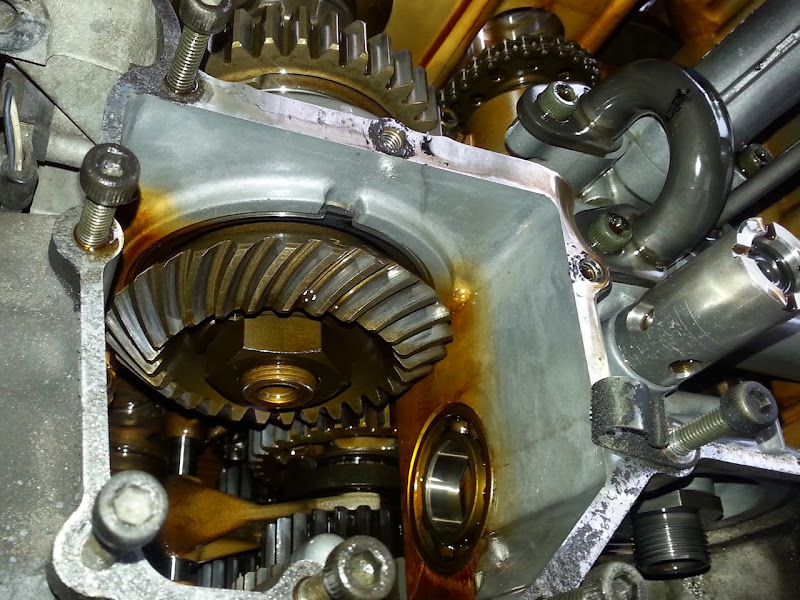
The U-shaped pipe is the output of the oil pump. Damn thing has an aorta! The big gear in the middle is the take-off from the output of the transmission, the middle gear, and you can see the bevel for the drive shaft at the top.

That short output shaft removes easily when you remove the three bolts holding its bearing in place at the rear of the motor, it slides right out. Here we see the end of the middle gear shaft, showing the 36mm nut we'll have to get at in just a few...

20140906_163948.jpg


Here's another shot of the oil pump, showing the shaft that the water pump "grabs" when it's installed.

20140906_164103.jpg


I took out the clutch basket and shift shaft at this time. I'd already had them out, but to keep from having parts lying around for weeks I reinstalled them and put all the covers back on, which also let me be less careful of grunge flying around when I actually removed the engine. Also, if you don't have an air impact driver, You want to get that 36mm nut off of the middle gear shaft before you remove the clutch basket. Have the bike in gear and the middle gear shaft won't spin when you go to loosen that nut with your breaker bar. It has a bend-it-on retaining washer you have to pry out off the way, too.

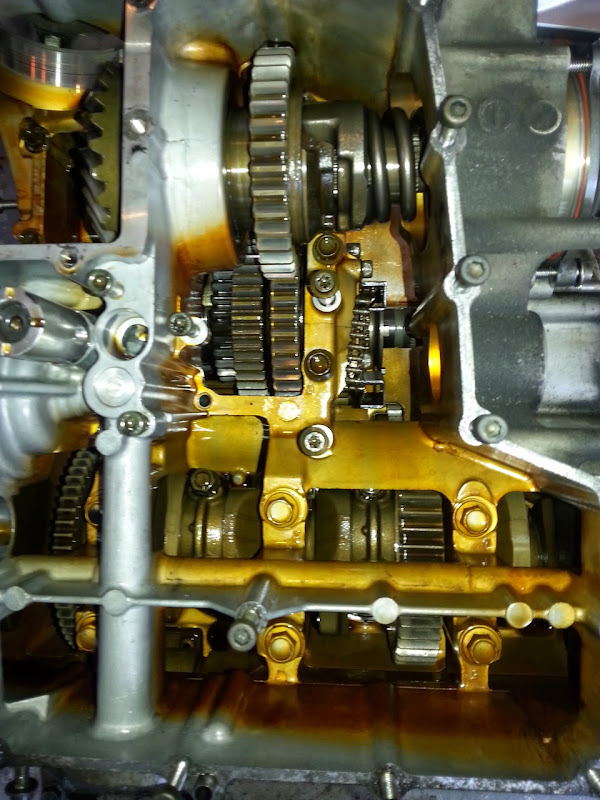
The oil pump is now gone, the chain is hanging down loose, It goes through a guide that ought to be removed, but the damn bolt head split!!! I'm not going to drill it out and extract it, I'll just work around it. Wasn't as big a problem as it could have been!

20140907_143835.jpg


Here we have the middle gear shaft out, and we are ready to split the case! Notice all the bolts sticking out the sides and the top. Instead of trying to baggie the bolts and catalog them, I just stick them where they came from. Works for me, I find it MUCH easier!

20140907_145416.jpg


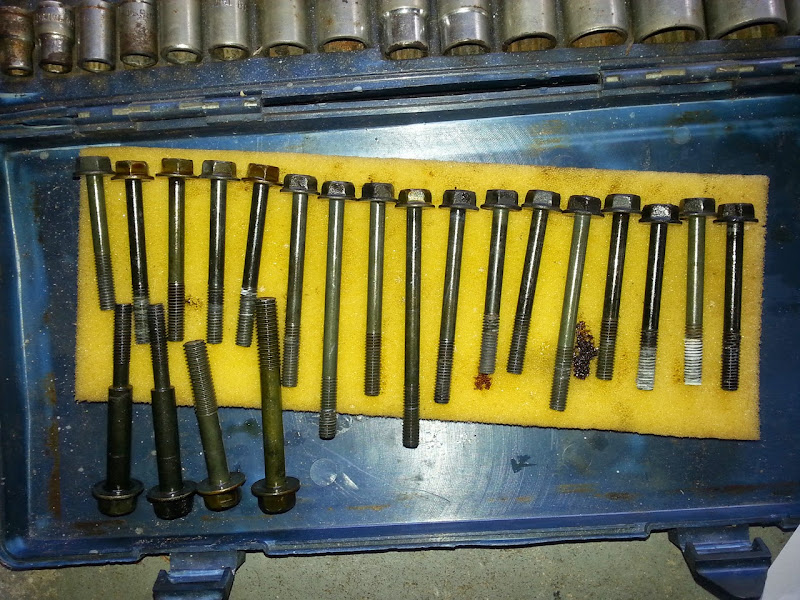
There are 31 bolts, and there is a sequence! Get a service manual! Removal consists of backing each bolt 1/4 turn in reverse sequence, starting with 31 and working back to 1. 31 down to 15 are 10mm heads, and 14 down to 1 are 12mm. 1 thru 10 are the actual crankshaft bearing bolts and they are single-use stretch bolts, so order 10 of those, part #90119-09001-00. I found them at boats.net for 3.84 each, which is better than the high 4-dollar range and up I saw everywhere else. Here are the 11 through 31 bolts. Notice the additional complication of different lengths and even types!!!!

20140907_153757.jpg


15 to 31 have 4 lengths, which I just called 1 through 4, with 1 being the shortest.

15 2

16 2

17 2

18 2

19 3

20 2

21 2

22 3

23 4

24 3

25 4

26 3

27 2

28 2

29 2

30 2

31 1

13 and 14 are shoulder bolts, and 12 is shorter than 11.

Some tapping with a soft mallet at strong-points around the case, and it pops free. There is no gasket, you use a sealant to re-assemble. After somehow magically cleaning all the oil that coats the surface as you pop it off.......

20140907_153846.jpg


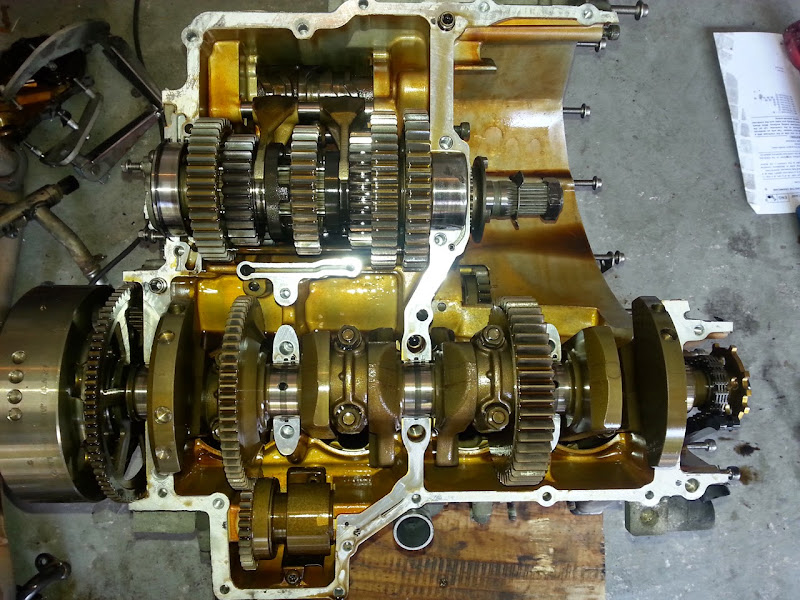
Here's a shot of the transmission works. If this were still on the bike, the camera view would be looking up from the ground in front of the rear wheel.

20140907_153857.jpg


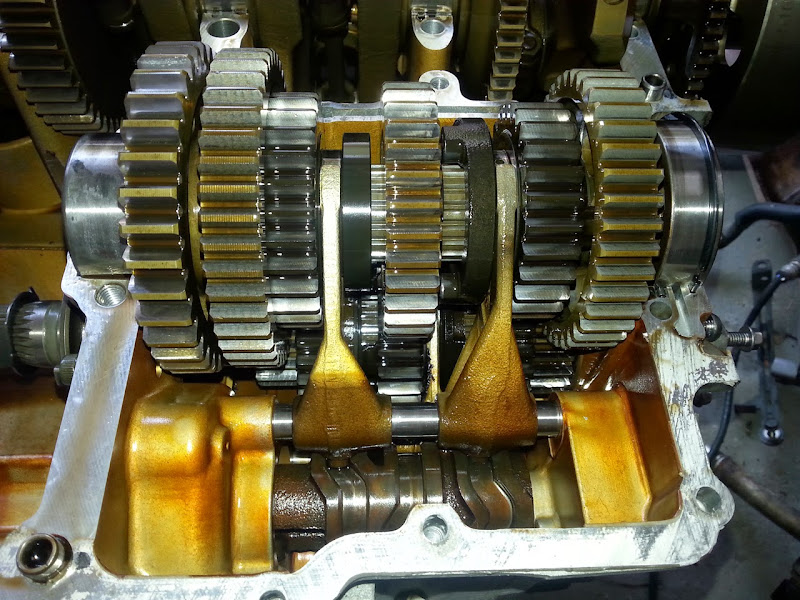
The shaft sitting on top here is the output shaft, and it just lifts right out. Next step is to get the shift forks out, and then the shift drum. This plate inside the case retains all of that. Again, Loc-tited bolts, lots of effort getting them out. Once out, the shafts holding the shift forks slide right out, and then the drum. You'll have to rotate it to a specific position to clear everything and slide it out.

20140907_155206.jpg


If all I were doing was replacing the shift drum I'd be putting stuff back in now, but I've been having the famous 2nd-gear-skip issue, so I had hppants send me the second gear parts from the engine he tore down. 5th gear, too, since it carries the mating dogs for 2nd. So the input shaft has to come out. Its bearing is held by T30 Torx bolts, one of which is visible above. Remove those bolts, then you're supposed to have a puller which bolts into that empty hole by the Torx bolt (and one other 180 degrees around) to remove the bearing and with it the shaft. I used a thick dowel placed against the other side of the bearing and struck it with a mallet to tap it out.

Here's a shot of the 2nd-gear dog, which is actually a set of pins on the side of the 5th gear wheel.

20140907_165925.jpg


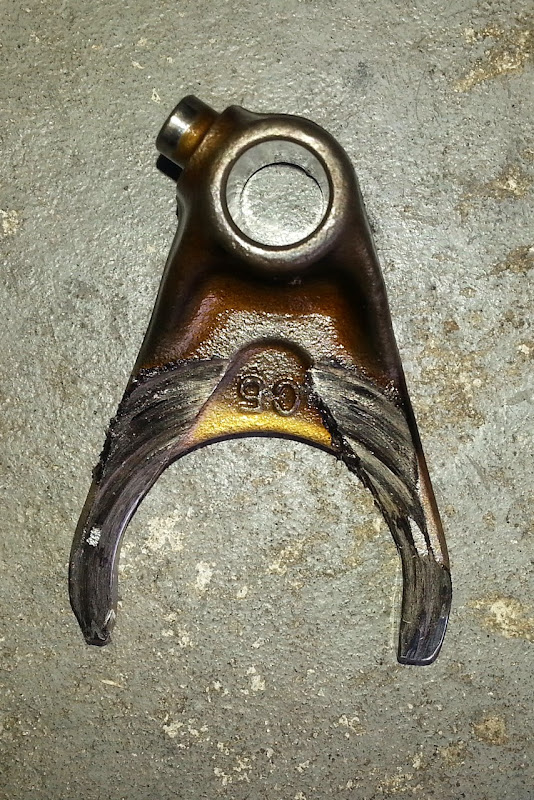
On examination I found some other issues. The center shift fork, which operates 4th and 5th, was heavily worn on one side. The fact the 5th is engaged for 99.99999437% of the bike's life may have something to do with that, but still....

20140907_155723.jpg


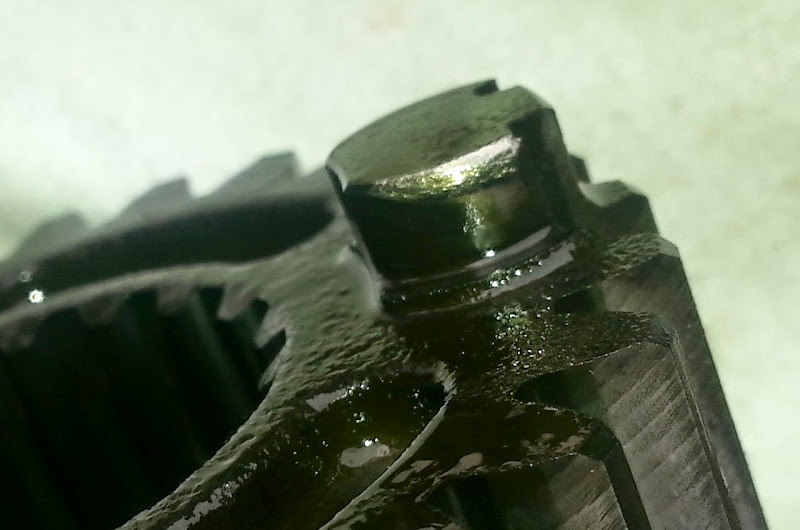
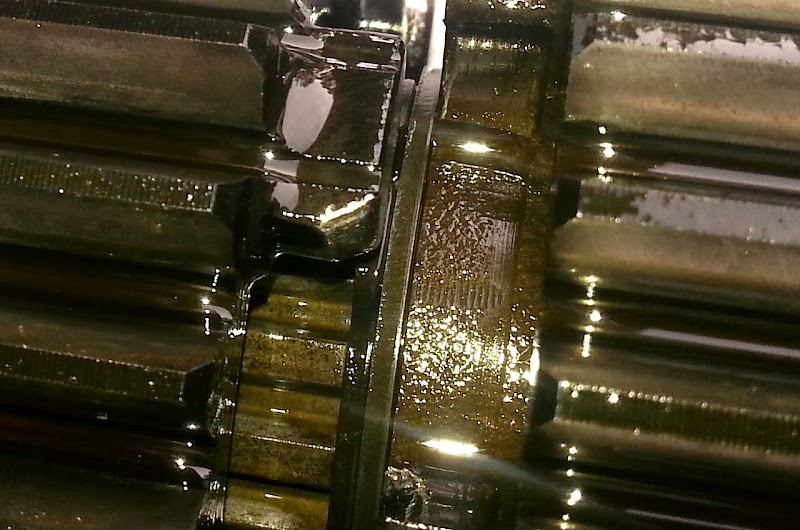
I also found heavy wear on the corners of the 4th gear dogs (on the 3rd-gear wheel) with similar wear on the mating surface.

20140907_165156.jpg


20140907_165218.jpg


That 4th-gear wear was actually the worst I see. So like I said at the start, I PM's hppants to send me the rest of the gearsets, I didn't want to just fix 2nd gear.

Someday "real soon now" we'll talk about putting it back together. Special torquing procedure for the case bolts 1 through 10 because they are the crankshaft bearings. You oil the bolt threads, tighten in sequence in steps to 20 newton-meters, then loosen. Tighten again to 20 newton-meters. Then with a regular socket or wrench, turn each bolt, in sequence, an additional 120 degrees. Bolts 11 through 31 are easy. Just tighten in sequence, 11 and 12 to 24 Nm, 13 and 14 to 12 Nm, and the rest to 10 Nm. Couldn't be simpler!!!!
smile.png


Oh, you don't have metric on your wrench???? Fine, 20 Nm is 14.75 lb-ft. 24 Nm is 17.7 lb-ft. I think you can find 12 and 10 by yourself now. (Hint: 12 is half of 24, and 10 is half of 20......
smile.png
)

 
Last edited by a moderator:
Nice work, Walt. I've turned wrenches my whole life. But, it's been a while and I'd be hesitant to take that on. May the force be with you!
smile.png
wizard.gif


Last edited by a moderator:
After work I will grab the rest of the Patriot tranny and get it packaged. Will be shipped tomorrow.

Still subscribed...

 
uhoh.gif
weirdsmiley.gif
omg2.gif
yeaahh.gif
dribble.gif
waaa.gif


Five years ago, when I swapped out the motor in Frankenbike, many following along made comments like "Wow, I wouldn't have the nerve to do that!"

Let me tell ya.....swapping a motor is child's play compared to this.

Walt, you are a stud!

 
Walt, I just had a thought.....

While the motor's out, I'd suggest putting time-serts into the four front motor mount lugs. Extra $$$, I know, but you don't want to discover stripped or "pulled-out" threads upon re-installation of the motor. DAMHIK. :)

 
Walt, I just had a thought.....
While the motor's out, I'd suggest putting time-serts into the four front motor mount lugs. Extra $$$, I know, but you don't want to discover stripped or "pulled-out" threads upon re-installation of the motor. DAMHIK.
smile.png
Well, since I removed those bolts from this engine and know how smoothly they came out, I don't think that's really a concern.

 
Obviously a good decision splitting the case and finding that damage to the gears, shifter dogs, etc... That gear box should be like new when your all done.

Great pic's and write up BTW!


Latest posts

Top