Rear shock linkage maintenance

Yamaha FJR Motorcycle Forum

Help Support Yamaha FJR Motorcycle Forum:

This site may earn a commission from merchant affiliate links, including eBay, Amazon, and others.
Just on this general subject, for those who have pulled the swing arm out for maintenance/service, has anyone found those bearings dry? I'm not too keen to pull the swing arm off just for shits and giggles just yet if I don't need to. It seems to move pretty unobstructed right now.
The bearings on the swing arm were in good shape on mine. They had a thin flim of grease on them, but it was time to clean and reapply grease. The lower bearings (where the dog bones attach) the bearings were OK. They needed clean and regrease they had a thin film of grease still on them. The bushing was another thing. The bolt was corroding to the inside of the bushing. It had not stuck yet, but was getting close to that. It was not as bad as the bolt that connected the lower control arm.

 
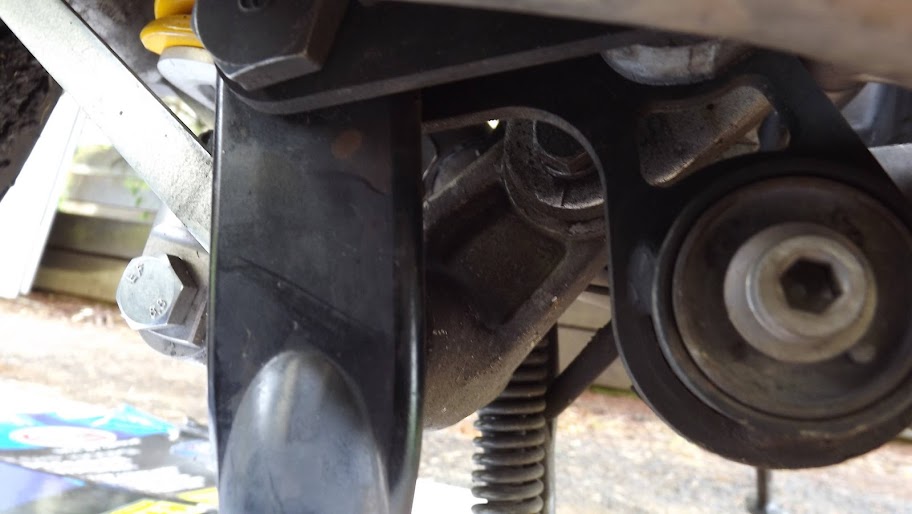
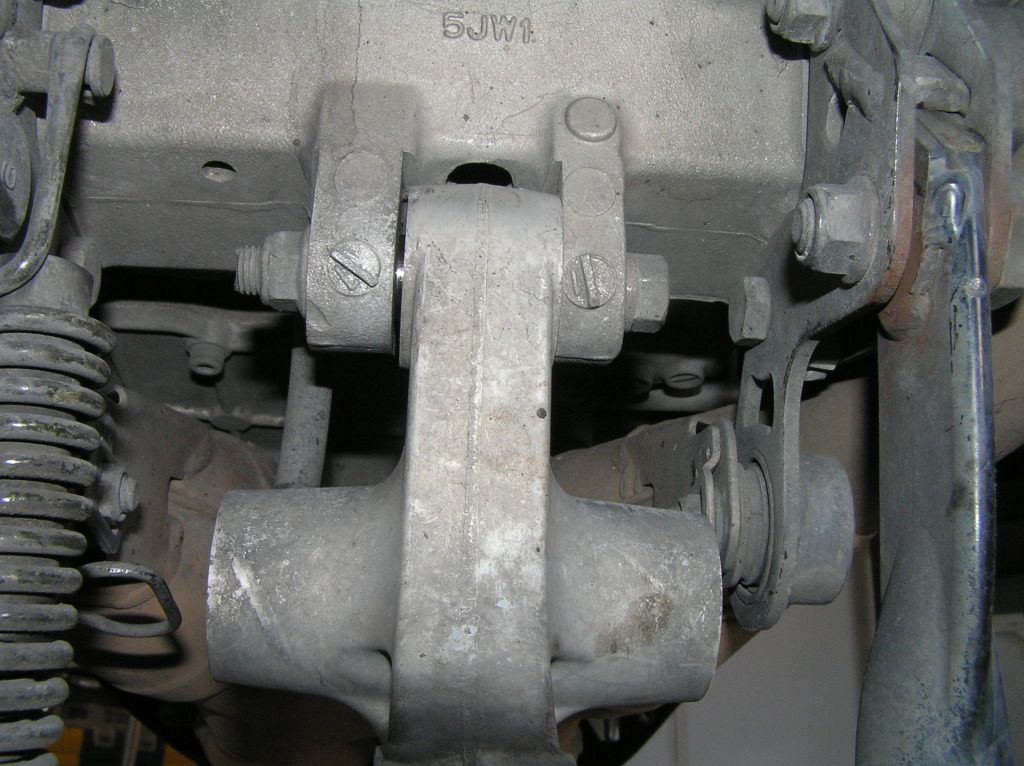
The bracket that prevents the bolt removal.
Before.jpg


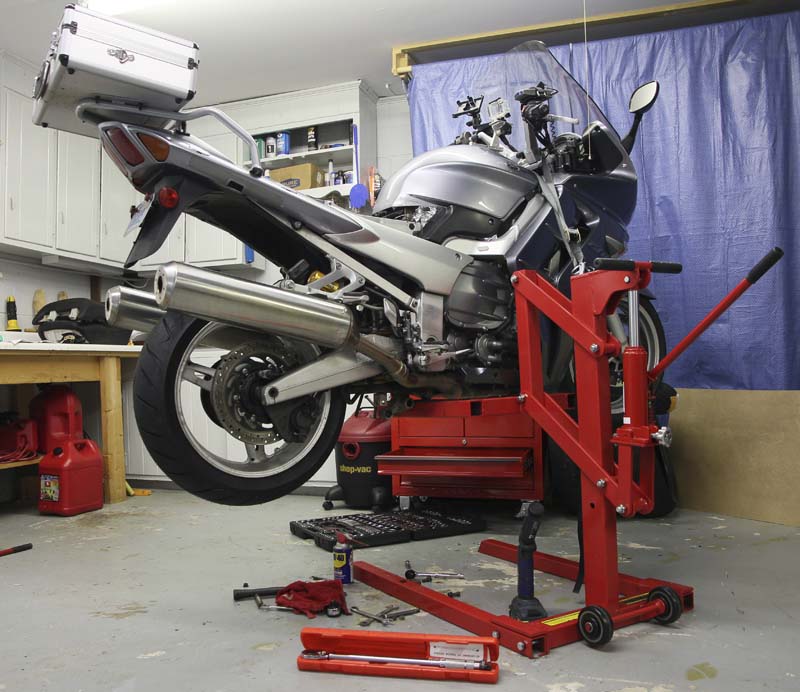
So over the weekend (on call again) I did the mod to allow the bolt and relay arm to be removed.

I used a rotary cut off wheel and small grinding stone and removed some excess material from the centrestand bracket to allow the removal of the bolt in situ. You don't have to remove the centrestand.

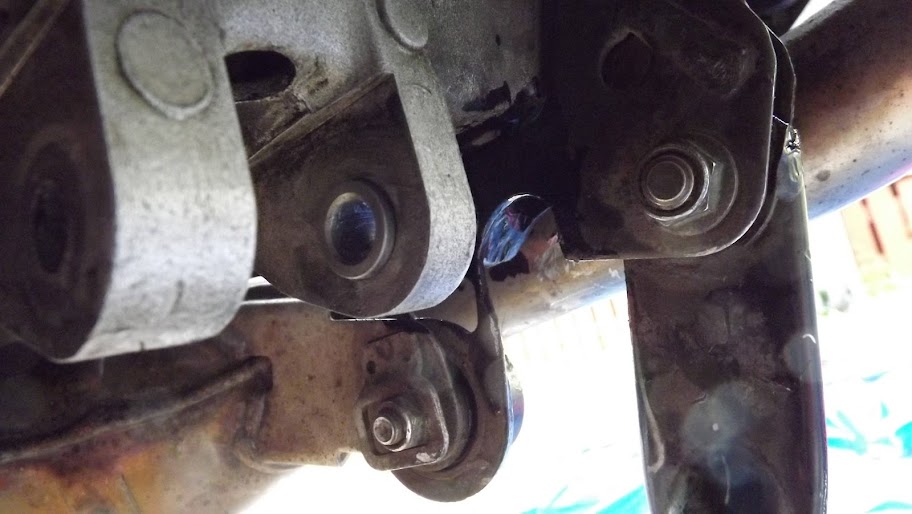
Metal and bolt removed

cut%2520away.jpg


The bolt for the frame pivot link is quite long and there are 5-6 threads extending the nut when done up. I cut the threads off leaving 1 thread past the nut when fully torqued. The bolt will not come out,(the bolt head hits the exhaust), without removing a few threads.

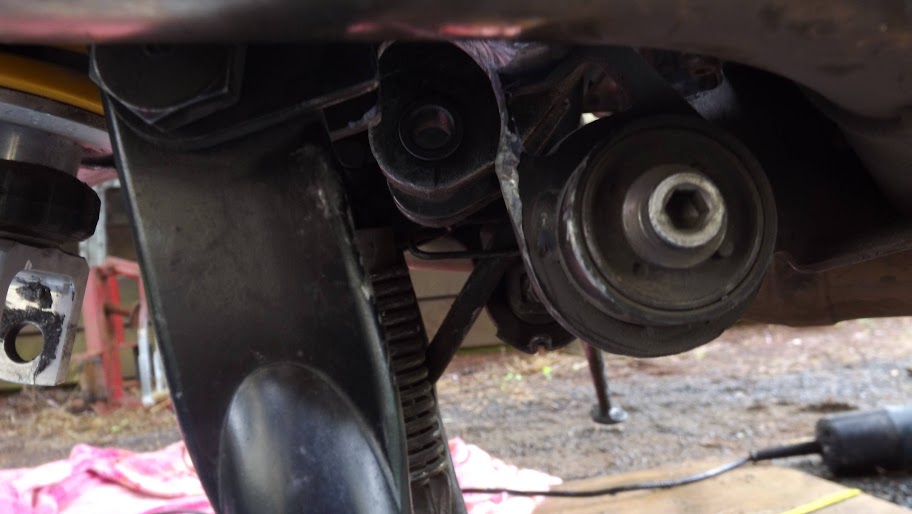
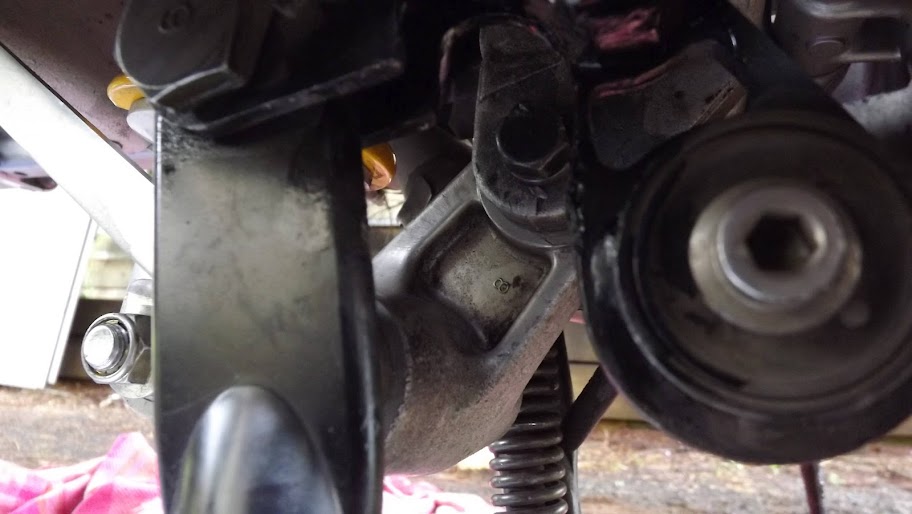
I used a dozen or more dremel cut off wheels and grindstones to remove the metal that prevents the bolt removal, there is plenty of "meat" left on the centrestand bracket.

After grinding

from%2520LHS.jpg


final.jpg


It may have been easier to remove the centrestand but I didn't want to risk slinging the bike by myself.

All up it took about 6 hours to do the mod and lube, and a lot of cut off wheels.

It will make servicing the linkages real easy next time, no excuse.

Cheers

What a great idea!!

That tab that you ground away only seems to support the exhaust pipe, so weakening it a little by grinding out that semi-circle seems like a worthwhile compromise.

[edit] I just went down and lay under my bike for a closer look. It does look like the brackets needing to be relieved are also a part of the center stand mounting bracket. Hopefully this doesn't weaken that bracket too much? I'll have to make a few measurements later when I have some more time.

By doing this mod you can properly service all of the lower suspension links without having to sling the bike to the ceiling or a makeshift pipe-stand.

 
Last edited by a moderator:
What a great idea!!
That tab that you ground away only seems to support the exhaust pipe, so weakening it a little by grinding out that semi-circle seems like a worthwhile compromise.

[edit] I just went down and lay under my bike for a closer look. It does look like the brackets needing to be relieved are also a part of the center stand mounting bracket. Hopefully this doesn't weaken that bracket too much? I'll have to make a few measurements later when I have some more time.

By doing this mod you can properly service all of the lower suspension links without having to sling the bike to the ceiling or a makeshift pipe-stand.
As my bike is still up on my (Christmas present to me - how did I live without it?) hydraulic lift, I rushed out to do this mod. My concern is the same, that it could weaken the center stand mounting.

Using Ken's pic:

fromLHS.jpg


Any thoughts?

Al
cold.gif


The lower bearings on my relay arm were dry, and when I tried to lube them, the plastic retaining ring disintegrated. I pulled the assembly and all the bearing needles out, then repacked them without the plastic retainer. Without the plastic case, they seemed to operate very smoothly.

Now I figured I might have to replace those bearings, but I did the repacking under advise from Cisco who knows a thing or two about these bikes. I was wondering if anyone else had repacked the bearings without the plastic cage.

 
Yeah, I pulled out those plastic like needle retainers (I mistakenly thought it was congealed grease) and just repacked with grease the last time, 30k miles ago. I'm due to do it again this winter. I'll report back when I get a chance to do the deed.

 
Last edited by a moderator:
The lower bearings on my relay arm were dry, and when I tried to lube them, the plastic retaining ring disintegrated. I pulled the assembly and all the bearing needles out, then repacked them without the plastic retainer. Without the plastic case, they seemed to operate very smoothly.
Now I figured I might have to replace those bearings, but I did the repacking under advise from Cisco who knows a thing or two about these bikes. I was wondering if anyone else had repacked the bearings without the plastic cage.

Yeah, I pulled out those plastic like needle retainers (I mistakenly thought it was congealed grease) and just repacked with grease the last time, 30k miles ago. I'm due to do it again this winter. I'll report back when I get a chance to do the deed.

The same thing happened to me on my first FJR when I installed the Wilbers shock at 32,000 miles. That FJR went to 226,000 miles with one of those linkages not having the plastic needle bearing retainer with no issues whatsoever.

 
Here's my version of linkage lube using a Harbor Freight portable bike lift and tie downs. No way as nice as a full on lift but it's functional and cost is more in line for an occasional use tool. It reduces the misery index of such jobs from dreadful to a mere PITA.
Bike+Lift.jpg


Lee, that looks like one slick and cheap solution, however from your photo, it looks like it could still be difficult to remove the Centerstand as the lift will be in the way?

 
If I recall. If you cut the head of the bolt off, you can then take it out the other direction. Then put new bolt in from the other side(leftside), and you wont have to mod or R&R the center stand. You may also have to take out the bushing that pinches the relay arm in order to get the new bolt in. Once you get the bushing out clean and grease it and it'll go in and out easy.

 
If I recall. If you cut the head of the bolt off, you can then take it out the other direction. Then put new bolt in from the other side(leftside), and you wont have to mod or R&R the center stand. You may also have to take out the bushing that pinches the relay arm in order to get the new bolt in. Once you get the bushing out clean and grease it and it'll go in and out easy.
Even mo' better. Think I'll try this before inflicting any grindage.

Now to look up the replacement bolt size.

Hmmmm..... this might work. I seem to recall now people mentioning something like this in the past. This is definitely the desirable way to go.

I did a rough measurement. On the bolt head side, it is appoximately 1.5" from the frame tab to the C-stand bracket. On the left side, or nut side, it is just under 2.2". Still going to be tight, but perhaps shorten the bolt those 3 or 4 threads that are not needed........

P1010178.jpg


Here's my version of linkage lube using a Harbor Freight portable bike lift and tie downs. No way as nice as a full on lift but it's functional and cost is more in line for an occasional use tool. It reduces the misery index of such jobs from dreadful to a mere PITA.
Bike+Lift.jpg


Lee, that looks like one slick and cheap solution, however from your photo, it looks like it could still be difficult to remove the Centerstand as the lift will be in the way?
Making it so you have to remove the center stand to get at the top linkage bolt is a bit of Yamaha engineering idiocy. The best option is to fix the problem with one of the remedies in this thread - grind away a little of the center stand base so the bolt will clear or cut the bolt so it can be removed and new bolt installed from the other side.

 
Here's my version of linkage lube using a Harbor Freight portable bike lift and tie downs. No way as nice as a full on lift but it's functional and cost is more in line for an occasional use tool. It reduces the misery index of such jobs from dreadful to a mere PITA.
Lee, how is the bike supported with the lift? Is there an attachment(s) to catch part of the frame / hard parts or just using the headers? Looks like a great alternative to a full lift and easier to store.

TIA

--G
Looks like it is only the headers and that's what kind of bothers me. I don't mind using the headers to lift the front of the bike when it is on the C-stand as the C-stand is still carrying most of the weight. But ALL of the weight on the header? Doesn't make me feel warm and fuzzy. Though it seems to be working fine for Lee.

 
my concern with cutting the head off the bolt is that there is a spacer [number 26 in the rear arm section of microfiche] that may only go in one way....

R

 
Last edited by a moderator:
my concern with cutting the head off the bolt is that there is a spacer [number 26 in the rear arm section of microfiche] that may only go in one way....
R

Oh, I am fairly certain that spacer goes in only one way. The question is, does it matter if the bolt is reversed and the nut is now on the spacer side?
Looking at the pics, it doesn't seem like it should matter, the head of the bolt and the nut are about as big/strong?

I would hope so. There are some decent pictures on the bottom of this write-up: https://www.fjrtech.net/getdbitem.cfm?item=15

I am still doubtful, even with a few threads cut off to shorten the bolt that there will be enough room to remove it from the left side, but I will be giving it a try in a few weeks.

 
my concern with cutting the head off the bolt is that there is a spacer [number 26 in the rear arm section of microfiche] that may only go in one way....
R

Oh, I am fairly certain that spacer goes in only one way. The question is, does it matter if the bolt is reversed and the nut is now on the spacer side?
The spacer is straight/symmetrical so it can be put either way. The nut has a washer on it and the bolt head may not. So if reversed you may want to put a washer on the bolt head, so were it contacts the frame it won't score it up/will better disperse the torque.

Sorry, I should have been more clear. I meant the spacer only will fit on the right side bracket of the frame.

 
Last edited by a moderator:
Top