Donal
Well-known member
Sounds like a deal to me


I am not sure who make the washer components for this shock but a good quality stainless steel should not corrode. I rather think there is another issue going on here. To me it looks like a galvanic reaction is what is causing the corosion on the interior parts of the shock. If the stainless steel washers are being push up against and aluminum housing while also being surrounded by shock fluid you may get this reaction. I wonder if grounding the shock housing to the frame would reduce this affect?This is to show what happens when you don't do the maintenance.
The background on my rear suspension: I installed a Penske 8987 shock on the bike at 5800 miles on 1/10/08. I have done no service to it until 12/29/12. The bike currently has 33,670 miles on it. When I bought the shock from GP Suspension they recommended servicing it every 20,000 miles. I noticed that it was not performing as well as it should about 5000 miles ago.
In December 2012 I had the shock serviced by the new owner of GP suspension (KFG Racing in Auburn, WA). The shock had 27,870 miles on it.
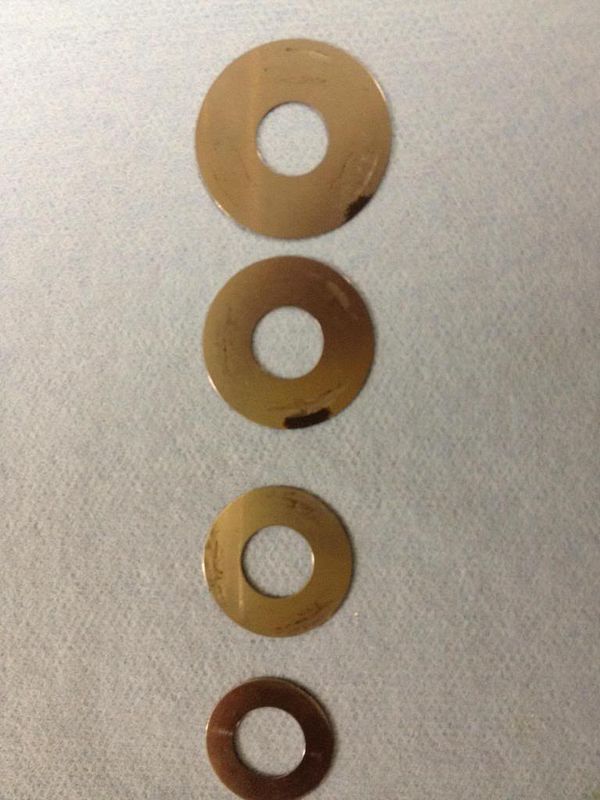
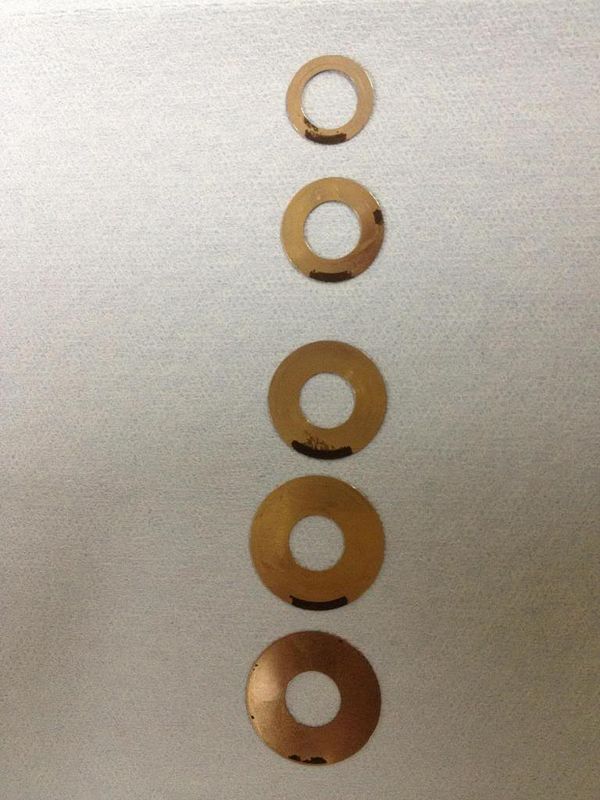
I got a call from GP to come take a look at the shock. Here are pictures of the shim stacks. They show lots of corrosion in the shims. The shims are varying thicknesses and diameters of stainless steel. (EDIT - the yellow color of the shims is due to lighting - they are stainless steel)
Below is the assembly that goes inside the remote resevior. It needs to be rebuilt do to the corrosion. This caused additional expesne that could have been avoided with a more regular service schedule

I'll add more photo of the shock internals when I get them from GP Suspension. I can say they looked pretty bad.

I have a very limited knowledge if how these things work. But here is how I understand it in very simplistic terms. The piece being held is a plunger that goes inside the remote resevoir. You can see the holes behind the shims, as load increase and the plunger moves, reisitnace to that movement is controlled by the holes in the vavle body and the shim stack. That controls how fast the plunger moves which controls how fast the swing arm moves to absorb or rebound from the movement.I am not sure who make the washer components for this shock but a good quality stainless steel should not corrode. I rather think there is another issue going on here. To me it looks like a galvanic reaction is what is causing the corosion on the interior parts of the shock. If the stainless steel washers are being push up against and aluminum housing while also being surrounded by shock fluid you may get this reaction. I wonder if grounding the shock housing to the frame would reduce this affect?This is to show what happens when you don't do the maintenance.
The background on my rear suspension: I installed a Penske 8987 shock on the bike at 5800 miles on 1/10/08. I have done no service to it until 12/29/12. The bike currently has 33,670 miles on it. When I bought the shock from GP Suspension they recommended servicing it every 20,000 miles. I noticed that it was not performing as well as it should about 5000 miles ago.
In December 2012 I had the shock serviced by the new owner of GP suspension (KFG Racing in Auburn, WA). The shock had 27,870 miles on it.
I got a call from GP to come take a look at the shock. Here are pictures of the shim stacks. They show lots of corrosion in the shims. The shims are varying thicknesses and diameters of stainless steel. (EDIT - the yellow color of the shims is due to lighting - they are stainless steel)
Below is the assembly that goes inside the remote resevior. It needs to be rebuilt do to the corrosion. This caused additional expesne that could have been avoided with a more regular service schedule
I'll add more photo of the shock internals when I get them from GP Suspension. I can say they looked pretty bad.
But then again I could be totaly delusional.
Isn't it a long cold winter. Got nothing better to do, well I got to finish lubing the rest of the dirt bikes in my garage. Well that is after I get Hudsons Husky 310 out of the garage Saturday.You guys are getting way to anal.. Buy a 12 pack and sit back fer a spell.Let Rossi and company worry about that ****. It's a near 600 pound pig fer shitsakes.


I'll be there...I'll be there...Isn't it a long cold winter. Got nothing better to do, well I got to finish lubing the rest of the dirt bikes in my garage. Well that is after I get Hudsons Husky 310 out of the garage Saturday.You guys are getting way to anal.. Buy a 12 pack and sit back fer a spell.Let Rossi and company worry about that ****. It's a near 600 pound pig fer shitsakes.
My only concern with that (I guess I'm just being anal)! is the design. My guess is that the collar is designed to slide to provide a 'clamping' force on the bearing sleeve without putting any 'side load' on the main bracket (frame). So each time I do it I feel compelled to free off the collar, try a different lube and re-assemble. At least when I tighten it I know that the bearing sleeve is being clamped as designed and I have not distorted the bracket.Even with a seized collar the exhaust can be "sprung" enough to remove the bolt. The collar is seized on place on my bike but I've removed and serviced the linkage several times now leaving the collar in place and springing the exhaust.
https://i628.photobucket.com/albums/uu4/fudgejerkin1188/fjrphotosrebuild023.jpg
I know. No hurry, it's not like I got time to work on the others anyway...I'll be there...I'll be there...Isn't it a long cold winter. Got nothing better to do, well I got to finish lubing the rest of the dirt bikes in my garage. Well that is after I get Hudsons Husky 310 out of the garage Saturday.You guys are getting way to anal.. Buy a 12 pack and sit back fer a spell.Let Rossi and company worry about that ****. It's a near 600 pound pig fer shitsakes.

That is what I believe the design intent of that joint is. The collar is sized to slide in the frame bore enough to provide axial clamping to the relay arm bearing sleeve and thus fix the sleeve to the bikes frame. This clever arrangement prevents side loading the frame tabs while providing solid mounting in the direction of the applied force. I think Fred said this already. This method is also employed where the top shock mounts to the frame.My only concern with that (I guess I'm just being anal)! is the design. My guess is that the collar is designed to slide to provide a 'clamping' force on the bearing sleeve without putting any 'side load' on the main bracket (frame). So each time I do it I feel compelled to free off the collar, try a different lube and re-assemble. At least when I tighten it I know that the bearing sleeve is being clamped as designed and I have not distorted the bracket.Even with a seized collar the exhaust can be "sprung" enough to remove the bolt. The collar is seized on place on my bike but I've removed and serviced the linkage several times now leaving the collar in place and springing the exhaust.
https://i628.photobucket.com/albums/uu4/fudgejerkin1188/fjrphotosrebuild023.jpg
Well........... that's my excuse YMMV