Rear shock linkage maintenance

Yamaha FJR Motorcycle Forum

Help Support Yamaha FJR Motorcycle Forum:

This site may earn a commission from merchant affiliate links, including eBay, Amazon, and others.
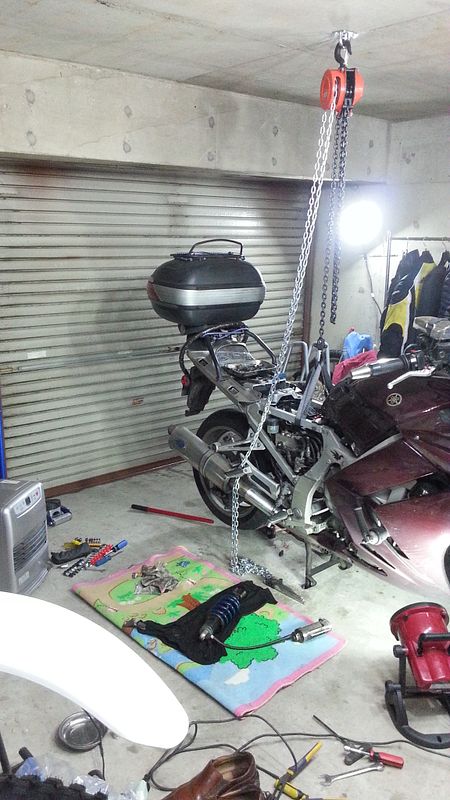
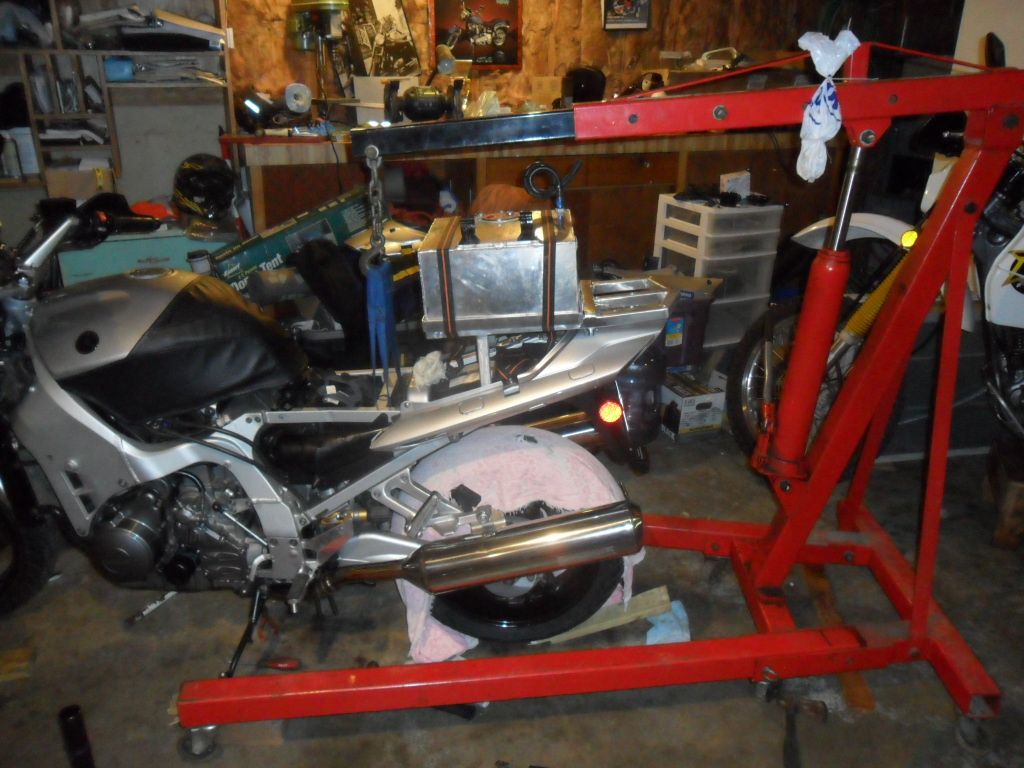
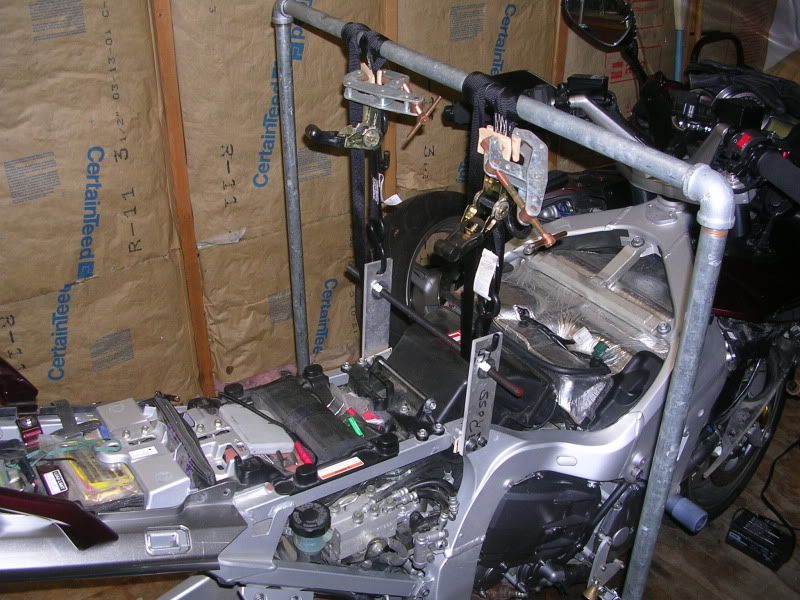
Here are few shots of how I lifted mine, the pipe frame I got from George that he made up.

DSCN6009.jpg


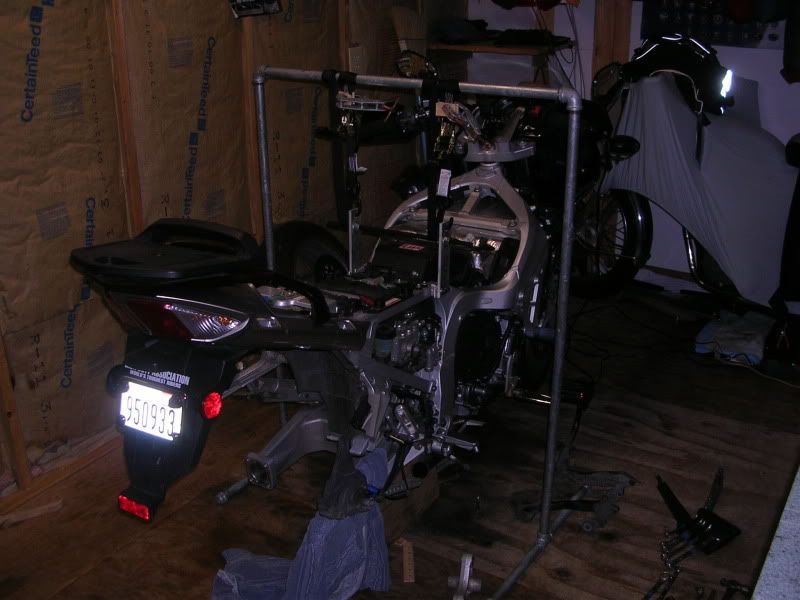
I turned some bushings and made a couple of plates to attach to the frame so I had something to grab.

DSCN6010.jpg


Some folks are afraid to lift the bike by that subframe.

I am not one of those folks.
wink.png


I figure if you can put the entire weight of an average American rider and passenger on there plus luggage, and then ride down the road hitting bumps and potholes, and those tubes don't bend, it'll probably bear the dead weight of the bike just fine.

However, I must ask... Do you always take your shoes off to do motorcycle maintenance?
rolleyes.gif


Last edited by a moderator:
Center stand is removed and all the bolts on the relay arm are loose. I found an engine lift that I can borrow for the weekend. The removal of the center stand was much easier/quicker this time with the uper two bolts reversed.

Canadian FJR

 
Some folks are afraid to lift the bike by that subframe.
I am not one of those folks.
wink.png


I figure if you can put the entire weight of an average American rider and passenger on there plus luggage, and then ride down the road hitting bumps and potholes, and those tubes don't bend, it'll probably bear the dead weight of the bike just fine.

However, I must ask... Do you always take your shoes off to do motorcycle maintenance?
rolleyes.gif
Only in Japan

 
Some folks are afraid to lift the bike by that subframe.
I am not one of those folks.
wink.png


I figure if you can put the entire weight of an average American rider and passenger on there plus luggage, and then ride down the road hitting bumps and potholes, and those tubes don't bend, it'll probably bear the dead weight of the bike just fine.

However, I must ask... Do you always take your shoes off to do motorcycle maintenance?
rolleyes.gif
LMAO, got to show respect to the FJR
rolleyes.gif


Seriously though, I took off the shoes to put on bike boots. This was a on a day when we had an unexpected big snow storm in Tokyo. I went out side to help these guys and some others get up the hill in front of the house.

36519_10151418856776228_163713918_n.jpg


397573_10151418755616228_944327650_n.jpg


Got the little bugger out. 33,000 km since I had it apart last time and that spacer was very close to being completely seized again. Time to get things all cleaned up and regreased. The good news is that all the bushings and bearings look to be in very good shape.

https://i1008.photobucket.com/albums/af207/scottcameron/SAM_1072.jpg

Does anyone want any pics of anything before it goes back together?

Canadian FJR

 
Last edited by a moderator:
I'm not sure why but I'm having a very hard time posting pics. I've posted many times before but this site does not like photobucket any more.
SAM_1070.jpg


I borrowed this engine lift, worked great.
<Pic assist> Good 'ol fashioned engine hoist works just fine.

BTW -- photobucket works fine, you just can't directly use the link for some reason. instead, use the Image feature from the post tool bar and link to the pic.

--G

 
Actually you can use the links.

Just paste or type the link into the reply window and then click on "More Reply Options" or "Preview Post" (depending on if you are doing a quick reply or are already in the full editor).

You'll see the image correctly displayed in the preview pane, and a pink banner message saying "You are not allowed to use that image extension on this community."

Just ignore that and click "Add Reply" and your post will still have the images in it.

 
Last edited by a moderator:
Actually you can use the links.
Just paste or type the link into the reply window and then click on "More Reply Options" or "Preview Post" (depending on if you are doing a quick reply or are already in the full editor).

You'll see the image correctly displayed in the preview pane, and a pink banner message saying "You are not allowed to use that image extension on this community."

Just ignore that and click "Add Reply" and your post will still have the images in it.
Exactly what I've tried a few times Fred, but the pics still don't show up...so I gave up.

I'll try it again and see what happens.

--G

 
I've been not keeping up with the forum of late as have been immersed in a VStrom project that is aimed for the Haul Rd next yr. I was catching up with Tony aka 101stPathfinder as I hadn't talked to him in awhile. One of the things that came up was his getting a new suspension from Taxxion and that he needed to do this service. He told me how to find this thread so I've been reading up and hopefully can be prepared. He says his bike has never been done, and my '09 hasn't either albeit there's about a 70K difference in mileage.

I do have a "cherry picker" aka engine hoist, but it does leak down over time - not so much that you can't lift it and it'll stay, but you can't leave something on it for extended time so I need to come up with another way to "keep it up" - and not in the Bustanut sheep kinda way!. Looking over the options on how many of you have done it, I think maybe the pipe stand solution is easiest to do.

One of the things that was mentioned here by someone (or maybe in one of the linked threads on this service) was the wish to have a spare relay arm. I did a quick search of part #s and see it's the same for '05 & '09 and price is ~$150 new depending on who you get it from. I found a good used one for $40 delivered online and it's on it's way here. That way we can set that up first and have it ready for T's bike and I'll keep his for a spare. I'm "hoping" mine isn't as bad as we're expecting his to be, that it only needs a clean and lube.

I also ordered some marine lube to have the correct stuff on the shelf.

Still don't know what the final plan is for best way to get all the bolts out - but I think I'm understanding to:

> NOT cut out the area to ease top bolt of relay arm removal as it'll weaken that area too much

> Make sure the collar is removable from top bolt as that will help. Clean, grease, reinstall.

> Turn the swingarm bolts around (?)

> Cut (or not?) ~4 threads off the top bolt for the relay arm

> Loosen up the exhaust bolts and you can move the exhaust around enough to get all the bolts out.

> Another option for lifting the bike is to put it on the side stand, then use a block of wood cut right to fit on the back of the engine. I have a scissor jack that is real handy so will look into this method.

> I do not have a bushing remover tool. I looked at cheapie versions for ~$40 up to Motion Pro set @ ~$200. I'm thinking that once I get the spare relay arm I'll see what it takes to get it apart and if need be go to Autozone and do their free tool loan for a special bushing removal tool.

Anything else?

Hopefully we can get Ts bike done right and I'll learn enough to do mine too.

 
These comments are based on two removals on a 2003 GenI.

Still don't know what the final plan is for best way to get all the bolts out - but I think I'm understanding to:

> NOT cut out the area to ease top bolt of relay arm removal as it'll weaken that area too much

- I agree, not needed

> Make sure the collar is removable from top bolt as that will help. Clean, grease, reinstall.

- This can be removed by removing the centerstand and then moving the left header pipe slightly. The top spacer will likely be seized. Once the relay arem is removed, you shoild be able to tap out the spacer and lube properly for next time.

> Turn the swingarm bolts around (?)

- I think you mean centerstand bolts. The upper two need to be cut and then order two new ones to be installed backwards. Washers will also be needed to prevent them from hitting the exhaust.

> Cut (or not?) ~4 threads off the top bolt for the relay arm

- Cut some off, it will make it much easier but not necessary.

> Loosen up the exhaust bolts and you can move the exhaust around enough to get all the bolts out.

- Exhaust bolts need to be removed in order to remove centerstand. (Not head bolts)

> Another option for lifting the bike is to put it on the side stand, then use a block of wood cut right to fit on the back of the engine. I have a scissor jack that is real handy so will look into this method.

- I have a block under my side stand and a jack under the right footpeg mount just in case the engine lift drops a little over night.

> I do not have a bushing remover tool. I looked at cheapie versions for ~$40 up to Motion Pro set @ ~$200. I'm thinking that once

I get the spare relay arm I'll see what it takes to get it apart and if need be go to Autozone and do their free tool loan for a special bushing removal tool.

- To me, it was worth it to bring it to the suspension shop and get all bearing/bushings replaced quickly.

Anything else?

- This is a frustrating job the first time. Once the centerstand bolts are removed the and inserted backwards, future jobs will be much more fun.

Hopefully we can get Ts bike done right and I'll learn enough to do mine too

A very good pointer that Fred had was to loosen all bolts prior to lifting the bike.

Have fun,

Canadian FJR

 
Last edited by a moderator:
Thanks CFJR! I think I got a game plan now.

I have the p/n's for the centerstand bolts (90109-101E6-00) so I'll get a couple ordered to have them ready along with a couple of washers.

I'll have that spare relay arm and will either rebuild it or have it done, but either way it should be here by end of the week so have a little time to figure it out. I'll price out all the internal parts first and go from there.

Yes, on the exhaust I meant NOT the headbolts, but many of the others.

And it sounds like I have what I need to lift it - altho building a pipe "skyhook" has been on my to-do list for a while now to help service the front. I have an all balls kits to replace the head bearings, not to mention being able to keep the handlebars out of the way for other things too. This sounds like a good excuse to get one built.

 
Just on this general subject, for those who have pulled the swing arm out for maintenance/service, has anyone found those bearings dry? I'm not too keen to pull the swing arm off just for shits and giggles just yet if I don't need to. It seems to move pretty unobstructed right now.
The bearings on the swing arm were in good shape on mine. They had a thin flim of grease on them, but it was time to clean and reapply grease. The lower bearings (where the dog bones attach) the bearings were OK. They needed clean and regrease they had a thin film of grease still on them. The bushing was another thing. The bolt was corroding to the inside of the bushing. It had not stuck yet, but was getting close to that. It was not as bad as the bolt that connected the lower control arm.
AuburnFJR, thanks for the info, could you also pls let me know if you came across any "gotchas" in the swing arm R/R?

 
> Turn the swingarm bolts around (?)- I think you mean centerstand bolts. The upper two need to be cut and then order two new ones to be installed backwards. Washers will also be needed to prevent them from hitting the exhaust.
I have the p/n's for the centerstand bolts (90109-101E6-00) so I'll get a couple ordered to have them ready along with a couple of washers.

I am assuming those in the know will correct me if I am wrong but it is my understanding that it is not necessary to cut the C-stand bolts off. Loosening and removing the exhaust mounting bolts will allow the right exhaust to be moved enough to get those original C-Stand bolts out. Then just reverse them (wish some new washers for clearance) when re-installing them.

 
Top