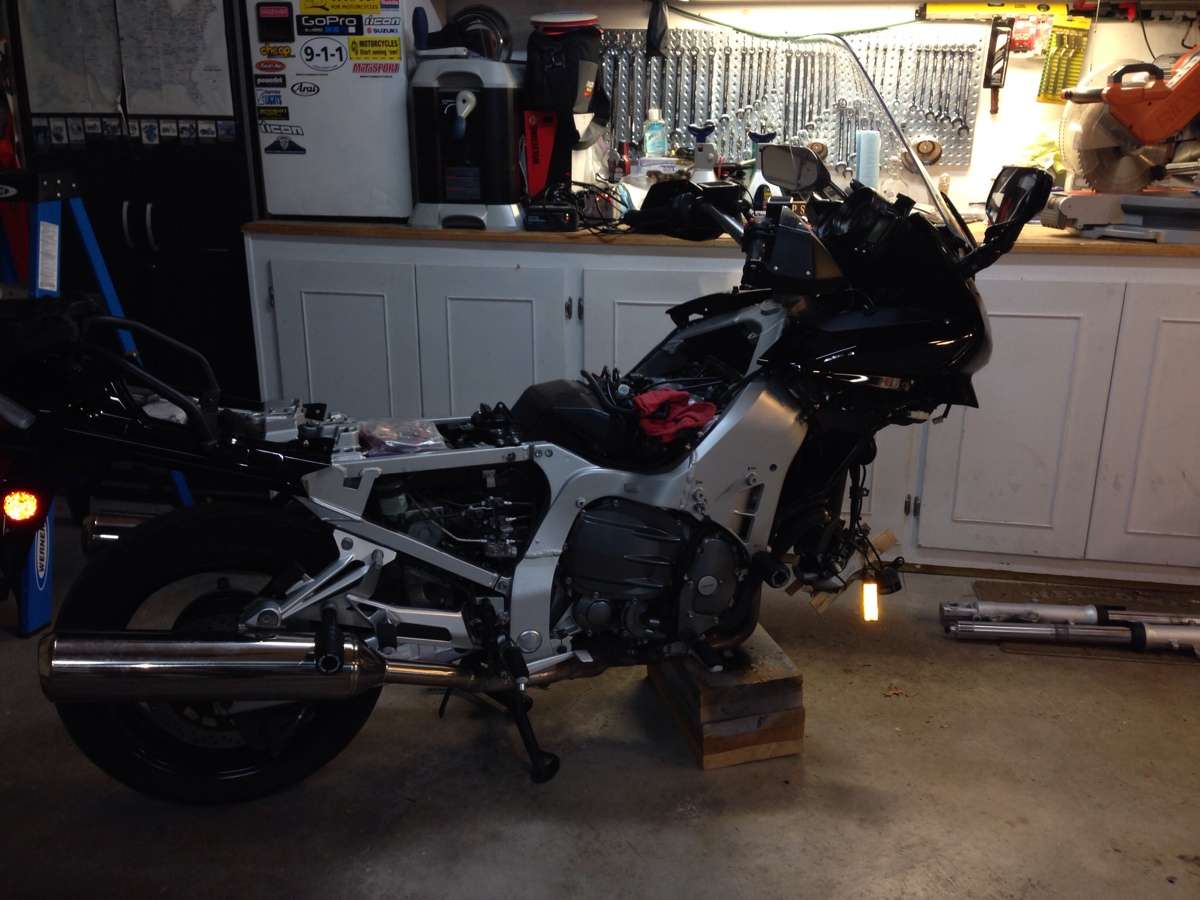
What did you do to your FJR today?

Yamaha FJR Motorcycle Forum

Help Support Yamaha FJR Motorcycle Forum:

This site may earn a commission from merchant affiliate links, including eBay, Amazon, and others.
[img=[URL="https://imageshack.us/a/img571/7838/heeg.jpg%5D"]https://imageshack.us/a/img571/7838/heeg.jpg][/URL]Time for the winter maintenance. This year will include a complete suspension upgrade with 25mm fork cartridges and an Ohlins shock from GP, clean and lube the rear linkage, valve check/adjustment, all fluids changed, regulator wire upgrade, TBS, and anything I happen to break along the way.
Mighty ambitious Phil

 
heeg.jpg

Time for the winter maintenance. This year will include a complete suspension upgrade with 25mm fork cartridges and an Ohlins shock from GP, clean and lube the rear linkage, valve check/adjustment, all fluids changed, regulator wire upgrade, TBS, and anything I happen to break along the way.
You guys in the cold climates are so lucky. I never have enough down time to knock out so many items.

 
[img=[URL="https://imageshack.us/a/img571/7838/heeg.jpg%5D"]https://imageshack.us/a/img571/7838/heeg.jpg][/URL]Time for the winter maintenance. This year will include a complete suspension upgrade with 25mm fork cartridges and an Ohlins shock from GP, clean and lube the rear linkage, valve check/adjustment, all fluids changed, regulator wire upgrade, TBS, and anything I happen to break along the way.
You guys in the cold climates are so lucky. I never have enough down time to knock out so many items.
Sure...rub it in. :)

 
I install my fuse block and re-ran all new wires to my gizmo's. Then I took a ride to check out my new LR4 LDrider lights after getting them all wired in. COLD what COLD?????? 26 degrees.

These things Kick Arssss!!! Very happy with the new lights.

Dave

 
Last edited by a moderator:
Wired an inline fuse cord for my heated jacket liner/gloves and to double for my battery tender. Took off the Yamaha sticker from the front fairing and the one on the tank. Checked the air pressure since I rode it home from the dealer a couple days ago and did not check first and I will be going for a ride tomorrow. Also dropped off my Yamaha top case, which I kept from my '08 FJR I sold 2 weeks ago, to a local locksmith since I forgot to UNLOCK the case!

(Two days ago I installed my Two Bros exhaust)

(Tomorrow I will ride her since Ginger has not really stretched her legs yet)

 
A gent from the FJR Owners Forum visited me today, fought his way through some real horrible storms..

He had a real bad fuelling problem on his Gen 1.

Over 3 years and several "bike mechanics" still buggered.

Performed Fred's "UnAuthorized TBS procedure" and fixed most of the symptoms, Thanks Fred.

The air screws were all over the place, sync out to buggery, worse I've seen on a bike.

All 4 vacuums perfect now over the entire rev range.

The warm idle wouldn't adjust back under 1500 rpm. Someone had adjusted the 4 stops, a Gen 1 thing, on the throttle bodies.

Adjusted the stops, perfect, full idle control using the warm idle adjuster.

The O2 settings were way way out, too many mechanics fiddling with it including an unknown history.

Picked some Gen 1 settings from the forum and adjusted to suit.

No more continual raw fuel smell, so we're on the right track.

The bike has rivnuts in the headers, a 2002 model, so one day hire / burrow a sniffer to adjust the CO values properly.

Might keep the spread and reduce them by a -1 at a time, over a period of time.

It is now one of the best Gen 1 bikes I have ridden, sweet.

Just waiting for a report when he gets home.

Can't believe such a simple procedure can make soo much difference to a bike.

 
Not too shabby for an afternoon's work!

KrZy8 Rawks ON!

  • Valve check
  • New Coolant Using distilled water
  • Brake fluid
  • New radiator hoses
  • Replace radiator
  • Lubricate swingarm bearings
  • Lubricate Suspension pivot bearings
  • R and R suspension
  • Change hydraulic fluid in clutch
  • New headlight bulbs
  • Lubricate shift mechanism
  • Lube center stand
  • Lube windscreen mechanism
  • Replace brake pads front/rear
  • Throttle body synchronization
  • Barbarian jumper modification
  • Replace wheel bearings
  • Install new brake linkage From extreme Marine
  • Headlight adjust mechanism Install new
  • Fuel pump for auxiliary gas tank
  • Service center stand
  • Clean air filter it's not that old
  • Pin saddlebags
  • Repair auxiliary fuel tank
  • Lubricate side stand. Too much wear. Replace.
  • Lube u joint
  • Replace thermostat and housing

 
I modified my 2013 battery Cover today. Now I can access the battery without removing the entire front panel again.
Procedure is surprisingly easy to do. I documented it on my website (use Google translate if needed, pictures are pretty self-explanatory):

https://www.wellingweb.nl/joomla/index.php/mijn-2013-fjr1300a/mods/afdekplaat-accu
Nice one! thanks for sharing.

 
That's the 2nd gen GS scooter with more electrical power.

The 1st gen couldn't handle that.

 
Moved the FJR to make room for my new (to me) 2012 'yellow jacket' Versys. We've got a couple of warmer days ahead so I'll be inspecting, cleaning and winterizing in preparation for an early Spring!

 
Not too shabby for an afternoon's work!

KrZy8 Rawks ON!

  • Valve check
  • New Coolant Using distilled water
  • Brake fluid
  • New radiator hoses
  • Replace radiator
  • Lubricate swingarm bearings
  • Lubricate Suspension pivot bearings
  • R and R suspension
  • Change hydraulic fluid in clutch
  • New headlight bulbs
  • Lubricate shift mechanism
  • Lube center stand
  • Lube windscreen mechanism
  • Replace brake pads front/rear
  • Throttle body synchronization
  • Barbarian jumper modification
  • Replace wheel bearings
  • Install new brake linkage From extreme Marine
  • Headlight adjust mechanism Install new
  • Fuel pump for auxiliary gas tank
  • Service center stand
  • Clean air filter it's not that old
  • Pin saddlebags
  • Repair auxiliary fuel tank
  • Lubricate side stand. Too much wear. Replace.
  • Lube u joint
  • Replace thermostat and housing
OK, you're hired. Will you work for minimum wage?
sleep.png
Might be worth paying his air fare & putting up with him for a day...
rolleyes.gif


Didja wear those new gloves, Joe?

On topic, I sat on mine in the garage this morning and made engine noises, then took the cage to work.

I know, wot a pussy

 
Must be a case of "monkey see, monkey do", or peer pressure.

I finished working in the yard, came in and took a shower... And then went down to the garage and did the clean & grease thing on the clutch & front brake levers.

Glad I didn't wait any longer - I don't think "grease" is supposed to be that dry, and that #5 bushing is showing its age.

 
Last edited by a moderator:
Top