Duster19
Well-known member
Interested in following this thread on Gen. 1 options. For nothing more then the looks of it, I also like the Tanji style. I do think the Linda's Custom Aux. tank covers are sweet too. ")
Dave
Dave


Really!I'm not sure Dean would mind. Since he's decided not to pursue this anymore, it's not like you're eating into his profits. If you like what he did and would like to use it, I'd encourage you to contact him and ask.1.) Dean figured out an ingenious mounting system; I'm not comfortable ripping off his idea

So true!timing is everything...
Absolutely.Are you going to keep us updated on the design you go with and the cost?


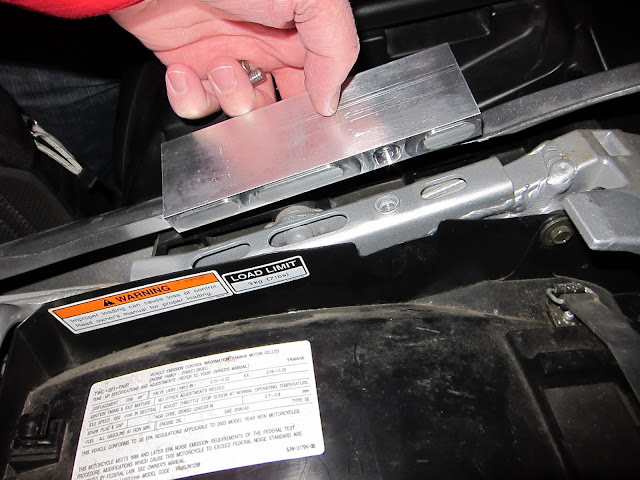
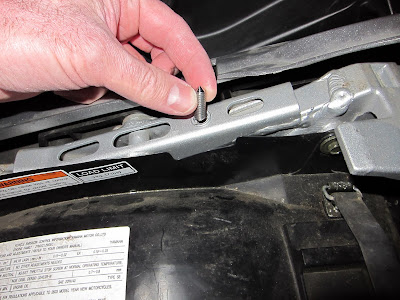
That sounds very interesting. Is there still the potential for a short production run, or will this be more of a one off?I'm working on the bracket. I made a template of the oval holes in the rear subframe and I have a couple of ideas.
I don't have any photos to share, but I'll try do describe what I'm trying out.
There is enough room under the seat to leave part of the bracket permanently attached to the bike. When I discovered that, I thought 'cool!' 'seat comes off, tank attaches to a bracket that's already rigidly attached.'
Next, I thought about boxing in the area under the the tank. Now, I'm thinking that if some sort of containment needs to be attached to the permanent bracket, I haven't gained much. The plan should change to: remove the seat, attach the bracket/container and attach the tank. I think I have the two sides figured out.
I'll be making parts in the next week or so and posting some photos. The bracket should work with the OEM grabrail or the Givi rack.
Actually, we just talked about that last night. I told the gentleman paying the bills that I would make whatever he wanted, but reminded him that making one tank for him would be more expensive than making several and spreading the costs out a little.That sounds very interesting. Is there still the potential for a short production run, or will this be more of a one off?

You missed out on the most dramatic parts! It turned out that the tank interfered with the seat if the seat was in the low position, and there is enough variation between GenII rear subframes that some custom grabrail bushings needed to be made. Oh, and how could I forget the tack weld problem! Poor 01VFR had the misfortune to discover all of these problems. <Link>i haven't seen any of the updates since my original reply. i never knew the Gen2 version went into production.
The screen shot is a wire-frame model of the critical attachment points on the GenI OEM grabrail. The geometry is not critical for the GenI tank, but it is useful to understand the relationship between the grabrail and rear subframe. Later, I'll add the oval holes in the rear subframe. I need to keep open the option of a rear subframe brace for GenI owners who choose to run without an OEM grabrail or a Givi rack. An internal brace will really save those people!I'll be honest Joe... I have no clue what I'm looking at, but happy you're working a Gen. 1 option.
Dave
Looking forward to seeing more update/pictures.Fatigue is the enemy of riders too. I don't know how you can stay awake riding more than a couple of hours without getting off and stretching at a fuel stop. Put 10 gallons on a bike and you will want to ride the 5 hours till the next stop.Pretty cool, but a couple of thoughts:
1. Fatigue is the enemy of sheetmetal. The fatigue crack in this design will form where the curved surface is welded to the flat surface. Try real hard to avoid welds in general and especially at right angles to a big flat surface like that. Suggestion #1: Make the top, front, two sides, and rear of one piece with gentle bends (CAD is a great resource to get the vertical corners right), then weld on the bottom. Suggestion #2: Make the entire Z-shaped bottom of a single piece. Give it a good half-inch or more of bend radius where your current sketch shows the bottom and top of the curved part.
2. Sheetmetal tanks are commonly held down by straps, because people long ago realized that cracks form at the edges of mounting tabs or where the wall thickness changes abruptly. Think carefully about how you'll hold the tank down. Also think about fatigue in terms of any tabs for light brackets, cargo tie-downs, etc.
3. Explosafe or any of the other foams are generally well-recognized as baffle material, but you'll need to check the IBA rulebook to make sure.
Hope this helps.
Bob
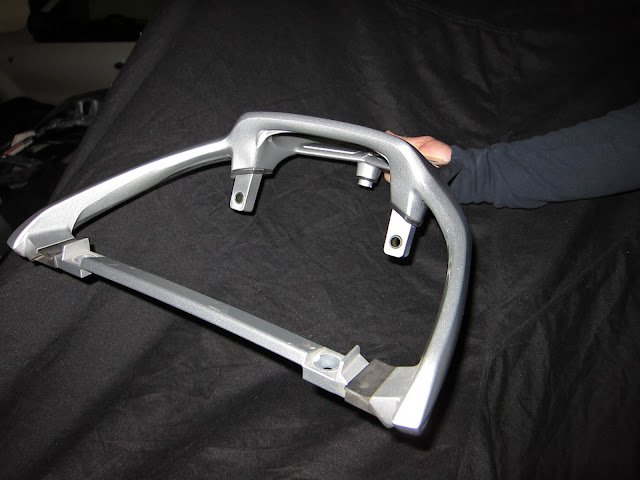
Just to clear up what that CAD screen shot represents, here's a photo with the grabrail in roughly the same orientation:


![Decrum Motorcycle Jacket Men - Mens Leather Jacket | [1100065] Austin Brown, XL](https://m.media-amazon.com/images/I/41HqZSRj6LL._SL500_.jpg)