Rear shock linkage maintenance

Yamaha FJR Motorcycle Forum

Help Support Yamaha FJR Motorcycle Forum:

This site may earn a commission from merchant affiliate links, including eBay, Amazon, and others.
> Turn the swingarm bolts around (?)- I think you mean centerstand bolts. The upper two need to be cut and then order two new ones to be installed backwards. Washers will also be needed to prevent them from hitting the exhaust.
I have the p/n's for the centerstand bolts (90109-101E6-00) so I'll get a couple ordered to have them ready along with a couple of washers.

I am assuming those in the know will correct me if I am wrong but it is my understanding that it is not necessary to cut the C-stand bolts off. Loosening and removing the exhaust mounting bolts will allow the right exhaust to be moved enough to get those original C-Stand bolts out. Then just reverse them (wish some new washers for clearance) when re-installing them.

Skooter is right. You can get the C-stand bolts out (easier than the longer upper pivot bolt) by flexing the header. After you remove the exhaust mount bolts at the passenger footrest bracket and also the bolts that go into the centerstand itself you can then "spring" the exhaust pipe out of the way without loosening the header bolts at the exhaust ports.

 
Just on this general subject, for those who have pulled the swing arm out for maintenance/service, has anyone found those bearings dry? I'm not too keen to pull the swing arm off just for shits and giggles just yet if I don't need to. It seems to move pretty unobstructed right now.
The bearings on the swing arm were in good shape on mine. They had a thin flim of grease on them, but it was time to clean and reapply grease. The lower bearings (where the dog bones attach) the bearings were OK. They needed clean and regrease they had a thin film of grease still on them. The bushing was another thing. The bolt was corroding to the inside of the bushing. It had not stuck yet, but was getting close to that. It was not as bad as the bolt that connected the lower control arm.
AuburnFJR, thanks for the info, could you also pls let me know if you came across any "gotchas" in the swing arm R/R?

Not really. Just take your time. The swing arm bolt it a very large Allen key so I used my multi step one for axles made by motion pro. The swing arm bolt is threaded in, so don't try to pound it out.

I believe it is the same size as the needed for the front axle. Although I never use it for the front axle because I leave the pinch bolts tight when loosening the nut.

 
I did this maintenance this weekend, almost fully. I could not manage to get the front center stand bolt off the left side, actually couldn't even loosen it. The springs were in the way to get any leverage on the thing. Are you guys just using a flat wrench for that? I did manage to do all the pivot points sans the one on the frame as I couldn't get that bolt out. What I was trying to do was take the two rear bolts out of the centerstand, and loosen the front two to allow it to be pivoted forward. This seemed feasible and I took the two rear out and loosened the right one, but the left was a no go. Has anyone tried this approach in lieu of removing the centerstand completely?

To hold the bike up, I have one of those Craftsman MC floor jacks, the yellow one. While I would never suggest buying one full price as they are quite flimsy, I got this one at a moving sale for cheap.

 
Last edited by a moderator:
I did this maintenance this weekend, almost fully. I could not manage to get the front center stand bolt off the left side, actually couldn't even loosen it. The springs were in the way to get any leverage on the thing. Are you guys just using a flat wrench for that? I did manage to do all the pivot points sans the one on the frame as I couldn't get that bolt out. What I was trying to do was take the two rear bolts out of the centerstand, and loosen the front two to allow it to be pivoted forward. This seemed feasible and I took the two rear out and loosened the right one, but the left was a no go. Has anyone tried this approach in lieu of removing the centerstand completely?
To hold the bike up, I have one of those Craftsman MC floor jacks, the yellow one. While I would never suggest buying one full price as they are quite flimsy, I got this one at a moving sale for cheap.
I used a box end wrench and mallet to hit the wrench to break it loose. I think you are correct that you may be able to just rotate the center stand forward. But if the bolt is that tight is may be corrosion and you probably want o get it out and put anti sieze on it.

 
EDIT: All balls makes a bearing kit for the FJR swing arm for $64.99 and has all the bearings, seals and new spacers. I am not sure of the spacer you are holding comes with the kit. I think it does, but I can't remember from my dirt bike. NOTE: this kist includes the swing arm pivot bearings, seals and spacers. But you may not need it. https://www.motosport.com/motorcycle/2004-YAMAHA-FJR1300-FJR13--all-balls-swingarm-bearing-kit?pssource=true&psreferrer=http%3A%2F%2Fwww.google.com%2F&utm_medium=cpc&creative=18261559705&adpos=1t1&gclid=CN61046L87QCFUxxQgodyV0AMQ&segment=badger&mmy_source=pdp
The page this goes to has a line that says "We're sorry, this product does not fit the ride you selected. " Does anyone have first hand verification that this is for our bikes? I went to the AB website but it doesn't list this kit, only these:

Wheel bearing kit - 25-1403

Steering bearing - seal kit 22-1003

Fork seal only kit - 55-140

I would think that Mother Yamaha used these parts/relay arm in another application, but am stumped on how to figure that out. Buying new from the dealer could get expensive if you needed it all.

 
Just on this general subject, for those who have pulled the swing arm out for maintenance/service, has anyone found those bearings dry? I'm not too keen to pull the swing arm off just for shits and giggles just yet if I don't need to. It seems to move pretty unobstructed right now.
The bearings on the swing arm were in good shape on mine. They had a thin flim of grease on them, but it was time to clean and reapply grease. The lower bearings (where the dog bones attach) the bearings were OK. They needed clean and regrease they had a thin film of grease still on them. The bushing was another thing. The bolt was corroding to the inside of the bushing. It had not stuck yet, but was getting close to that. It was not as bad as the bolt that connected the lower control arm.
AuburnFJR, thanks for the info, could you also pls let me know if you came across any "gotchas" in the swing arm R/R?
Not really. Just take your time. The swing arm bolt it a very large Allen key so I used my multi step one for axles made by motion pro. The swing arm bolt is threaded in, so don't try to pound it out.

I believe it is the same size as the needed for the front axle. Although I never use it for the front axle because I leave the pinch bolts tight when loosening the nut.
I didn't have the correct Allen for getting the shaft out for the swing arm so I improvised using a 5/8 Spark Plug socket turned around as the head on it is a 3/4 and fit perfect! Then I put a 5/8 Allen in in the socket to pull it out shaft luckily I had purchased the correct socket for the steering head stem nut and that helped me get that big nut off on the left side also the nut on the right side I used a 1 1/16 socket to get that nut off.

 
I did this maintenance this weekend, almost fully. I could not manage to get the front center stand bolt off the left side, actually couldn't even loosen it. The springs were in the way to get any leverage on the thing. Are you guys just using a flat wrench for that? I did manage to do all the pivot points sans the one on the frame as I couldn't get that bolt out. What I was trying to do was take the two rear bolts out of the centerstand, and loosen the front two to allow it to be pivoted forward. This seemed feasible and I took the two rear out and loosened the right one, but the left was a no go. Has anyone tried this approach in lieu of removing the centerstand completely?

To hold the bike up, I have one of those Craftsman MC floor jacks, the yellow one. While I would never suggest buying one full price as they are quite flimsy, I got this one at a moving sale for cheap.
I used a box end wrench and mallet to hit the wrench to break it loose. I think you are correct that you may be able to just rotate the center stand forward. But if the bolt is that tight is may be corrosion and you probably want o get it out and put anti sieze on it.

Here's another "trick" for those stubborn centerstand nuts. Get the box end of your combination wrench on the nut to be loosened, then to get added torque on the wrench hook another size box wrench over the open end of the combination wrench, like this:

100_3859.jpg


If you can't get them with this, you need to hit the gym.
wink.png


edit: If you break the open end off the combo wrench, you are on your own. May be best to use Craftsman or SnapOn wrenches with a lifetime warranty!

 
Last edited by a moderator:
Thanks. Actually on certain size box wrenches you can use a square ratchet head in the open. Similar to your pic, Fred, just different and sometimes the adjustability of the ratchet makes the angle better. Anyway, the 14mm wrench is one of those sizes with a 1/2" ratchet. It was the other site I couldn't hold. The exhaust pipe was too close to the bolt head and I could squeeze the flat wrench in there. I didn't know if there was a trick to that. I had the exhaust unbolted from the frame at the point that was close to the area. I'll give it another try sometime, just not today.

AGain, thanks all.

 
Yeah the trick is to remove that exhaust bolt up near the passenger foot peg, then the pipe will flex much more and you can get the box end on the head. But, in the default configuration the nut is inboard.

There is one of them on the left side that fouls on a little metal retainer clip for the vent tubes. I just flexed that back and forth and broke it off. I could ty-wrap the vent tubes, if I really wanted to.

 
Last edited by a moderator:
Just on this general subject, for those who have pulled the swing arm out for maintenance/service, has anyone found those bearings dry? I'm not too keen to pull the swing arm off just for shits and giggles just yet if I don't need to. It seems to move pretty unobstructed right now.
The bearings on the swing arm were in good shape on mine. They had a thin flim of grease on them, but it was time to clean and reapply grease. The lower bearings (where the dog bones attach) the bearings were OK. They needed clean and regrease they had a thin film of grease still on them. The bushing was another thing. The bolt was corroding to the inside of the bushing. It had not stuck yet, but was getting close to that. It was not as bad as the bolt that connected the lower control arm.
AuburnFJR, thanks for the info, could you also pls let me know if you came across any "gotchas" in the swing arm R/R?
Not really. Just take your time. The swing arm bolt it a very large Allen key so I used my multi step one for axles made by motion pro. The swing arm bolt is threaded in, so don't try to pound it out.

I believe it is the same size as the needed for the front axle. Although I never use it for the front axle because I leave the pinch bolts tight when loosening the nut.
AuburnFJR, thanks for the info, I have one of those multi step Allen keys so will make use of it like you pointed out.

 
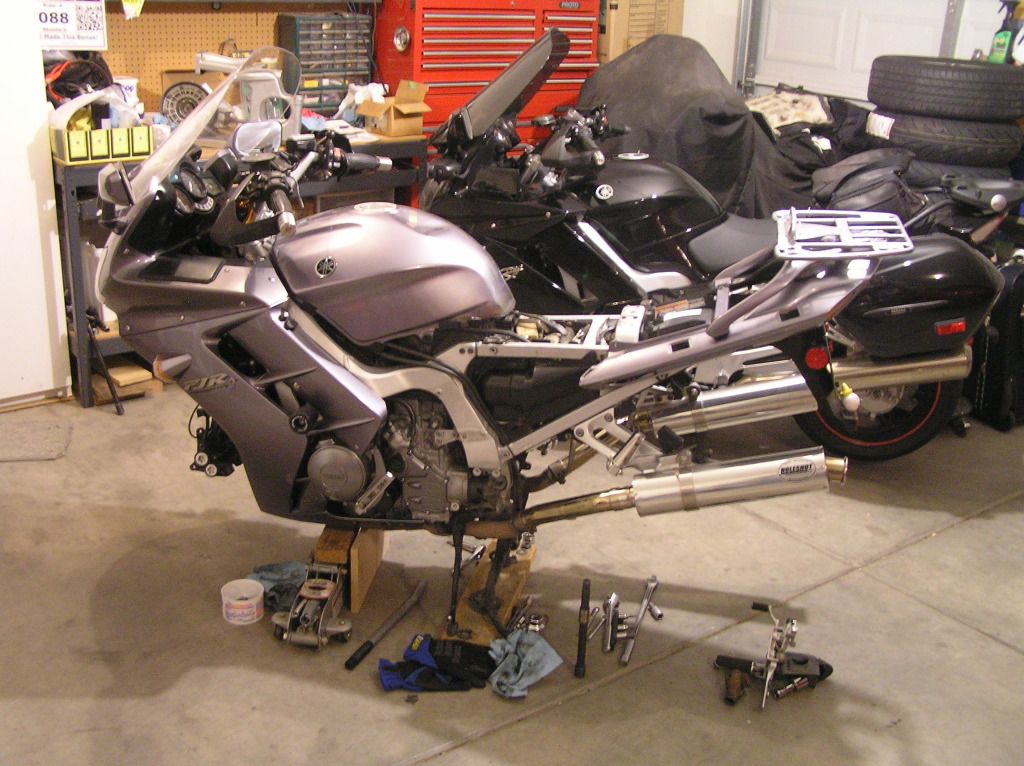
Making slow but steady progress on my poor Hula girl. As much as this sucks, I am enjoying learning to do some new maintenance procedures.

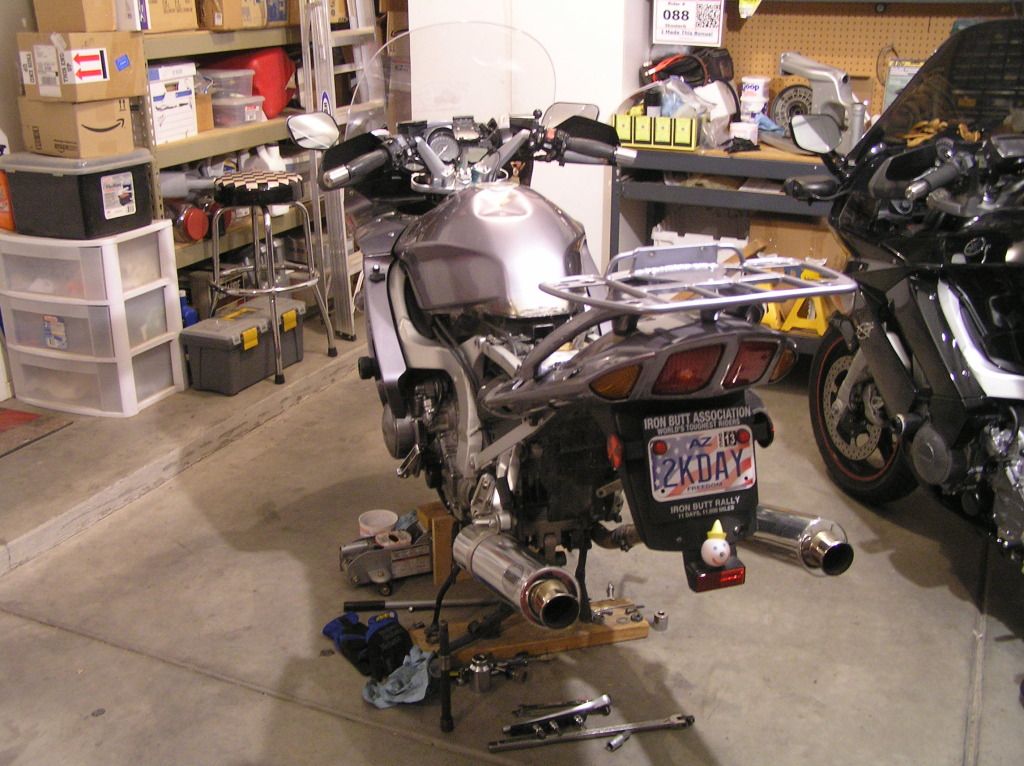
This is how my poor FJR has looked for quite some time now:

P1010183_zps801ec1ba.jpg


P1010182_zps2dceb52c.jpg


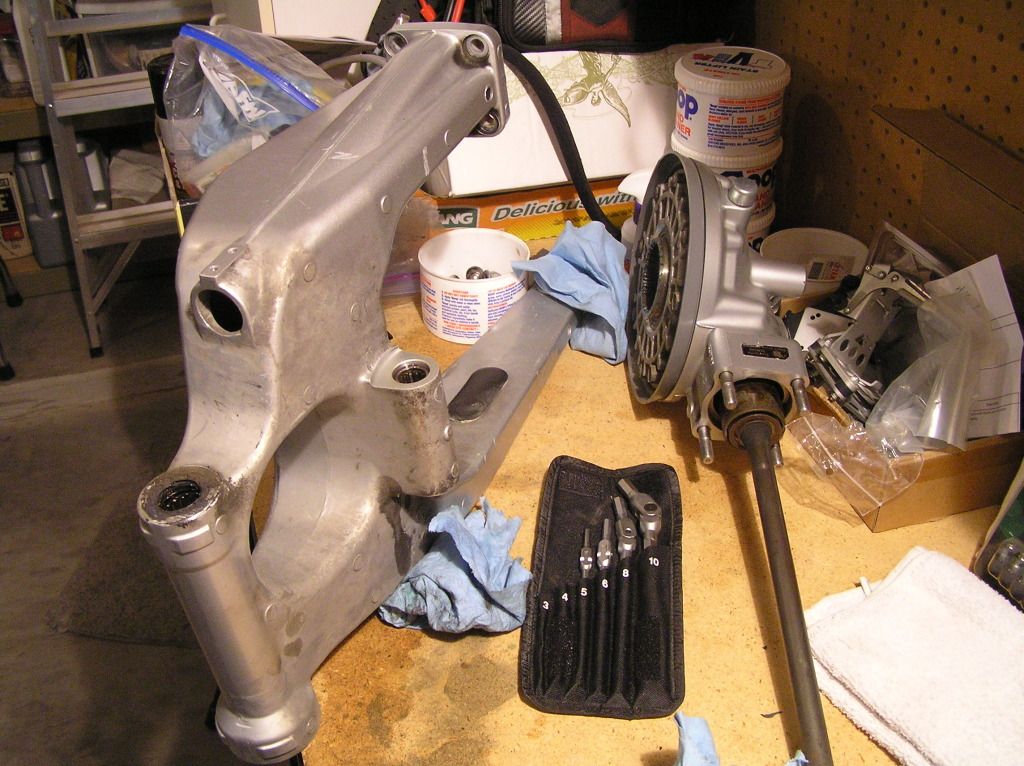
Removing the swing arm wasn't too bad at all. After 130k miles, it is a bit dirty.
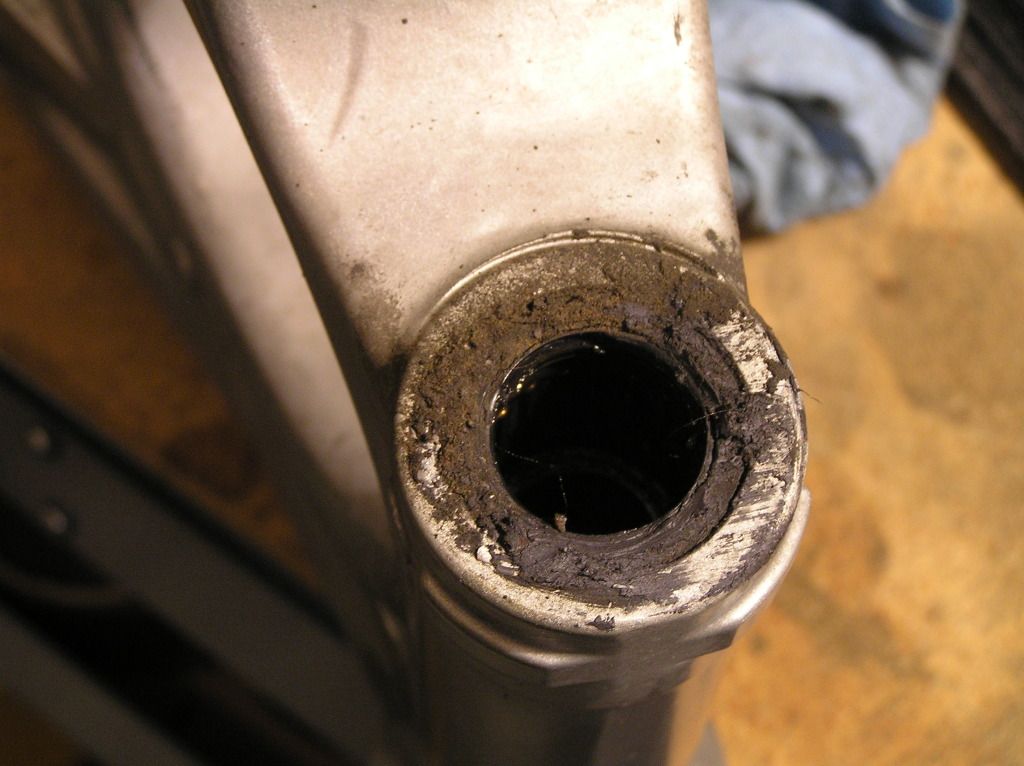
P1010194_zpsaf0c0c3b.jpg


The seal is yucky.

P1010185_zps1489830a.jpg


Swing arm pivot bearings seem fine. Ain't going to mess with them. New seals are on the way.

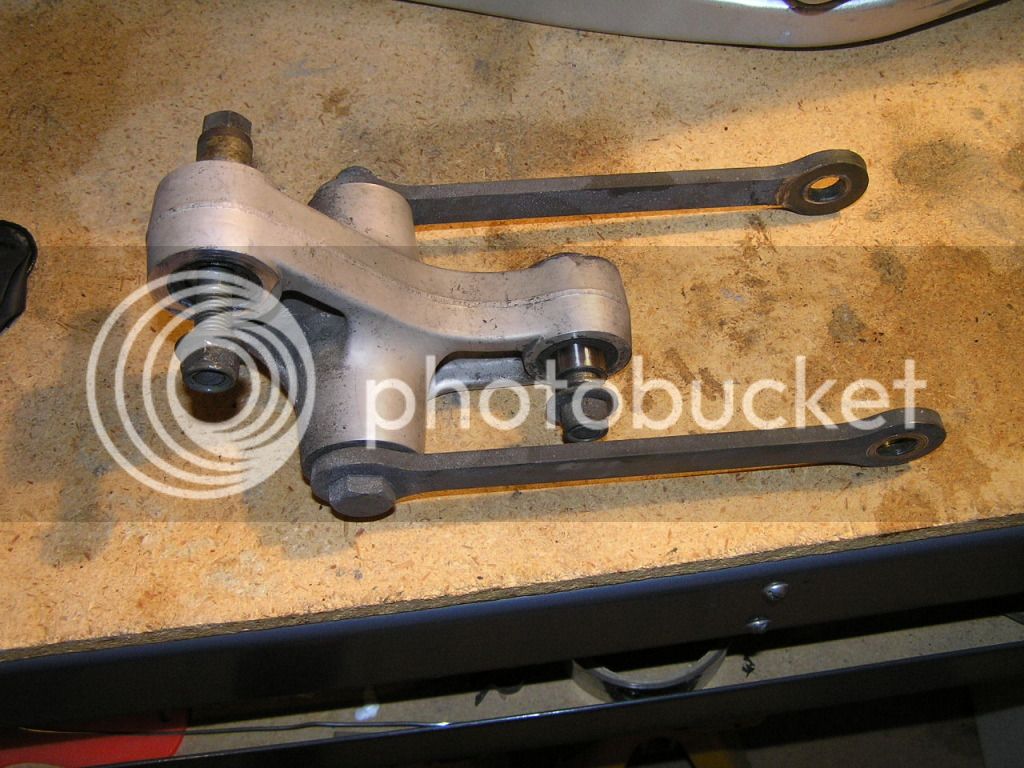
Bought a suspension relay arm from a 2003 FJR off ebay for $35 delivered. What a deal! I was hoping all the bearings would be good and I could just swap it in for the current one with the bad bearings.

P1010196_zps06d91de5.jpg


But alas, even though the dogbones moved easily and smoothly, upon disassembly the center collar had the faintest of bearing marks on one side. I've learned my lesson and will get new bearings installed. The two single outer bearings on either end were fine.

So off to my favorite tech went the swing arm and new relay arm. There was no way I was going to attempt removing and pressing in new bearings. I just would have made things worse. Proper must-have tools here as far as I am concerned are a blind bearing puller, and a press.

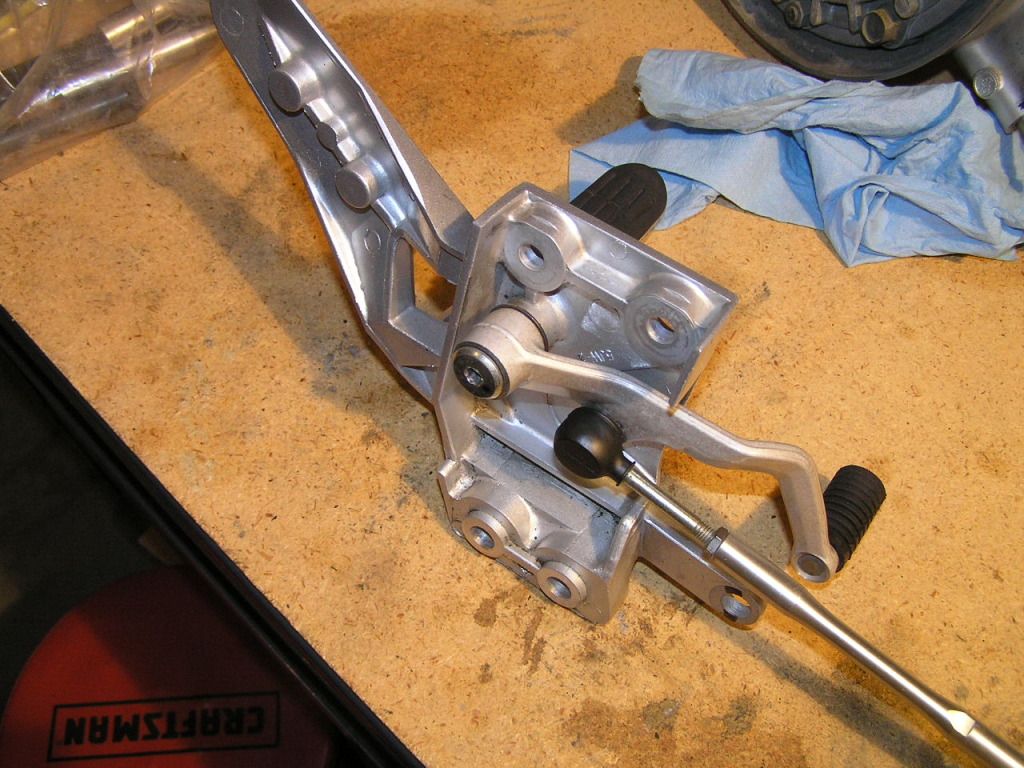
While those pieces were gone, I did a lot of cleaning and serviced the final drive splines and U-joint. In just over 365k miles of FJR ownership I have never lubed my shift lever. Its never needed it as far as I am concerned. Well, since it had to come off to remove the swing arm, I lubed it. It's prettier now, but doesn't move any more smoothly. At least I feel better. I guess.

P1010209_zps39c769b5.jpg


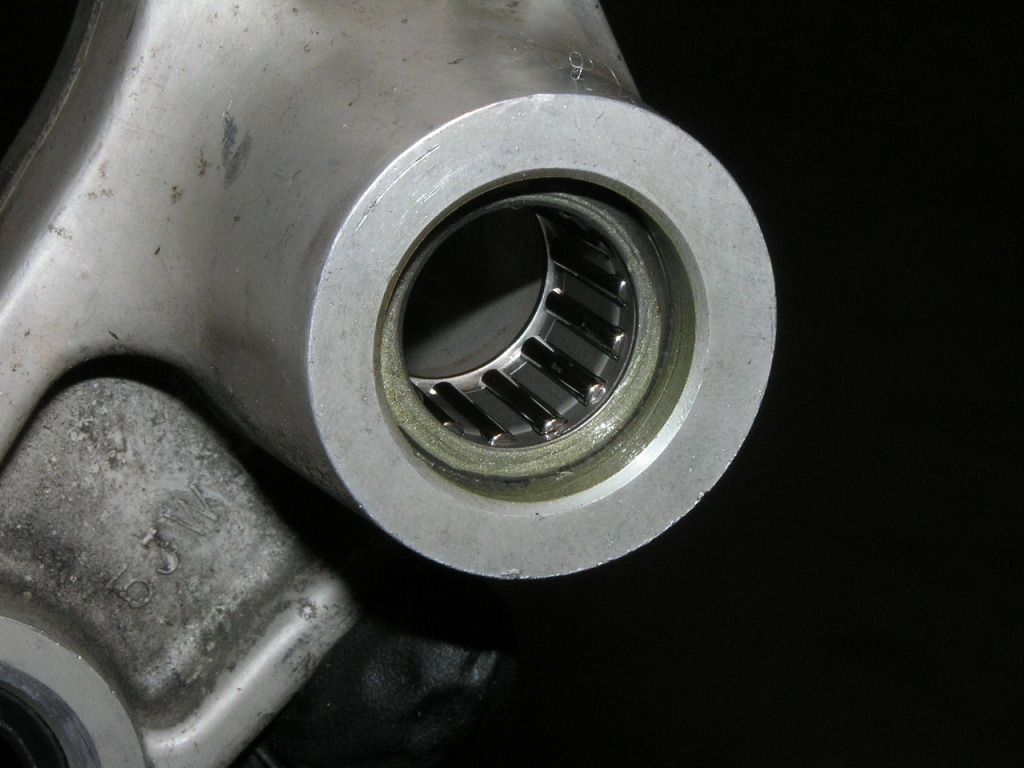
Today I picked up the swing arm and relay arm with new bearings installed. Here's a photo of one of the new bearings in the relay arm. Puuurty.

P1010217_zps4ead5ec0.jpg


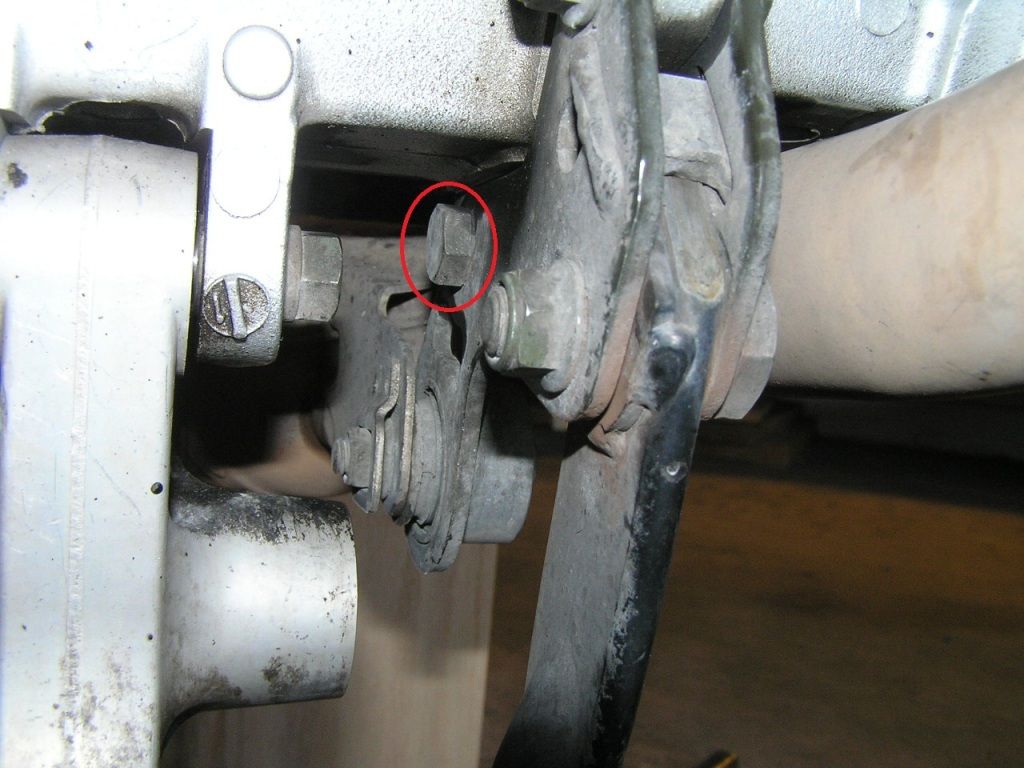
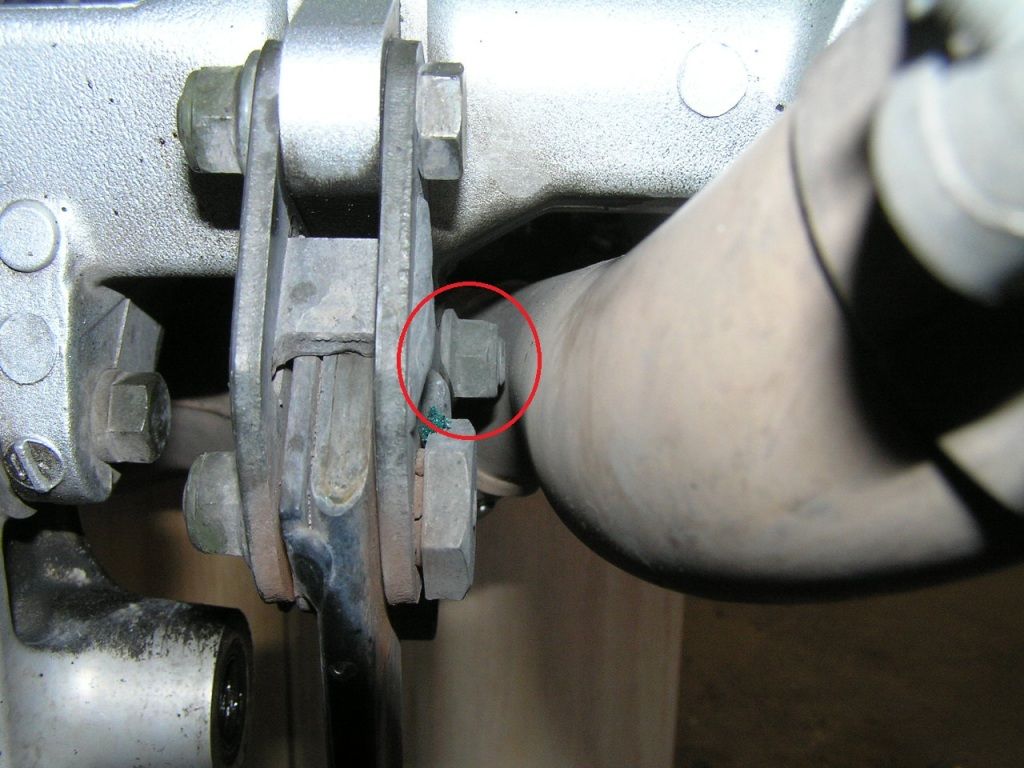
I then loosened all the C-stand bolts and upper relay arm bolt preparing for the big job once I have a way to suspend the FJR. These pieces are easy to get to with the swing arm removed. Lucky me, the PITA right side C-stand bolt had already been reversed. I bought the bike with 5900 miles on it. It did have an Ohlins shock on it when I bought it. They must have serviced everything and reversed that bolt when they installed the shock. Even with low miles. Lucky me! Photos of the usually offending bolt in the better orientation:

P1010204B_zpsbc068587.jpg


P1010205B_zpsd80414d1.jpg


My newly serviced forks and Wilbers shock arrived from Traxxion this evening so everything is starting to come together. Tomorrow I will install the forks, a necessary step to keep the FJR stable while suspending the rear. Tomorrow I will also go and pick up a friend's home made hoist rack so I can suspend the rear and remove the C-stand. New seals for swing arm and relay arm are supposed to arrive Friday. I work Thursday through Sunday, so Monday will be a big day. Lube all the cleaned bearings, install new seals, remove C-stand, remove current relay arm and replace with ebay one with good bearings and then put everything back together. This has turned out to be one expensive maintenance evolution. At least the end of the tunnel is in sight.

Would like to say I am looking forward to a nice ride then, but I am way overdue for a valve check so that's next.

At 130k miles, Hula Girl is getting a new lease on life.
smile.png


Last edited by a moderator:
P1010183_zps801ec1ba.jpg


Be happy you don't have any Earthquakes/tremors in AZ, this kind of setup, even temporarily would be pretty risky out here
not_i.gif


Thanks for the pictorial Scooter, I'll be doing much of the same in a couple of weeks time.

Hey those look like Gen 2 mirrors on your Gen 1, I believe that's the first time I've seen that mod.

 
Last edited by a moderator:

Greg's picture above shows how you can get that pesky upper pivot bolt out without cutting it. This was pointed out already in an earlier post, but I think some folks may have missed it or not fully understood what was being said.

You can see the head and spacer of the upper relay arm pivot on the left side of the center stand. Notice how the head of the pivot bolt is smaller than the outside diameter of the spacer? :thumbsup:

If you remove the centerstand, then loosen the pivot bolt and slide it fully to the right you won't be able to remove the bolt as it will hit the exhaust pipe, but you'll be able to get the relay arm out. If you then re-assemble the nut and bolt (without the relay arm in place) you'll be able to pull out the spacer by tightening the nut and the head of the bolt will pull it right through the hole in the frame tab. You may want to pack something (metal objects) tightly between the two frame tabs to support them so you aren't stressing them too much as you tighten the bolt. A broken tab would suck pretty badly.

Once the spacer is free you then should be able to get that bolt out pretty easily as you can angle it in the larger hole in the right side tab.

 
I like the fuel tank volume reduction mod myself.

WTF happened there, Greg?
blinksmiley.gif

That is the subject of old forum lore: https://www.fjrforum.com/forum//index.php/topic/12725-skooterg-munches-playa-dust/

Or the reader's digest version..........

P6260660b.JPG


That fuel tank is the original off my old Dirty Ol Whore, my first FJR. So she still lives a little bit. It is the tank plumbed for a fuel cell so I kept it. And as that dent was caused by my collar bone and ribs crashing into it - they lost. It is also my daily reminder NOT to be stupid.

Skooter-Since your initial posting of this thread, YOU have cost me $3k in upgrades and servicing. Thanks buddy...

Sometimes ignorance is bliss (?)

What are friends for?

 
Last edited by a moderator:
Excellent post Skooter!

I seem to remember changing all the linkage bearings around 144k and they were completely shot. The linkage had very little movement.

We checked the swing arm bearings and they seemed fine so we left them alone.

 
Top