Smokers (BBQ - not grilling)

Yamaha FJR Motorcycle Forum

Help Support Yamaha FJR Motorcycle Forum:

This site may earn a commission from merchant affiliate links, including eBay, Amazon, and others.
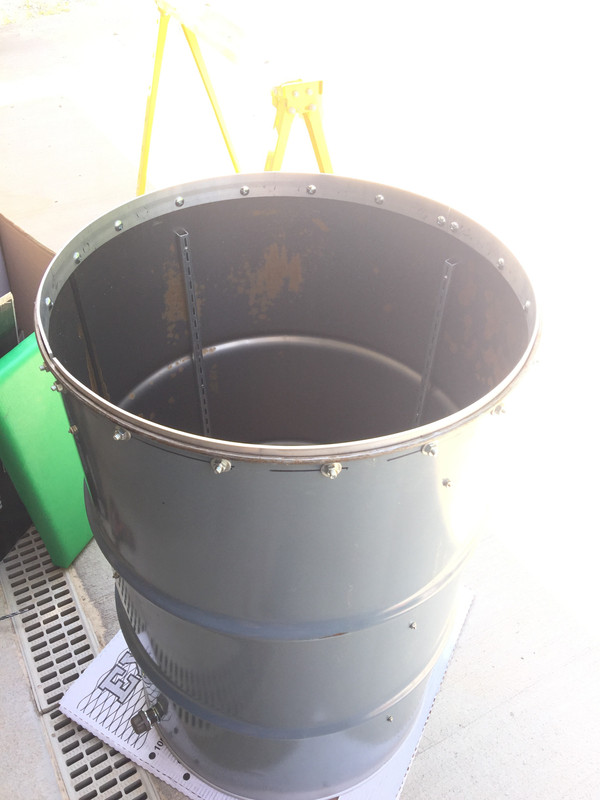
Nice score. Watching your progress anxiously.

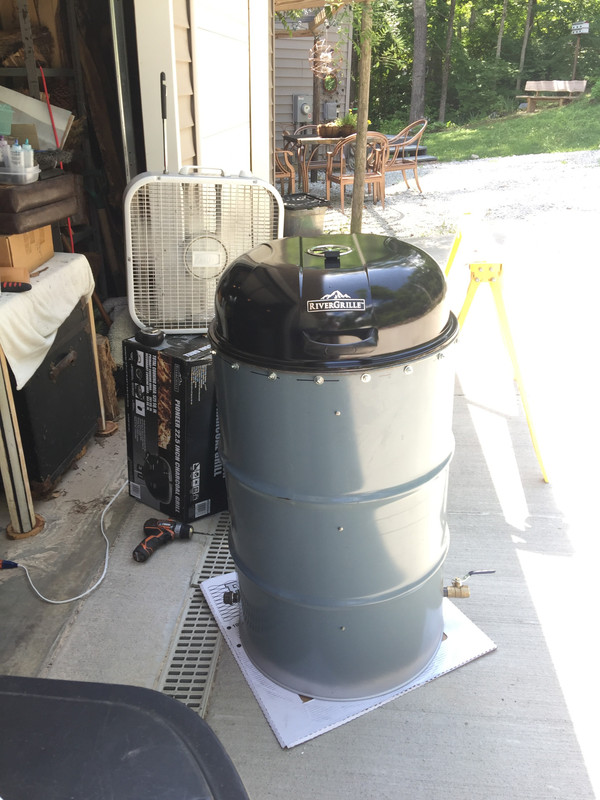
Had a good day of rib cookin' today. Fired up the OK Joe with a full bag of Royal Oak briquettes, bought at Lowe's for less than $6 a bag. Good thing they were cheap cause I used the whole damn bag.

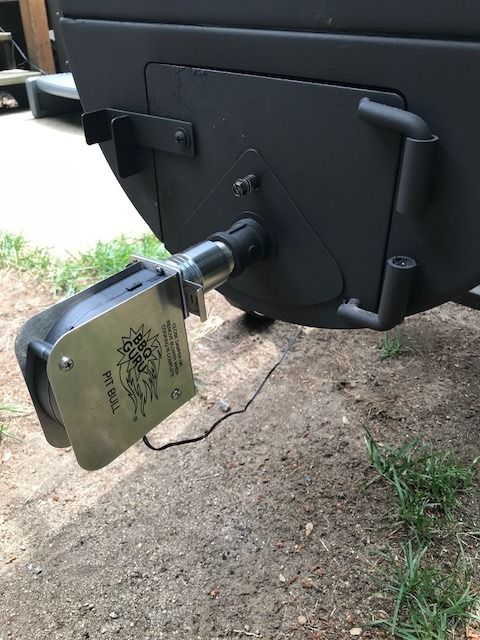
Hooked up the DigiQ stoker again, this time with the new Pit Bull high(er) CFM blower

IMG_1590.jpg


My DigiQ and Smoke thermometer probes both run into the pit through my new Weber silicone probe port

IMG_1592.jpg


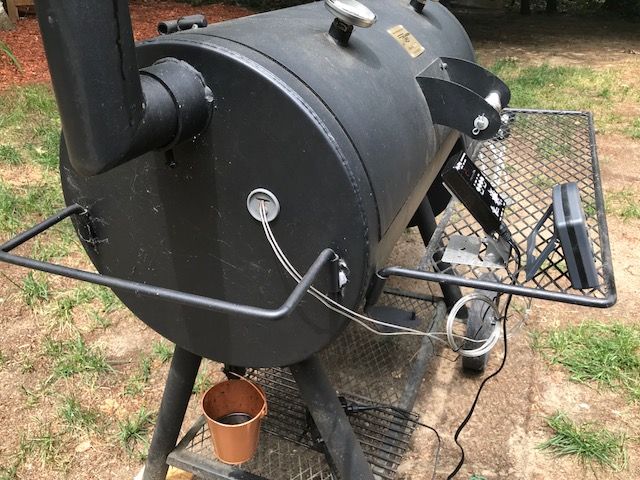
Let the stoker bring the pit up to temp, which only took about 20 minutes.

IMG_1591.jpg


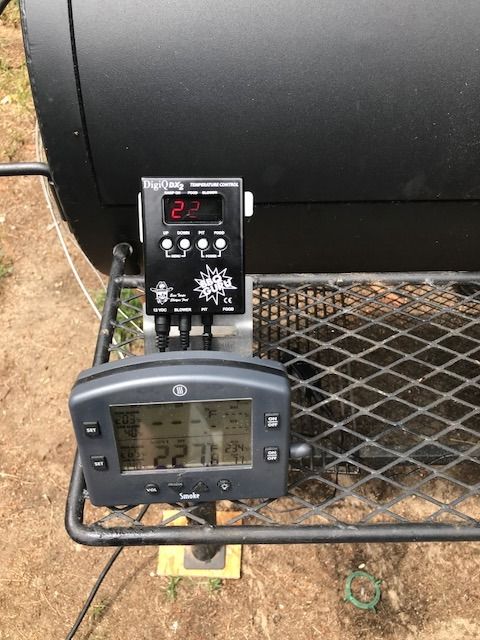
Stoker was reading 225 but has rolling digits that the camera froze.

IMG_1593.jpg


And, just a short 5 hours later...

IMG_1594.jpg


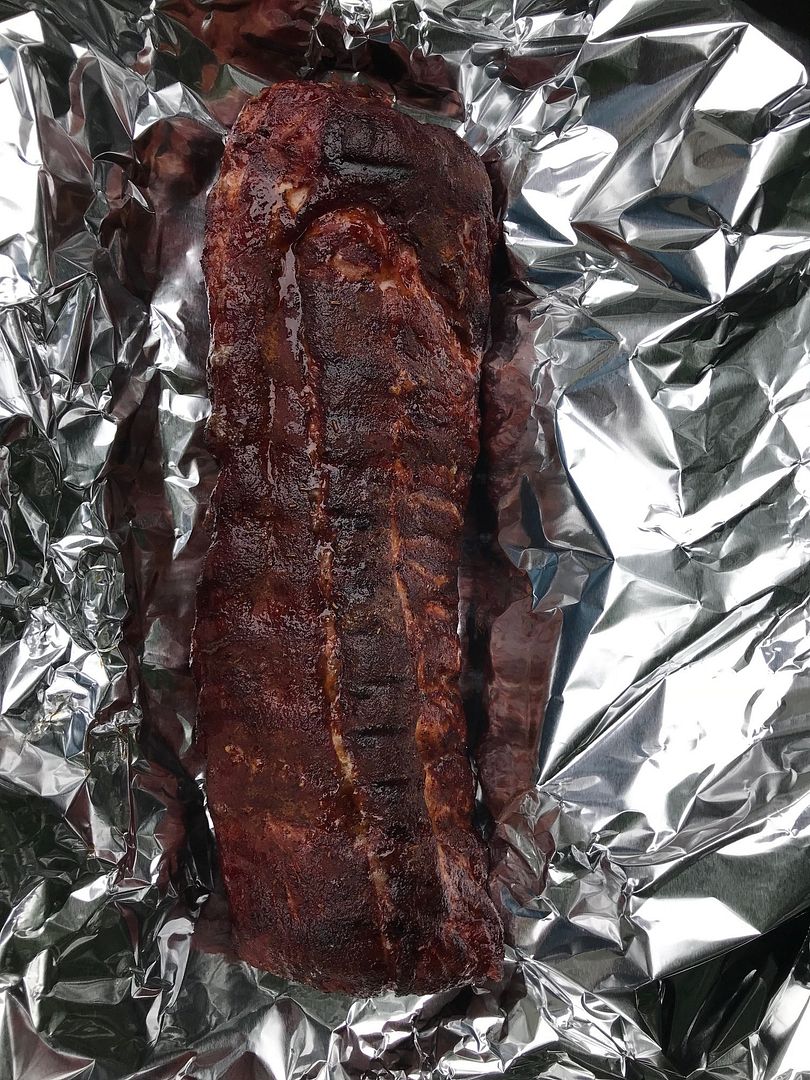
There were two racks like that...

IMG_1595.jpg


IMG_1596.jpg


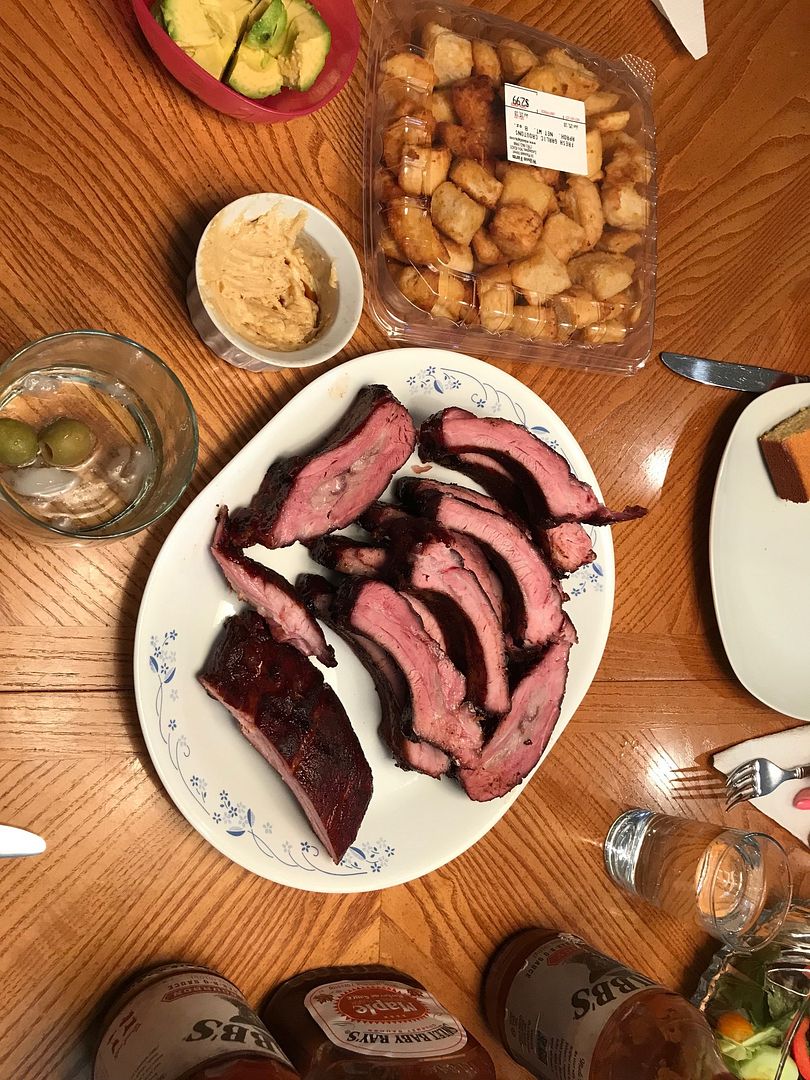
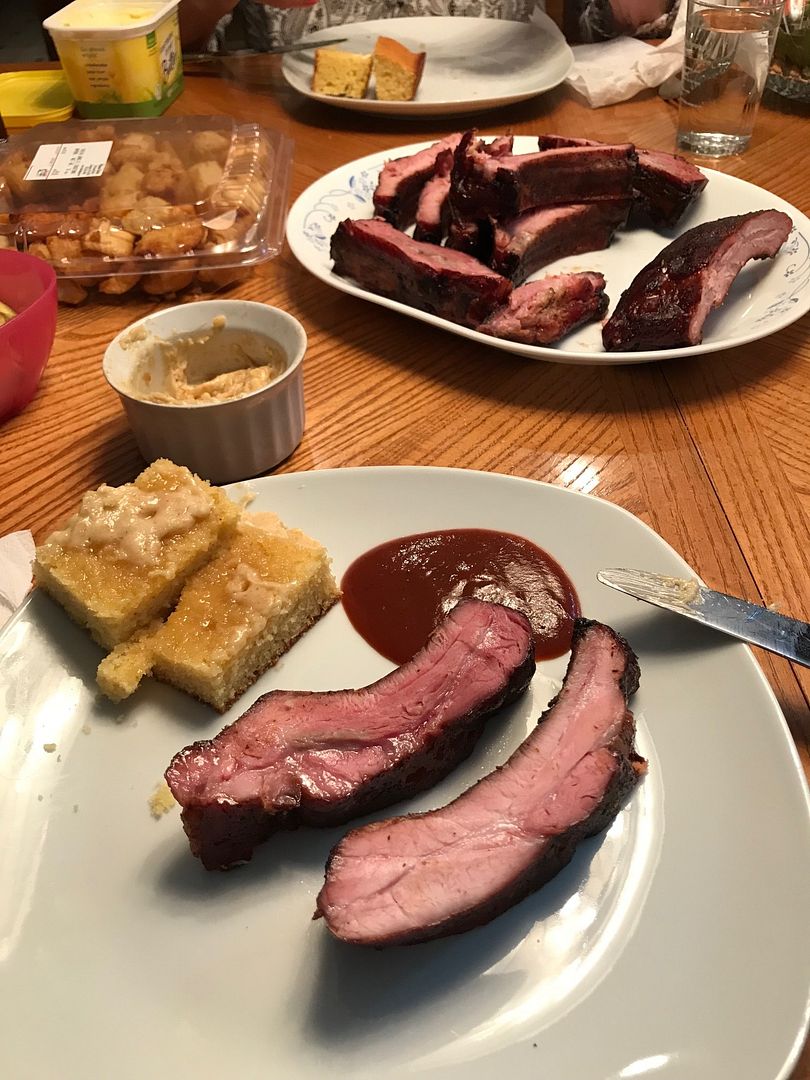
I nailed the done-ness this time to perfection. Not as loose and overcooked as my normal results. Had the perfect pull and chew without failing off the bone in one giant hunk.

Oh, and that tan stuff in the little bowl in the last shot is maple butter for the corn bread. If you've never made that before you just don't know what you've been missing. Of course real maple syrup is required, and the darker grade the better. Google is your friend there...

 
Last edited by a moderator:
Damn nice looking ribs there. ;)

Those look exactly how mine usually do, pink to the bone :) I understand now why you cook your BB's for 5 hours and I do mine for 4 to 4-1/2 hours (max) ... your other post says you "flip and flop" your racks as you smoke them do to the proximity of the firebox. Which means you open up the door to do this. I don't open my smoker until I'm pulling them out. (As we seem to be cooking them at the same temperatures)

Sadly the nice cool wet weather has left and we are in for record highs again this week (98+ humid) so work on the UDS will likely be slow as I hate working in the heat (and with the wife gone I have watering to do for all the plants and new trees)

We ate up a rack out of the freezer last night BTW. Evey's cousin was impressed. There's a few untouched bones left for dinner tonight. :)

 
Last edited by a moderator:
I find that flipping is required for even cooking with either my OK Joe or UDS as the heat is coming from below the grate in both cases. Much more so on the vertical, but also to a lesser extent on the offset. Yours being a heavy gauge reverse flow must have more uniform temps vertically and horizontally. Ive also noticed that you stand your ribs up in racks, where I lay them flat. That might make a difference. I should try standing mine up and see how that works.

On the same line, the DigiQ has a Lid Open menu setting that you need to change when you use it on an offset. On a vertical, when it detects the lid was open it turns the fan off for a while knowing it is going to temp spike from all the added oxygen. You want to turn that off on an offset. When you open the cook chamber you want the stoker to keep blowing to bring the cook chamber back up to temp. When you open the firebox to add wood or fuel it never even notices.

 
Hmmm, magic? Not really.

It does help hold the temps pretty steady, but it isnt magic, especially on the offset. Not sure how often Ill even use the stoker on the OK Joe in the future. On the vertical it is more magic like as you can pretty much set it and forget it for 16 hours.

As for the smoke club: I would never want to join any club that would have the likes of me for a member. ;)

 
Gee, I thought this WAS the smoke club.......

I've measured a 5-10 degree difference between one end of my reverse and the other. 5 being average and 10 when I add fresh fuel.

If you noticed I position the rib rack as centered as I can, and put the "thicker" end of the slabs at the firebox side.

Racks are nice in not just letting you cook more ribs, but those with handles make it less messy and quicker pulling the meat out. (Or spinning them around) :)

Edit: put the grill together tonight. Not a bad grill for $39. Will need to make some spacers to use the hinge on the drum, but not a problem. Not sure what to do with the thing after I use the lid for the smoker....

IMG_3421.jpg


Last edited by a moderator:
I lived in that hood once....now you have to put a "FREE"' sign on it if you want it to disappear.

Well, finished up the charcoal basket tonight, using Fred's design.

IMG_3423.jpg


Getting up early (to avoid the heat) to do some more work on the project.

 
Last edited by a moderator:
I am guessing that will take a 15 lb. bag, correct.
Dave
Guess we'll find out. Quick calculation shows volume at 2,120 square inches. (Diameter 15", height 12") this doesn't figure in any charcoal piled over the baskets height.

Not sure how much wood figures into the equation either ..... ;)

 
Okay, got a lot done this morning. Installed the adjustable shelf rails and cut the brackets. Photo shows how they are placed:

IMG_3424.jpg


Pic of both racks:

IMG_3425.jpg


Ball valve and extra vent put in.

IMG_3426.jpg


Still to do, get bolts to attach legs:

IMG_3427.jpg


And work out how to fit the lid. Hope to be able to fire it up by next weekend. :)

 
Last edited by a moderator:
Looking good. Those shelf brackets are genius!

I suggest that you try to get those legs spaced out to the edge of the drum as much as possible to make the thing as stable as possible, especially if you plan on hanging any sort of a side shelf on there like I have.

 
Last edited by a moderator:
I just laid them up there, was very hot, dripping sweat, so no thought into placement.

I do plan on making a nice cedar side table (if for nothing else just to hold the temperature gauge)

Next problem is how to get those goddamn labels off......

 
Goof Off solvent.

I think if you use some washers as spacers youll be able to put the legs out all the way to the edge sitting up on that crimped ring on the bottom. That should give you a nice stable base.

The shelf comes in handy to put trays on when loading and unloading your meat too.

 
Last edited by a moderator:
As the labels were paper, I just laid a few layers of hot soaking wet cloths over them. This dissolved the paper, which rubbed off easily. I then used some lacquer thinner to remove the leftover adhesive. Clean with no trace they were ever there. :)

 
Last edited by a moderator:
As I may have mentioned, the lid I picked up was a tad small to fit over the edge of my drum. So the plan was to get a metal ring made up at a local metal shop to fit in the inside lip of the drum, sticking out enough for the lid to fit over it. Well one shop wanted over a hundred bucks to roll me a strip of aluminum and another one just didn't want to do it. So I woke up today and said **** them, I have some aluminum band in the garage I was going to use on another project (building side case supports for my Bonneville)....I'll just bend them myself right over the drum and bolt them down using C clamps to pull them in.

So started with one 36" piece:

IMG_3432.jpg


Then the other one:

IMG_3433.jpg


Finished up. Does look kinda Frankensteinish, but that's why they are called Ugly Drum Smokers:

IMG_3434.jpg


AND Voila! perfect fitting lid:

IMG_3435.jpg


Now just have to cobble up some 7/16" spacers to get the hinges to work, then it's off to paint and reassembly. :)

 
Last edited by a moderator:
You are taking Ugly Drum to a whole new level. ;) The gap in the metal band will make a handy slot to run your probe wires through.

I guess you could always cut the lip off the top of the drum later if you get sick of the Frankenstein look.

 
Last edited by a moderator:
You are taking Ugly Drum to a whole new level. ;) The gap in the metal band will make a handy slot to run your probe wires through.
That's exactly what I had in mind, as I'm still not sure where to put that rubber grommet thingy. The shelf will be on the side by the gap, and I'm thinking of putting the grommet down where the lower rack would be.The only thing I find "ugly" so far is that plastic placard that says "River Grille", expect to see two bolt heads there in the next photo...

 
Last edited by a moderator:

Latest posts

Top