Gen II Crash Bar Group Buy

Yamaha FJR Motorcycle Forum

Help Support Yamaha FJR Motorcycle Forum:

This site may earn a commission from merchant affiliate links, including eBay, Amazon, and others.
That's some tasty "thinking out of the box", but I wonder, if a passenger DID use that as a foot rest, would the top bar press on the back of the calf muscle?
Hard to tell from the angle.
Only if you have reaaaaaally short legs.

Mine, freshly painted by Garauld, arrived today. I will install them this weekend for certain and have pictures posted. (see linky in sig) Unless I get really anxious tonight and install them...

 
Someone will have to explain or show me how (07 A) they are getting the rear sets to fit. Mine don't. I can get two of the three mount points to line-up, but that third is always off center and not by just a little. (I can't shove or bend those bars enough to make it fit). None of the bolts are tight right now so that I can wrestle with it and move it around..but there's just no way that's going to work.

Rear footpegs aren't fitting in the welded-on mounts. Plus, according to the directions, you use the factory bolt to secure it at the original footpeg spot. Fine...so how does the footpeg stay in the bracket mounts?

Extremely frustrating.

edit: did I expect perfection? Not really.

On to the fronts...

edit 2: Wow. Are we sure they had a bike to install these on in the shop? One of the steps is to remove the rear engine mounting bolt. Ok, easy enough. One of the last steps is to put that bolt back in but "do not re-use the stock nut" - um...WTF?! There wasn't one provided. I had two clear plastic bags with bolts and washers and such......I also don't see how I'm keeping the Wild Bill pegs at all. The mounting plates for those are going to rub right up against the front crash bars.

 
Last edited by a moderator:
I don't know (yet)... I just got confirmation today that racing905 received my rears to get the peg brackets mounted on.

My suggestion:

Take some photos of what's not fitting. Post them where Aaron/Stephanie can see them. Take GOOD photos. I did this with my fronts that didn't seem to fit.

They called me in about 10 minutes and told me what I was doing wrong (rather, my bike had a bolt installed backwards from their directions and it just didn't click in my head)

I expect to see mine in a couple weeks.

-MD

I think their instructions said to install one side or the other, tighten them both down then insert the center rod.

IMHO:

- Insert the middle bar under the motor

- install the right side 'snug'

- install the left side snug it up

- then loosen both sides, and thread the bolts into the middle bar, once they are started, tighten the right side.

- Tighten the bolts for the middle piece, then tighten and torque the left side.

 
Last edited by a moderator:
I also don't see how I'm keeping the Wild Bill pegs at all. The mounting plates for those are going to rub right up against the front crash bars.
Someone mentioned they didn't design the bars with the highway pegs in mind; however, another member just marked a new hole in the plates for the pegs to work, removed them, center punched that spot, and re-drilled a new hole for the pegs to work. Sounds workable to me, but I have no first hand experience with it. I'm awaiting for Gen I bars to be designed, made, and tested.
I saw that too. What I'm saying is that the brackets holding the footpegs rub against the crashbars.
TurboDave got them on and so did someone else, I can't remember who.

Again, Pics speak volumes :)

 
Has anyone attached some clamp-on pegs to these yet? I've been looking at them to put highway pegs on. I have the wb brackets on now, but they make me somewhat uncomfortable being bolted to the engine. If anyone has put pegs on, pics would be nice.
check post # 329, 5 March, this thread for pics for install of guards and mounting of WildBill pegs.
bump bump for info purposes

 
Someone will have to explain or show me how (07 A) they are getting the rear sets to fit. Mine don't. I can get two of the three mount points to line-up, but that third is always off center and not by just a little. (I can't shove or bend those bars enough to make it fit). None of the bolts are tight right now so that I can wrestle with it and move it around..but there's just no way that's going to work.
Rear footpegs aren't fitting in the welded-on mounts. Plus, according to the directions, you use the factory bolt to secure it at the original footpeg spot. Fine...so how does the footpeg stay in the bracket mounts?

Extremely frustrating.

edit: did I expect perfection? Not really.

On to the fronts...

edit 2: Wow. Are we sure they had a bike to install these on in the shop? One of the steps is to remove the rear engine mounting bolt. Ok, easy enough. One of the last steps is to put that bolt back in but "do not re-use the stock nut" - um...WTF?! There wasn't one provided. I had two clear plastic bags with bolts and washers and such......I also don't see how I'm keeping the Wild Bill pegs at all. The mounting plates for those are going to rub right up against the front crash bars.
You're experiencing the same frustrations I had.

As far as the "missing" new nut for the rear engine mount...the directions are missing quite a lot. What you do is remove the entire bolt pulling it out from the shift side. Then you eventually reinsert the bolt through the brake side and thread it into the shift side guard, which is threaded.

My shift side bag did not line up either. It was off about 5/16". Stephanie said they changed slightly during the powdercoat process. I couldn't bend them either. What I did was mount the footpeg bolt and two upper bolts. Then, pushing really hard, I was able to insert the bolt at an angle and with enough cursing and anxiety about stripped threads was finally able to get it in.

And no, my setup did not come with extra passenger footpeg mount bolts either. Maybe we should ask? I haven't priced them yet.

 
You're experiencing the same frustrations I had.
As far as the "missing" new nut for the rear engine mount...the directions are missing quite a lot. What you do is remove the entire bolt pulling it out from the shift side. Then you eventually reinsert the bolt through the brake side and thread it into the shift side guard, which is threaded.

My shift side bag did not line up either. It was off about 5/16". Stephanie said they changed slightly during the powdercoat process. I couldn't bend them either. What I did was mount the footpeg bolt and two upper bolts. Then, pushing really hard, I was able to insert the bolt at an angle and with enough cursing and anxiety about stripped threads was finally able to get it in.

And no, my setup did not come with extra passenger footpeg mount bolts either. Maybe we should ask? I haven't priced them yet.
I'm not going to shove/bend these things and leave them bolted with that much tension. I would if I could reasonably move the metal with minimal force. What I will have to do to get the rear set mounted is not acceptable. Not after having spent $300 for the product and another $100 for the painting. (Garauld's price is more than fair and includes shipping) My biggest issue is that it seems more and more of us are having to ship one or two pieces back to get them "adjusted" If they have a jig how are these so far off?

I'm going to email/call Racing905 and see what can be done. My biggest concern relates to the paint...

I can deal without the highway pegs. Maybe I can re-sell them here. I had to give up on it last night as work called. I'll try it again tonight and get some pictures.

 
Anyone having fitment issues with the fronts?
I did at first, took these photos, showed them to racing905. They called, pulled my head out of my ***, told me to turn the bolt around, and I was good to go.

Again, just snug everything up, then loosen to insert the bottom rod, then tighten everything up.

All good.

I do NOT have my rears back from getting the foot peg brackets put on. When I do I'll verify fitment of what I have. If they need a little tweaking (bending) I can do that, but not a lot.

-MD

 
I'm still waitpng for a new set for my 07 AE, I sent the first set back about 3 weeks ago and still haven't received the new set. I think I will call Stephanie tomorrow and see what's up, and also ask her if they straighten out the issue with the rears. I have a lot of patience but if this new doesn't fit I think I'm going to get a refund.

 
Count me in too, black is beautiful. just let me know what where and when on payment. ck c-card or paypal are all fine with me

 
Dam, stupid me, Saw this at the top of the list and assumed it was a new post. I got ahold of racing 905 anyway and got a set ordered, hopefully they are working out well for everyone.

Philip

 
I saw that too. What I'm saying is that the brackets holding the footpegs rub against the crashbars.
TurboDave got them on and so did someone else, I can't remember who.

Again, Pics speak volumes :)
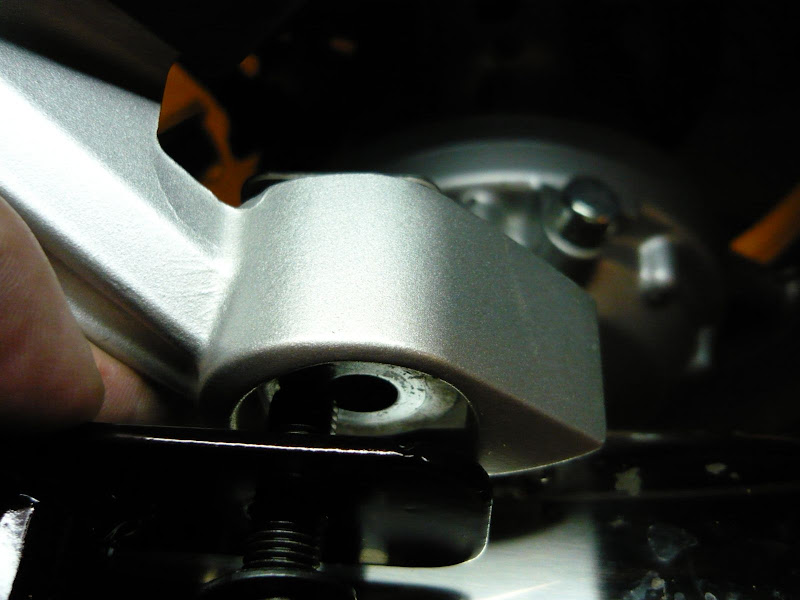
PICCIES

highlights -

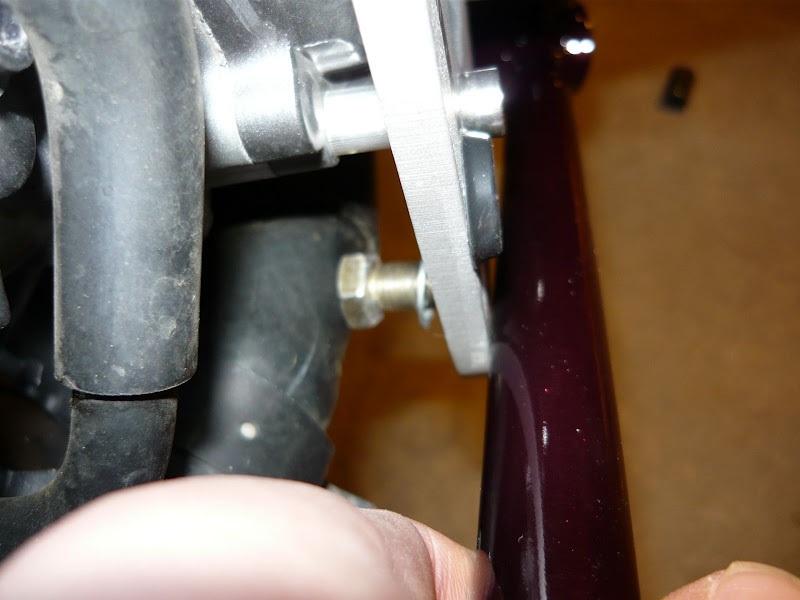
Even if I snug these up, I don't have the play required to get this close (left side)

P1000446.JPG


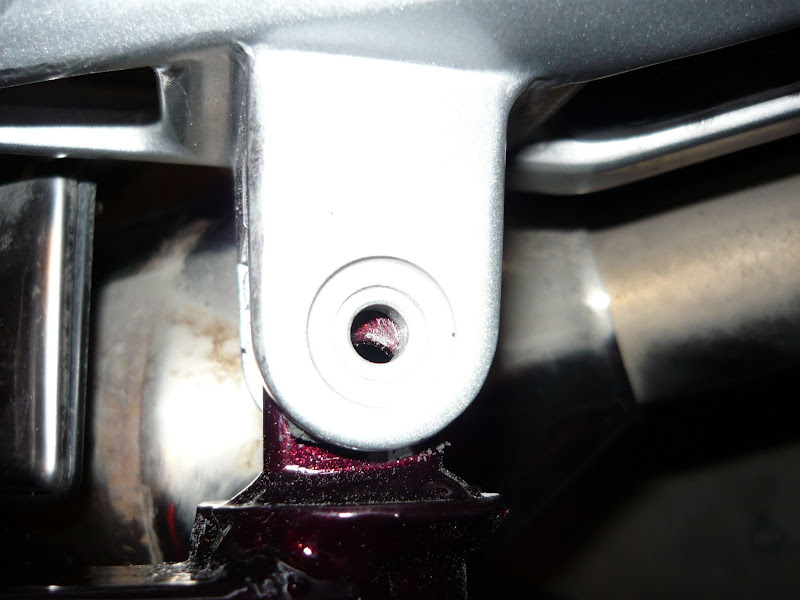
Right side - I started on this side getting the exhaust and the top bolts started...again, if I snug them, I'm not going to get that lower mount on at all.

P1000453.JPG


if the pegs have to go, then so be it...this is just setting the bars up against the frame (and rear engine mount). The lower bar isn't in play here...

P1000455.JPG


Last edited by a moderator:
Twisted,

Not looking good. I've got the same bike, model and year, you do. Let me know if you ever get them to fit and if not let me know what 905 has to say. It sounds like they are willing to make them work but I share your concern about the paint as my bars just arrived at Garauld's.

 
Last edited by a moderator:
this post just saved my bacon while installing my front bars a few minutes ago. I didn't have clearance issues but the "don't reuse the stock nut" had me seriously confused. I'd called the "tech support" number but they're closed apparently, so fortunately I remembered seeing something about this. So with the bars hanging by the front engine bolt and tools scattered around the bike, I rushed in, fired up the laptop and dug till I found this post.

After that, the only glitch was not having an allen wrench long enough so I had to hop in the van and drive to the auto parts store to get what I needed to finish up. I'll be doing a shakedown ride in an hour to make sure everything's golden.

The fronts were easier to install than the rear set, surprisingly.

-Rick, SJ, CA

-07 FJR1300A

I received a PM asking a question that I think may benefit others. It really came down to clarification of some comments I made about the original right side bar and what was wrong. Here is a synopsis of my reply to clarify:
Q: The instructions tell me not to use my original nut on the rear mounting bolt and to thread it into the bar, but the bar is not threaded, DUH!

What they failed to tell you (at least in my instructions) is that the rear mounting bolt gets flipped around so that you insert it into the right side and it threads into the left side bar. The left bar is threaded and becomes the "nut" for the rear mounting bolt. Of course, if you start on the right side as they suggest, you can get confused by this easily... as I did. Anyway, remove the rear mounting bolt & nut, install the right side first and just slide the rear mounting bolt into the hole and through to the other side. When you install the left bar, your bolt will have threads to screw into.

Q: I received my crash bars but the right side appears to be about 1/8" short in the rear and won't allow the rear mounting bolt to line up.

My right side bar was not "short", it was just the right length (as I suspect yours is) it just would not slide far enough to the rear to make a clean opening for the bolt to go through. This was caused by clearance issues between the frame and the engine cover. As I said in the thread, I ground some metal off of each side (front & rear actually) to clearance the bar and make it fit. My replacement bar that just arrived had a smaller diameter tube used in the rear than my first one and the clearance was not an issue. (1.25" OD tubing on the original, 1.0" OD tubing on the replacement)

I hope this helps others that may have received the original version of the right side bar. An easy way to tell would be to check the diameter of the tubing used on the rear mounting point. If it is 1.25" OD, it is the original design and may have clearance issues on 09, 08, 07? but I suspect will fit an 06 since something minor changed from the original bike used to design the bars.
 
this post just saved my bacon while installing my front bars a few minutes ago. I didn't have clearance issues but the "don't reuse the stock nut" had me seriously confused. I'd called the "tech support" number but they're closed apparently, so fortunately I remembered seeing something about this. So with the bars hanging by the front engine bolt and tools scattered around the bike, I rushed in, fired up the laptop and dug till I found this post.

After that, the only glitch was not having an allen wrench long enough so I had to hop in the van and drive to the auto parts store to get what I needed to finish up. I'll be doing a shakedown ride in an hour to make sure everything's golden.

The fronts were easier to install than the rear set, surprisingly.

-Rick, SJ, CA

-07 FJR1300A

Rick,

You have an '07-A, bars fit w/no problems? Twisted has an '07-A with fit problems. My bars ('07-A) just arrived at Garaulds for paint; he called me after my last post and I've put the paint on hold until I'm sure they will fit. Wasn't thrilled with having to re-paint if they didnt fit properly. Not sure what I can do other than ship them here to make sure they fit then ship them back for paint...PITA. Any1 else have an '07-A with fit problems? Any1 else have suggestions......
 

Latest posts

Top