• If you have bought, sold or gained information from our Classifieds, please donate to FJRForum and give back.

    You can become a Supporting Member or just click here to donate.

LEDRider LED Floods and Spots - FJR Forum discount

Yamaha FJR Motorcycle Forum

Help Support Yamaha FJR Motorcycle Forum:

This site may earn a commission from merchant affiliate links, including eBay, Amazon, and others.
Correct, these do not come with a harness. As to running them at 100% all the time, I don't think that would be a good idea, even with them mounted low. During the day it would be fine, at night, they will be too bright for oncoming traffic. These little lights will put out more light than a 65 watt high beam. So, I definitely suggest adding a dimmer. Also, if you need longer wires on the mini's let me know how long and I'll be happy to splice and shrink longer leads for you.

 
Ok great, that's what I needed to know , will look at a dimmer too. Order Placed thanks
Thanks for you business
smile.png


Did you need longer leads on the lights? They come with 1 foot leads. If you want them longer, let me know and I'll extend them for you (send me a PM with the desired length). Check out the IQ-170-A from Skene. It has 2 5-Amp channels, and has the Alert feature which is really nice. The IQ-170 is the same, but does not have the alert feature. Looks to be a $20 premium for the Alert feature.

 
FYI Folks - We're back in stock on the LR4's.

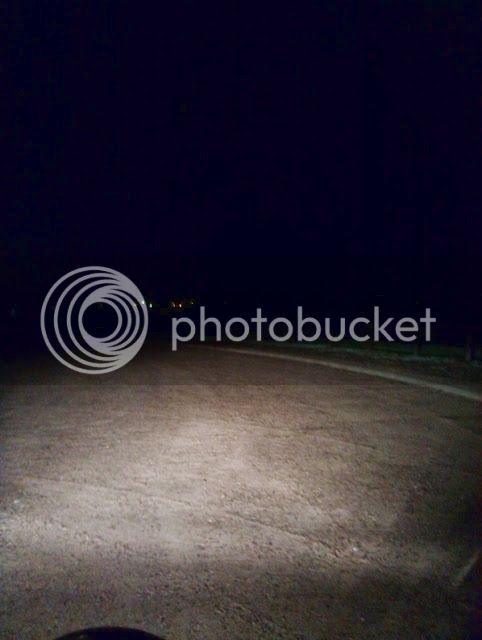
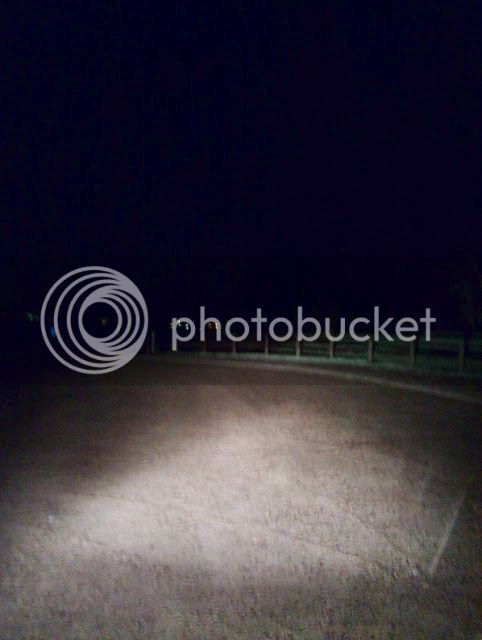
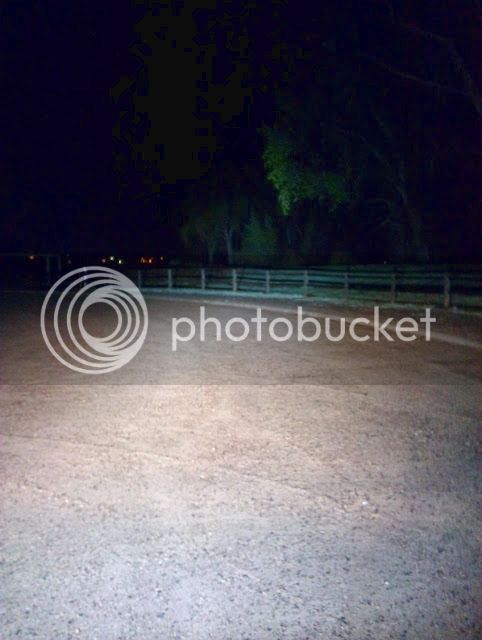
Here's some shot's I was able to grab the other night. Bike is on center stand. The fence is @150 feet from bike. Farthest tree in the background is between 400-500 feet. Crappy camera, non scientific 3 foot per pace measuring, for comparative purposes only.

Stock FJR Low Beam (55 watt halogen)


Stock FJR High Beam (65 watt halogen)


FJR Low Beam + 2 LR4 Floods


In other news, WynPro is working on light brackets for the LR4 for 2nd and possibly 3rd gen FJR's. Very impressed with the initial mock-up
thumbsup.gif


Well it is time to show some what I did all weekend. I didn't make the missus to happy being so busy and all but I should be out of the dog house in couple of days.

I think I came up with a pretty good bracket design for the LR4's and if there is some interest I will start another thread in the group buy section. These things are rock solid for minimal vibratoin. I can adapt the design to possibly cover some of the other lights Justin is offering also. Now I might need a ginny pig to test out some of the other lights if there is interest for those.

Now Let me know what you folks think, Remember these are the first set of prototypes and eventually they will be painted black or if there is enough interest I can have a bunch anodized. The other option is to send them to Garauld to have them custom painted for your feejer.

100_0929_zps2b10cebd.jpg


Made to follow the contour of the fairing. A 1/16 rubber pad will attached to the underneath for protecton of the paint. It would be nice to try these on a 2013 to see how they would fit.

44e3741c-49ca-477c-b2b1-6a86bf8166dd_zps89617f3e.jpg


Remember these are comming off and are going to painted black. Gen 1's will need to route the wire elsewhere.

100_0937_zps3ad1bd06.jpg


100_0936_zps393fefd1.jpg


100_0940_zps6a3871ed.jpg


Last edited by a moderator:
Dave - the brackets look great as I already mentioned. Can't wait to see some pics once you have yours painted!

 
Dave - I like how this tucks the light in close to the mirror base. How does this effect aiming of the lights? With a flood pattern light, this is probably a non-issue.

Now Let me know what you folks think, Remember these are the first set of prototypes and eventually they will be painted black or if there is enough interest I can have a bunch anodized. The other option is to send them to Garauld to have them custom painted for your feejer.

100_0937_zps3ad1bd06.jpg
 
Well it is time to show some what I did all weekend. I didn't make the missus to happy being so busy and all but I should be out of the dog house in couple of days.
I think I came up with a pretty good bracket design for the LR4's and if there is some interest I will start another thread in the group buy section. These things are rock solid for minimal vibratoin. I can adapt the design to possibly cover some of the other lights Justin is offering also. Now I might need a ginny pig to test out some of the other lights if there is interest for those.

Now Let me know what you folks think, Remember these are the first set of prototypes and eventually they will be painted black or if there is enough interest I can have a bunch anodized. The other option is to send them to Garauld to have them custom painted for your feejer.

Made to follow the contour of the fairing. A 1/16 rubber pad will attached to the underneath for protecton of the paint. It would be nice to try these on a 2013 to see how they would fit.

44e3741c-49ca-477c-b2b1-6a86bf8166dd_zps89617f3e.jpg
I have a 2013 and I'd be willing to be a Guinea Pig
punk.gif


Last edited by a moderator:
Dave - I like how this tucks the light in close to the mirror base. How does this effect aiming of the lights? With a flood pattern light, this is probably a non-issue.

Now Let me know what you folks think, Remember these are the first set of prototypes and eventually they will be painted black or if there is enough interest I can have a bunch anodized. The other option is to send them to Garauld to have them custom painted for your feejer.

100_0937_zps3ad1bd06.jpg
There is plenty of room to get it adjusted to where you need to focus the light. I reversed the bracket on the light to bring it in closer so if you wanted to leave the bracket in its original location it would stick out a little further. As it is right now I think the pattern is adjustable enough to get it where you need it. I haven't wired them up yet and I am still researching a dimmer switch. It looks like you can spend anywhere from $4.00 to $70.00 for a dimmer switch depending on function.

 
Last edited by a moderator:
What I like about this mount is with the angle the base is sitting at, it appears by tilting the forward portion of the light up (which would point it up and out), it would adjust the beam in a manner that would put light on the road while leaned over. This is one of the issues with riding mountain roads in the dark - when the bike is leaned over, the stock headlights do not light up the road around the corner.

Other mounting brackets will do this as well, but you would have to loosen / tighten both fasteners to do so.

I'm going to scout out an area that I think will work well for taking some night shots of the lights.

Wayne

 
What I like about this mount is with the angle the base is sitting at, it appears by tilting the forward portion of the light up (which would point it up and out), it would adjust the beam in a manner that would put light on the road while leaned over. This is one of the issues with riding mountain roads in the dark - when the bike is leaned over, the stock headlights do not light up the road around the corner.
Other mounting brackets will do this as well, but you would have to loosen / tighten both fasteners to do so.

I'm going to scout out an area that I think will work well for taking some night shots of the lights.

Wayne

With the flood pattern, I find it works best with both lights level with the bike, not pointing up or down. I run my left light pointed straight ahead, and the right angled out just a hair. Another option is to turn them in a bit and cross them, which will give you better cornering light.

 
Dave - You ready to part with a set of these yet? Are you able to engrave "WynPro" on the side edge or between the mirror and light mounting area?

Wayne

Dave - I like how this tucks the light in close to the mirror base. How does this effect aiming of the lights? With a flood pattern light, this is probably a non-issue.

Now Let me know what you folks think, Remember these are the first set of prototypes and eventually they will be painted black or if there is enough interest I can have a bunch anodized. The other option is to send them to Garauld to have them custom painted for your feejer.


100_0937_zps3ad1bd06.jpg
There is plenty of room to get it adjusted to where you need to focus the light. I reversed the bracket on the light to bring it in closer so if you wanted to leave the bracket in its original location it would stick out a little further. As it is right now I think the pattern is adjustable enough to get it where you need it. I haven't wired them up yet and I am still researching a dimmer switch. It looks like you can spend anywhere from $4.00 to $70.00 for a dimmer switch depending on function.
 
Wayne,

I did make two sets up and hope to be back on them this weekend. I had to get ahead on some of my other parts this week to give me time. Your right, where the heck do I put WYNPRO. Hadn't got that far yet I guess. If you interested in the second proto type set PM me. I would like to do a short run to price them out first. When I get some more sets done I will post up under the group buy section.

My ADVmonster dimmer switch should show up tomorrow. Allen, I ended up getting the Rotary dimmer switch rather than the remote. I could just see myself loosing that thing somewhere along the highway. So that will be part of the project to rap this up this weekend also. Looks like I will be back in the doghouse again.

Dave

 
Last edited by a moderator:
When will the WynPro Custom MC Products brackets be availble, I will order a seet as soon as they are available..

 
I will try and post something up by Monday. Hang in there. Moving my bunk out to the garage tonight. Good thing its heated.

Dave

 
Top