• If you have bought, sold or gained information from our Classifieds, please donate to FJRForum and give back.

    You can become a Supporting Member or just click here to donate.

LEDRider LED Floods and Spots - FJR Forum discount

Yamaha FJR Motorcycle Forum

Help Support Yamaha FJR Motorcycle Forum:

This site may earn a commission from merchant affiliate links, including eBay, Amazon, and others.
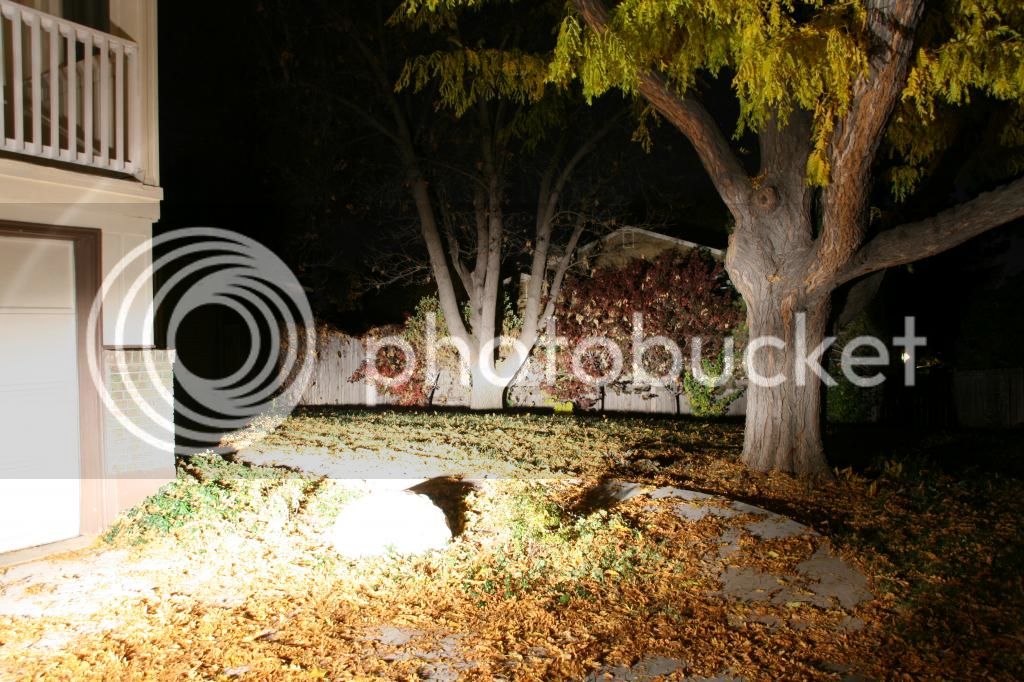
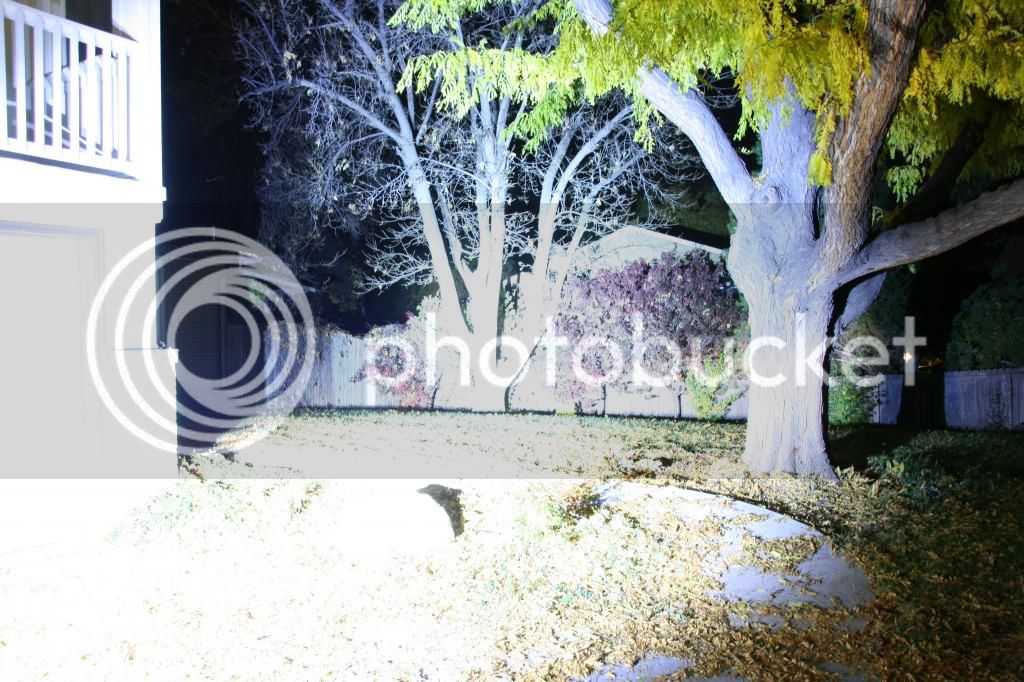
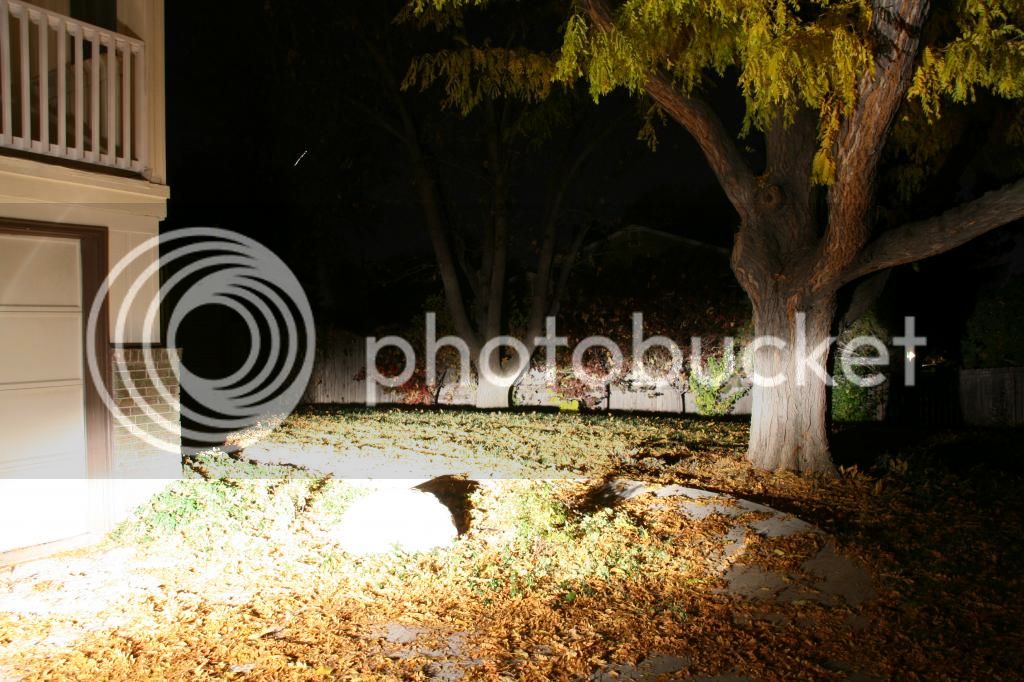
Well - I got a decent camera finally. Here's a few pictures I took sitting in the driveway, pointing at the (empty) house next to ours. The tree is about 50 feet (the one where the lights are pointed at, the other is closer in), and the neighbors house behind the fence is about 75. Pictures taken on side stand, bike is at an angle to the house pointing at the tree. These are just for practice. I'll be getting shots of all the lights we have in a fixed location where I can show the range better.

Stock low beam only:
1lowbeam_zpsd2a12222.jpg


Stock high beam only:

2highbeam_zpscb5e6836.jpg


Stock Low beam plus two LR4 floods:

3lowflood_zps8ef0b90e.jpg


Those tree tops above the house in the background are 200ish feet away, in the next neighbor overs yard.

 
Last edited by a moderator:
FYI - I posted up some more pictures of the LR4 floods in action on our Blog. I reduced the shutter time and aperture for those pictures, as the ones above turned out a bit over exposed. Now that I have a decent camera and am learning how to get the settings right I'll be getting a rig setup to test all the lights at once to better show the beam patterns.

On another note, we are working on developing a quality, low cost, rotary dimmer that can be used with our LED lights (and just about any other LED that does not have it's own built in dimming circuitry). We opted for the rotary design as it's simple, and does not require the use of a RF dongle that can be lost or have a dead battery. There will be a high beam over-ride on the dimmed setting. At first it will be available in a single 7 amp channel. Once we are happy with the results, we'll expand to a dual channel as well, with independent over-rides, to control multiple lights with there own settings (for example, you could set your left light to 0% with low beams, and your right to 20% - or control multiple sets of lights). I'll post up more details as they become available.

Also - we are currently awaiting a new shipment of the LR10's which were more popular than we had planned for. We'll have more in early next week
smile.png
. Thanks everyone here for your business!

 
Well the first production run will finish up tomorrow on the WynPro LR4 light brackets. Hardware is on order and should be in on tuesday. I will get something posted up tomorrow with the details. Been a long day thats for sure. I took my prototype ones back off and painted them gloss black. Tomorrow I hope to get it all back together again. The wife is still talken to me at least.

Good night all,

Dave

 
Last edited by a moderator:
Folks, I need some feedback on my latest photos. I finally got a decent camera to use for a few months and I'm still learning to use it. What I've found is that even with a good camera, it's hard to get a picture to come out exactly as what you see in real life. I've been playing with different aperture and shutter settings in manual mode, and I think I'm getting close. Please let me know how the following shots came out, and look on your computers.

Bike was in turnout on right side of road on center stand. Camera was on tripod on the left side of road. 1st tree is at 750 feet, second tree is at 1000 feet. I reset the GPS at the farthest tree and drove up and turned around where I took the pictures: https://lh5.googleusercontent.com/-c-tgnYwIsB8/UndK8_eavnI/AAAAAAAACnc/pfYmP4xFgpA/s912/IMG_20131102_235944.jpg

Note: you can click on the pictures on drop box to zoom in to full size.

First shot is stock low beams with +80 Halogens:

https://www.dropbox.com/s/6u9bfo4i5q9ohd6/1low.jpg

This is stock highbeams, +80% halogens:

https://www.dropbox.com/s/kkdv8k420lwq46d/2high.jpg

This is low beams plus 2 LR4 floods:

https://www.dropbox.com/s/55exx1h6o4fhgc9/3LR4.jpg

And just for fun, this is low beams + LR4 floods + LR62 spots:

https://www.dropbox.com/s/vp8b5g4kwiurtzi/4LR4%2BLR62.jpg

The more I use the LR4, the more I like it. Unfortunately, when you adjust the camera settings to show the distance of the lights, the close in light looks a lot brighter than it is. Unlike other quad cree XM-L lights on the market, the LR4 doesn't have nearly as much close-in glare, and a farther light throw. If I could only have one aux light on my bike, I think the LR4 is the clear winner.

 
Those are cool pictures -

In the end, the lights relative to each other is what is important to me.

 
I finally got around to mounting mine. A pair of LR4's and mini's with a Skene controller. After dicking around with them all day it was dark enough to go for a test ride and aim them proper. I have few words for the performance of these.

Runway lights!

I'd strongly advise anyone to (in the dark) walk out in front of your bike and have a look at it to check aim and power levels. A blinded oncoming driver is likely to be a dangerous one!

I wanted the lights to come on like the factory lights (after the engine starts) To that end I found my answer at the grip warmer troller.

Brown wire is energized by Headlight Relay #1 when engine starts. I used this as the switched power source for the controller.

There is also a pigtail installed at the left Headlight giving me a shot at the Yellow wire (high beam). I don't feel quite so bad using positaps on an accessory harness.

 
I finally got around to mounting mine. A pair of LR4's and mini's with a Skene controller. After dicking around with them all day it was dark enough to go for a test ride and aim them proper. I have few words for the performance of these.Runway lights!

I'd strongly advise anyone to (in the dark) walk out in front of your bike and have a look at it to check aim and power levels. A blinded oncoming driver is likely to be a dangerous one!

I wanted the lights to come on like the factory lights (after the engine starts) To that end I found my answer at the grip warmer troller.

Brown wire is energized by Headlight Relay #1 when engine starts. I used this as the switched power source for the controller.

There is also a pigtail installed at the left Headlight giving me a shot at the Yellow wire (high beam). I don't feel quite so bad using positaps on an accessory harness.
Thanks for the feedback :)

 
I finally got around to mounting mine. A pair of LR4's and mini's with a Skene controller. After dicking around with them all day it was dark enough to go for a test ride and aim them proper. I have few words for the performance of these.Runway lights!

I'd strongly advise anyone to (in the dark) walk out in front of your bike and have a look at it to check aim and power levels. A blinded oncoming driver is likely to be a dangerous one!

I wanted the lights to come on like the factory lights (after the engine starts) To that end I found my answer at the grip warmer troller.

Brown wire is energized by Headlight Relay #1 when engine starts. I used this as the switched power source for the controller.

There is also a pigtail installed at the left Headlight giving me a shot at the Yellow wire (high beam). I don't feel quite so bad using positaps on an accessory harness.
It may be too late but did you take any picks on where to connect? Also are the posi taps available locally or must you order online? I still need to make my bracket for my ADVmonster rotary dimmer so I am running behind on getting these hooked up.

Dave

You tap into the yellow wire on the headlight plug for the highbeam bypass, and the green wire with the blue stripe on the headlight relay for relay power when the headlights come on. And you need to order posi-taps online. Some NAPA's used to carry them, but they stopped. I'll see if I can get a picture of the tapped wires later.

 
FYI - the skene dimmer comes with all the positaps - if your using that
I didn't get the Skene dimmer. No positaps for me but there is a disconnect on all the 12V leads. Not sure what good that does other than making it easy to remove the switch.

 
It may be too late but did you take any picks on where to connect? Also are the posi taps available locally or must you order online? I still need to make my bracket for my ADVmonster rotary dimmer so I am running behind on getting these hooked up.
Dave
The positaps came with the Skene controller, but they are on ebay as well as online shops. They are absolutely the best tap connector I have ever used. well worth the effort to procure.

Seeing as you also have an 08, your wiring should be just like mine. If you lift up the controller for the grip warmers you will see 2 connectors on it. One has a brown wire that changes to green on the bike side of the connector. This is hot only after the engine is running. Use it for switched power to your controller or to trigger a relay.

For the high beam signal use the yellow wire coming off the (left is much easier access) headlight bulb. I had a pigtail there (I assume was part of the factory accessory grip warmer kit) so I didn't have to pierce the factory harness wire.

Sorry no pics. I was to deep in it at the time to even think of documenting it. If needed, I can pull the panel and snap a couple.

BTW I had estimated 4 hours to mount the lights, cut, solder and route the harness for these. Start to finish I was in it 8 hours. Good thing this job wasn't to pay the bills but on the flip side I think I got a great job done ;) YMMV

 
Last edited by a moderator:
I have a question. If I add the LR4s I'd only want them to come on with my high beams. They can be off the rest of the time. With this in mind, do I need a wiring harness? Can I just wire them in to the existing high beam circuit?

I already have fork lights so conspicuity is covered.

Thanks!

 
I have a question. If I add the LR4s I'd only want them to come on with my high beams. They can be off the rest of the time. With this in mind, do I need a wiring harness? Can I just wire them in to the existing high beam circuit?
I already have fork lights so conspicuity is covered.

Thanks!
Just a simple relay will do - $5 at an auto parts store or radio shack. I wouldn't power them right off the highbeam circuit, they draw too much power on top of what that circuit already handles. The image below shows how to wire it. But instead of switched power to terminal 85, that would connect to a tapped feed from your yellow highbeam wire.

foglite.jpg


I agree with what Justin suggested - use the high beam as you trigger for the relay, pull power from your battery or fuse block.

I hadn't thought about the indicator light -that will be handy for during daylight hours - I'm going to add that to my wiring plan.

I have a question. If I add the LR4s I'd only want them to come on with my high beams. They can be off the rest of the time. With this in mind, do I need a wiring harness? Can I just wire them in to the existing high beam circuit?
I already have fork lights so conspicuity is covered.

Thanks!
Just a simple relay will do - $5 at an auto parts store or radio shack. I wouldn't power them right off the highbeam circuit, they draw too much power on top of what that circuit already handles. The image below shows how to wire it. But instead of switched power to terminal 85, that would connect to a tapped feed from your yellow highbeam wire.

foglite.jpg
 
Got it. Then could I run the wire from 30 thru a 20a fuse to the fuse block instead? And what gauge wire should I use?

Would you mind giving me a link for a relay so I'll be sure to get the right thing?

Thanks again.

 
Here's a link to a relay: https://www.amazon.com/Scosche-RLYBSCH-Bosch-Relay-Amp/dp/B003BHINKI

Just go to any auto parts store and ask for a SPST (single pole, single throw) or SPDT relay (single pole, double throw). If it has four or five pins marked 30, 85, 86, and 87 ( or 87a/87b for a spdt) it will work. The difference between 87a/87b is that one is active with the switch open, the other with the switch closed. So you could wire something to turn on when something else turns off. I'd use 16 gauge with a 7 amp fuse. The fuse is there to protect the wire - going larger on the fuse gives you no advantage. The lights draw 4 amps or so for a set. On my bike at 14.1 volts, they are pulling 1.8 amp each.

Edit: Better yet: https://www.amazon.com/HELLA-003510087-Mini-Relay-Bracket/dp/B000VUAJIM .. $3

 
Last edited by a moderator:
Cool, thanks. Assuming you have them in stock, I'll place an order shortly.

 
Top