• If you have bought, sold or gained information from our Classifieds, please donate to FJRForum and give back.

    You can become a Supporting Member or just click here to donate.

LEDRider LED Floods and Spots - FJR Forum discount

Yamaha FJR Motorcycle Forum

Help Support Yamaha FJR Motorcycle Forum:

This site may earn a commission from merchant affiliate links, including eBay, Amazon, and others.
justin, the wires coming out of the box are pretty stiff due to the sealant. In trying to gently route them, I sort of snapped the seal at the box. I expect when you switch to a grommrt it might be more resistant to this.

 
justin, the wires coming out of the box are pretty stiff due to the sealant. In trying to gently route them, I sort of snapped the seal at the box. I expect when you switch to a grommrt it might be more resistant to this.
Eric - once you get the wires into the position you want, just reseal the crack with some liquid tape. The new design will fix that issue.

 
First off, Justin, received my dimmer yesterday as promised. Thanks very much, that was above and beyond the call, getting it here so fast. :thumbsup: so I'll be trying to get the lights installed and wired later today.

Which brings up my Q, where are people installing these things where they are out of the way, but accessible without removing any panels? The box doesn't look all that grotesque to my eye. So I was thinking of just Velcro-ing it to the inner surface of the A or B panels if the fork leg will clear it OK. Haven't even test fitted it yet.

Any other Ideas?

 
Last edited by a moderator:
I mounted mine on a small bracket I fashioned that bolts on the left hex screws that hold the clutch in position. It sticks out a little, but I'm ok with that. Wired the 2 amp fuse to the trigger wire too!.

If I cant reach it easily while riding, having a knob doesn't do me much good. I like it right up there by the switches.

 
Thanks for the reply, Eric.

I'm actually not too concerned with adjustments on the fly. I figure that once I have it set for the low beam setting it will probably not get adjusted much from there. But I will take a look at that location and see if it makes sense for me.

I just looked at the space between the side of the "A" panel and the fork and it looks pretty tight. Another option might be inside the glove box? I only use that to carry my registration papers anyway.

 
Another option might be inside the glove box? I only use that to carry my registration papers anyway.
That's where mine is. I have no need to adjust on the fly. Otherwise I would have used some dual lock and mounted it on the bottom of my dash shelf.

 
Justin,
I PM'd you a couple times asking for one of the dimmers, do you have any left ?

Thanks
OK, that's weird. I just went through all my messages and there is nothing there from you. Not sure what's going and why your messages are not reaching me. Shoot me an email to "sales <at> ledrider <dot> com", and we'll get you sorted out.

 
All done with the install. It was pretty easy altogether. The worst thing was getting those damn ABCD panels to go back on. As usual.

I mounted the lights on WynPro Gen 1 brackets (closeup pictures of the Gen with FZ1 brackets on that thread).

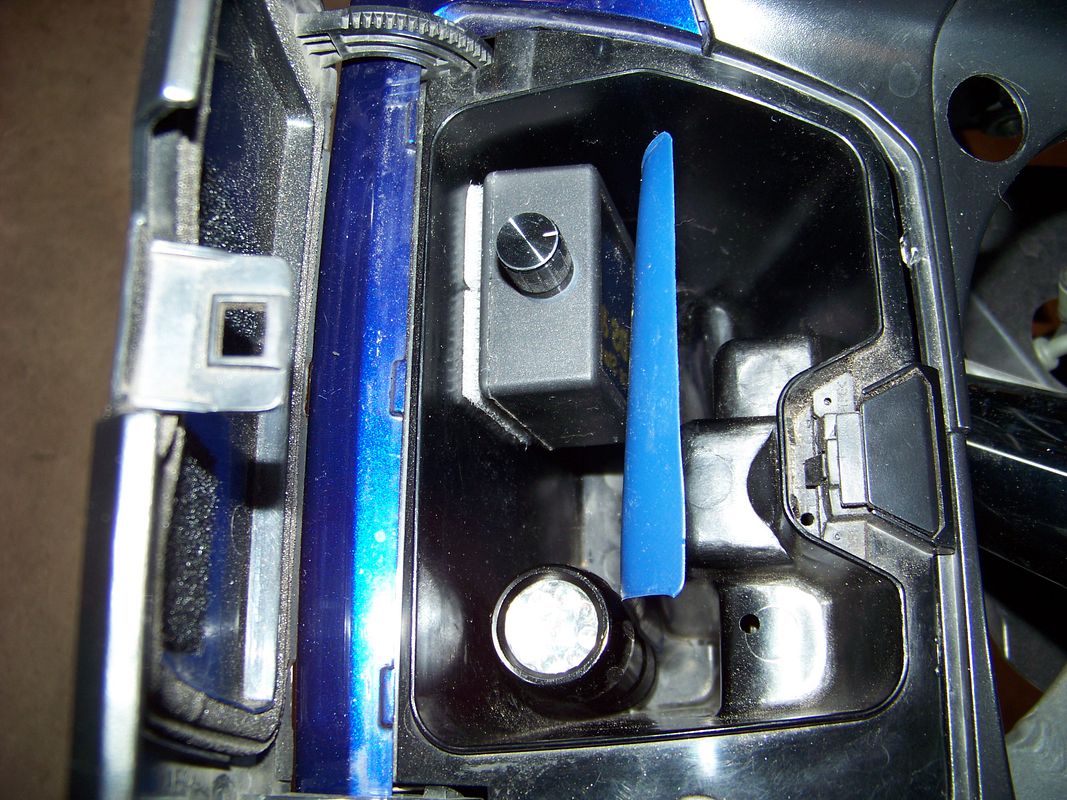
And I did decide to just velcro the dimmer box inside the glove box. That actually worked out pretty well especially since I have defeated my glove box solenoid and can open it while under way if I really want to. Still room for my Reg and a small LED flashlight. What more could you ask for?

100_4352.jpg


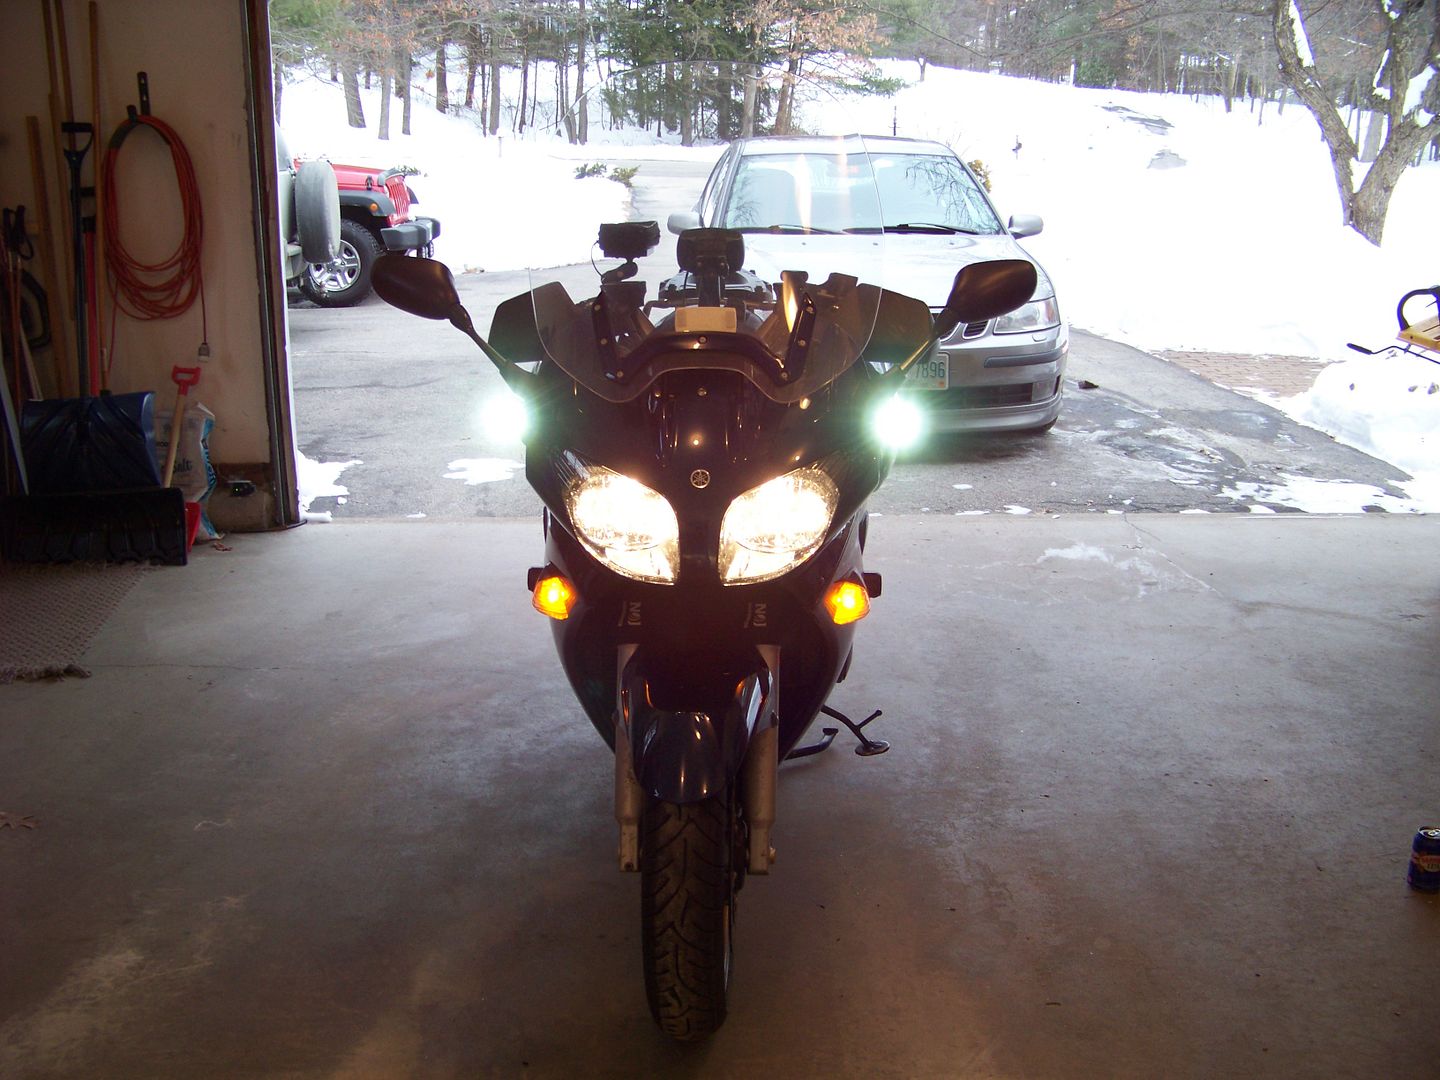
Dimmer works exactly the way I'd like it to (tapped off the high beam signal with a 3 amp fuse because that was what I had on-hand). LED lights come on with ignition keyswitch. I'm pretty jazzed about how they look.

Low beam DRL mode:

100_4356.jpg


High beam Max Photon Blasting mode

100_4357.jpg


Thanks for everything Justin. This might well be my best FJR farkle evah!

(well after the Russell seat... ;) )

 
Looks good Fred! Might want to turn down the DRL mode at night, looks like you have it set at about 45%. With Dave's brackets, the FJR installs look so clean
thumbsupsmileyanim.gif


Also on the dimmer, just wanted to verify some facts with my electronic designer before making a statement. I know just enough to be dangerous :) . The low down is that the microprocessor that the bypass routes to has very high resistance which protects the bypass source. Even if the microprocessor shorted, the current limiting resistor between microprocessor and the bypass wire(blue) is 10K ohm, so it will not affect the 12V source the bypass trigger is connected to. I still suggest adding the fuse to the mix though, just for piece of mind.

 
Thanks, Justin.

Actually that low beam shot was right at 25%. Probably just the angle of the camera picking up more of the flood light and less of the headlight caused the funny exposure.

One cool thing I noticed right away... when you switch between high and low the LEDs react so much faster than the halogen headlamps that you can see the distinct two-step change, especially when looking at the front of the bike.

 
Nice job on the install Fred.

Looks great!!! You will appreciate the lights much more at night once you see how well they work. The dimmer box is pretty much a set it and forget function so the glove box is an awesome idea. I was going to post a link but it seems the buttons on the forum aren't working for me very well today. Then again it may be my computer. It may be time to upgrade my PC soon.

Dave

 
Fred, not to beat the subject to death, but did you use a relay, or are you satisfied with the fuse inline on the trigger wire to the H/B?

 
Fred, turn the bike around and melt the snow and ice in your driveway with those things.
You noticed. Blech!!

Fred, not to beat the subject to death, but did you use a relay, or are you satisfied with the fuse inline on the trigger wire to the H/B?
Not on the high beam trigger signal, no. It is not needed.

I have one relay that is key switch triggered and that feeds a small terminal strip in the nose that I use to feed my heated grips (seldom use), cruise control, and a few other items. I hooked these lights up to that strip so they get the key switching.

 
Well, then I'm going with my original plan to feed 12v from the FZ1 block (switched) and use the 2A fuse inline on the blue trigger wire from the HB. I will just ride in the daytime at first in case it blows!

 
One time offer: I have a set of used LR62's I pulled off my bike if anyone is interested. They are in good working condition, and hate to see them sit around. How about $65 shipped CONUS to the first person to call dibs? Great lights for just about anything - motorbike, car, truck, jeep, etc.

 
Are these the 4 light pattern or two. If they are the two you have them on sale on the website for $55.00 am i missing something? If that is for one that I guess the price is good.

Dibs for now, Dave

 
Last edited by a moderator:
Are these the 4 light pattern or two. If they are the two you have them on sale on the website for $55.00 am i missing something? If that is for one that I guess the price is good.
Dibs for now, Dave
Dave - those are the 2 led spots that sell for $55 each. This is a pair for $65 shipped.

 
Top